Chopper
-
Posts
4,888 -
Joined
-
Last visited
-
Days Won
272
Everything posted by Chopper
-

Fragarock's Scout Build
Chopper replied to fragarock's topic in Scout Trooper: "The Mandalorian" WIP
Frank, just a quick clarification: For the Mando Scout, you should not be using a wrapped tube, or the cast wrapped tube that comes with the RS kit -- that's for the ROTJ scout. The CRL for the Mando Scout states: "Thermal detonator box with short corrugated hose attaches to the back of the belt". You should use some corrugated gray pool hose or vacuum tubing that's sized to fit with the RS detonator box. -
Based on your photo, I would say that the shaft of your boot should be around 14 to 14.5" inches.
-
Ah okay. Yeah, the WTF pulls can be a bit hard to tell where to trim. I'd take a pencil and work on getting the bottom lip to match the bottom of the back armor, then transition to the sides.
-
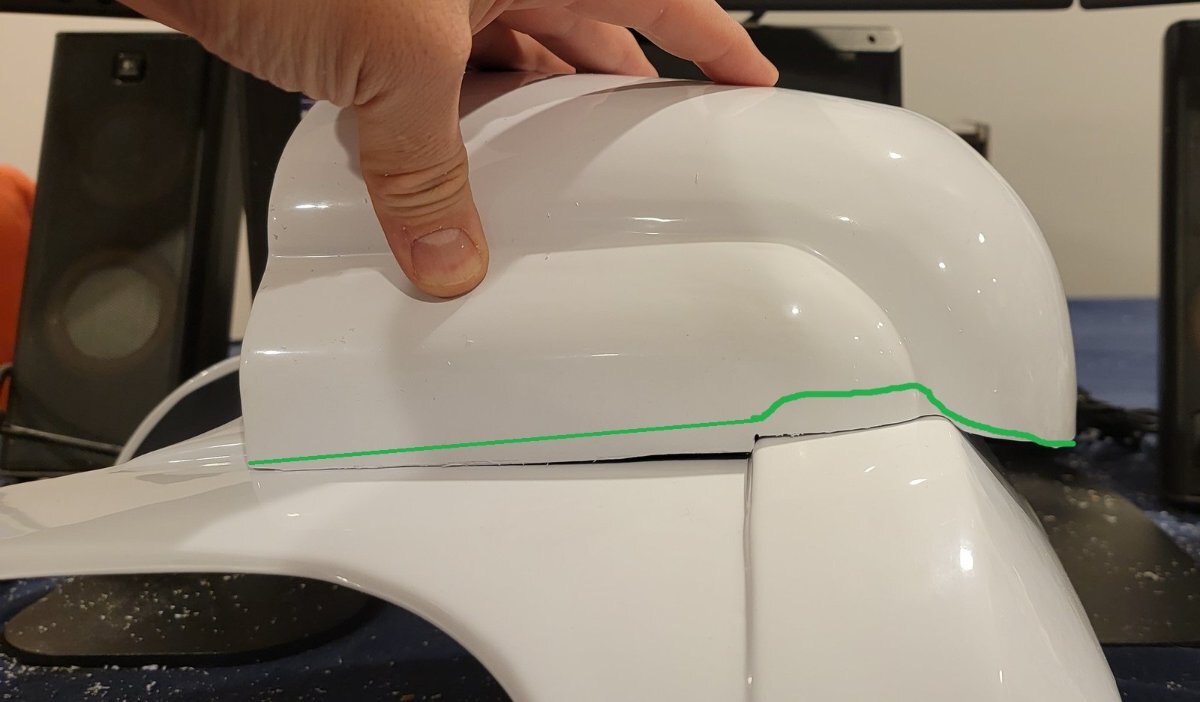
Hm, I hate to say it, but you may have trimmed too much off the bottom of the tank. That lip on the bottom is meant to fit against the bottom edge of the back armor. See ref photo below. You might be able to angle it a bit, as I've marked in the photo. Go slow and take off a little at a time.

-
This forum does not have unlimited image storage capacity. You'll need to host images externally. See this thread: http://forum.501stpathfinders.com/index.php?/topic/23053-faq-how-do-i-post-images/#comment-216514
-
3D modeled some scout stuff!
Chopper replied to Darth Voorhees's topic in ROTJ Biker Scout Armor/Helmet
Thanks Lou -
One note -- the shoulder bridge covering you've id'd appears to be herringbone twill tape. I would not use twill tape if you're interested in Level 2/Lancer, though it's fine for basic. For Level 2 you want either white elastic or webbing. "Shoulder bridge covers, covering the join between the front and back of the armor, are made of white cotton webbing or elastic."
-
The WTF helmet tends to be one of the most challenging scout helmets for people to put together. You might want to take a look at this thread for some decent build photos: http://forum.501stpathfinders.com/index.php?/topic/20405-tb-80225-wtf-helmet-build/#comment-185533
-
As far as I can see with the photos you have, your flight suit doesn't look all that baggy to me. Obviously you already self-identified your inverted knees. I'd slide your drop boxes back a bit, so they're better centered on the sides of your legs. Right now they're kicked forward a bit. Also, try and widen where your rear drop box straps come together in back by maybe an inch. They don't need to touch each other on the back of the belt. As for your shoulders, they're pulling back because your back armor is sliding back as well. A typical solution is to put some velcro on your chest armor, which then attaches to velcro on your flak vest, which keeps the armor from sliding back. That usually helps keep the shoulders better aligned on your shoulders. You can also check out this post for some general tips, though none of it is required: http://forum.501stpathfinders.com/index.php?/topic/18894-some-tips-for-keeping-your-scout-costume-together-while-trooping/
-
If you have access to a decal cutter, or if you know a friend who has one, then that's the best way to go. I don't think that what you've done should be much of an issue for basic. The upper right quadrant of the circle could be neatened up a bit, but that's pretty minor.
-
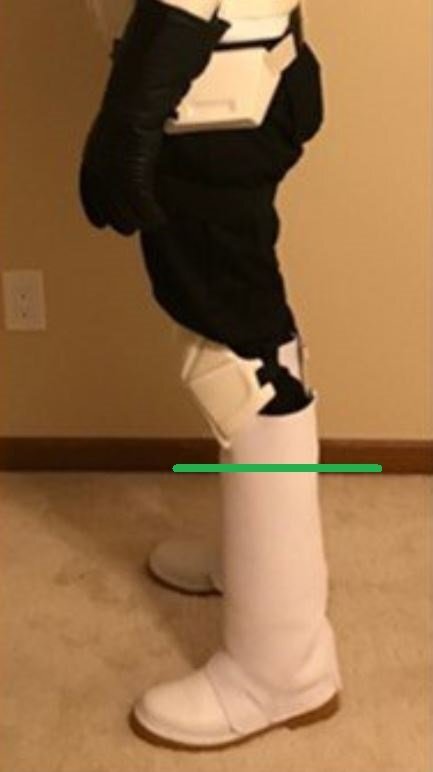
There is no specific measurement, but the knee armor shouldn't be sitting on top of, or inside the boots shafts. I'd say your boots need to go to about here.

-
I can tell you that they are definitely too tall for Level 2/Lancer, if that matters to you. I do think they're likely too tall for basic clearance as well, but I would consult with the Central Garrison GML to get their opinion, since it's ultimately their call.
-
I think the faceplate alignment does need some work in this case, particularly on bringing the top portion further inwards. The SC helmet can be a little tricky to get the top and bottom parts lined up properly, but it is doable. It is okay for Level 1 and 2 to have some gap on the sides of the helmet. They were not perfectly flush in the film helmets either, and those that appeared that way were the one-piece stunt helmets.
-
Hi, I don't have any in-hand experience with that blaster, but just looking at the photos, there are a number of inaccuracies. It looks pretty elongated, lengthwise, and the front end of the singeppoint scope looks incorrect. Also, if it's solid resin then it will weigh down in your boot as well.
-
Nice work Peter. Nothing really stands out to me for Basic/Level 1 clearance. As refinements, and these are really Lancer/Level 2 items, I would recommend is to bring your chest pouches in slightly so that the ends align with the ends of your chest armor. Your chest and back are pulling back, which is also pulling your shoulder bells back. Try and pull your knee armor up. It may be that your boots are too tall, which you can't do much about with the IB boots. Again, that is a Lancer/Level 2 issue and shouldn't be a problem for Basic clearance.
-
Fragarock's Scout Build
Chopper replied to fragarock's topic in Scout Trooper: "The Mandalorian" WIP
This is how my RS drop box is trimmed, if that helps: -
Fragarock's Scout Build
Chopper replied to fragarock's topic in Scout Trooper: "The Mandalorian" WIP
That's correct, the elastic gets threaded over the top of the parachute buckle. It is not sewn or affixed like you would with a real buckle -- it is purely decorative. You can adjust and slide it on the strapping as needed. -
Fragarock's Scout Build
Chopper replied to fragarock's topic in Scout Trooper: "The Mandalorian" WIP
Attach it to the back inside of your bund. -
Oh okay, good. No worries.
-
Your belt should be positioned just below your belly button/navel. 20" seems like a lot for bund height. In general, most bunds measure 8"-9" in height. Have you looked at this post yet? http://forum.501stpathfinders.com/index.php?/topic/19967-soft-parts-best-practices/ Trying to get the bund/belt proportions is key. Here's an image, which may help:
-
I would smooth this area out a little bit more with a nail file or emory board, but otherwise you should be good.
-
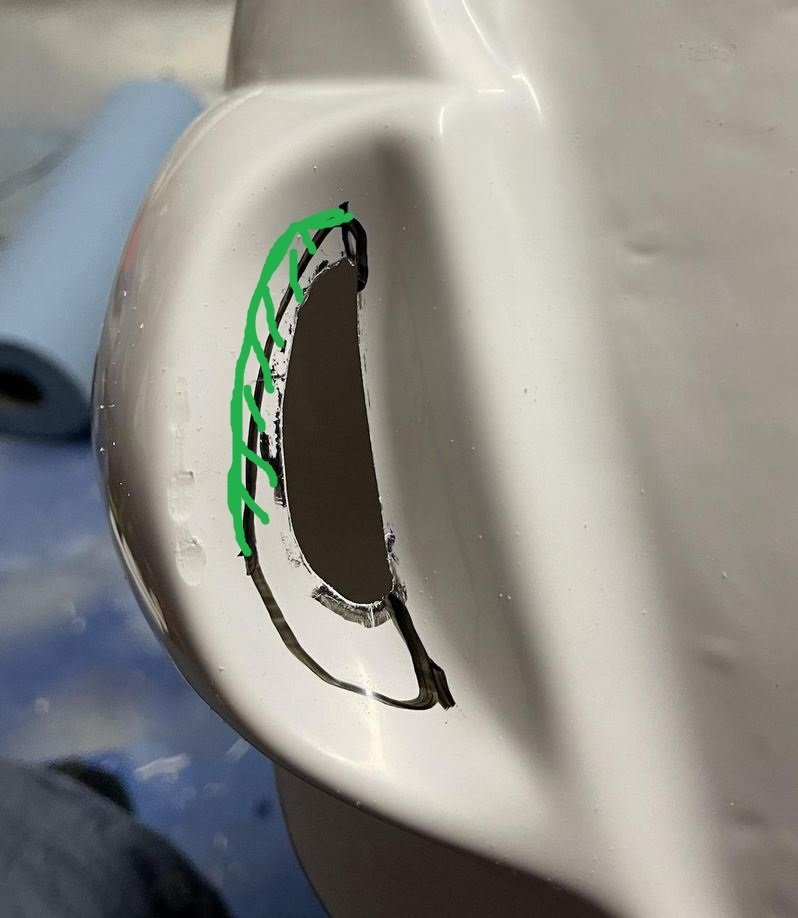
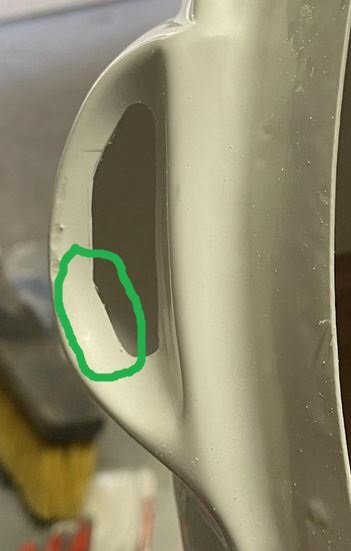
The outline in the second image, the wearer's left ear, looks good. I'd cut a little bit more on the wearer's right side to match, as indicated in the attached photo.
-
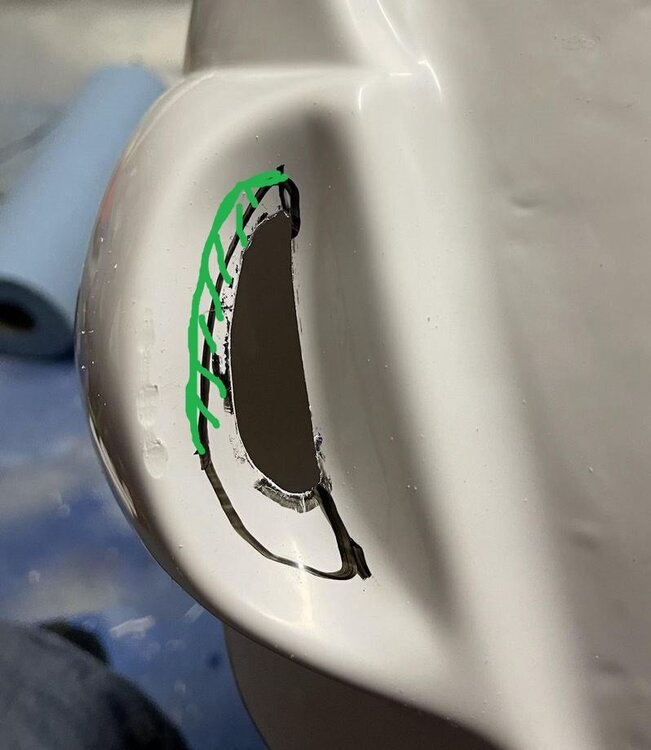
Kevin, good progress, but I think your ear holes are still too small. Look at how large they are on the screen scout helmet, below. Try to open them up a bit more.
-
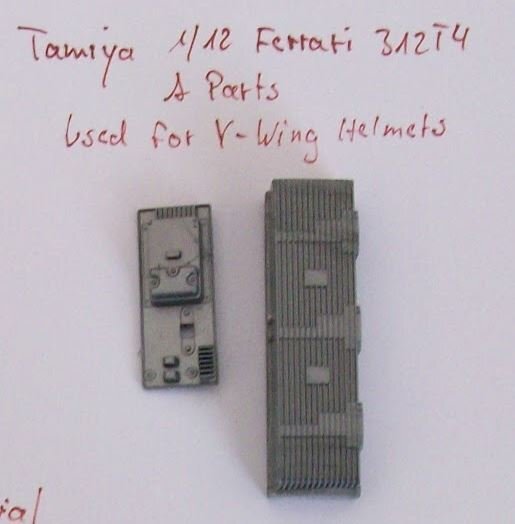
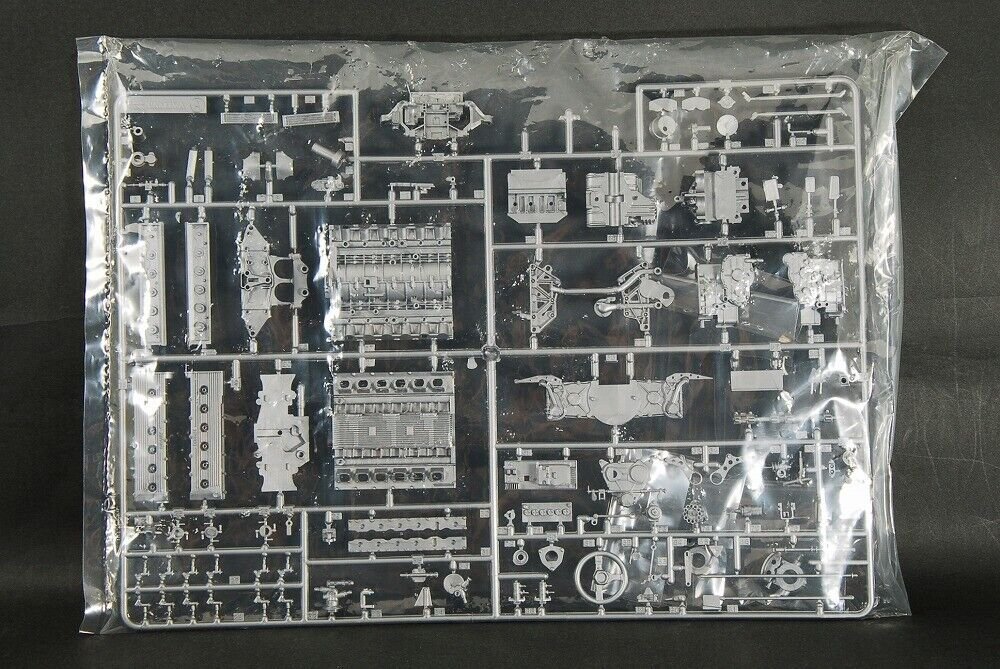
At least part of the rectangular det greeb uses parts from the Tamiya 1/12 Ferrari 312T4. You can see the part they used in the first photo, as well as on the lower right portion of the sprue.
-
Secure one side of it, leave the other loose, pull the elastic over until it feels right, then mark where it should be with chalk, or tape. Also, the top elastic on the knee armor is optional.