Chopper
-
Posts
4,886 -
Joined
-
Last visited
-
Days Won
270
Everything posted by Chopper
-
As an armorer, I can confirm that the chin strap and chin cup are optional.
-

kman's yak (yet another Kropserkel) helmet build
Chopper replied to kman's topic in ROTJ Biker Scout Armor/Helmet
The Kropserkel helmet is fine for Level 2/Lancer, requiring only some very minor mods. The rest of their armor won't clear Level 2/Lancer. See here: https://forum.501stpathfinders.com/topic/21881-rotj-scout-armor-kit-accuracy-and-level-2-lancer-applications/ -
Drop boxes webbing off-white options?
Chopper replied to JohnReillis's topic in ROTJ Biker Scout Armor/Helmet
The webbing you linked should work. If the shade is still too light, you can try tea dying the webbing after you receive it. -
In general, please don't use steel rivets on any armor builds, be it pulled abs or printed. As you've discovered, they are a beast to remove.
-
FYI, on the blaster those screws should be more flush with the plate.
-
Thank you, Tim. Pathfinders Command is currently discussing the matter.
- 1 reply
-
- 3
-

-
Galactic Armory 3D ROTJ Scout Model Assessment
Chopper replied to MrPoopie's topic in ROTJ Biker Scout Armor/Helmet
If it's covered up and not visible then it should not be an issue. -
As a FYI, please note this post which outlines the issues with the GA files:
-
Nice. Just make sure you give the paste time to completely dry (24 hours or more), or else it can be tough to work with.
-
If you paint the scope as is black, then you will be fine. There is no reason to add the clear plastic lens included in the kit. The point of including the CRL comment about the lens was because people were making the scope into an actual scope, which wasn't the case in ROTJ.
-
Congrats!
-
Yes. From the CRL:
-
You could PM Lou Darth Voorhees @Darth Voorhees. He was making 3D versions of the 3M bolts with a real metal screw. You could try asking him to see if his might fit better.
-
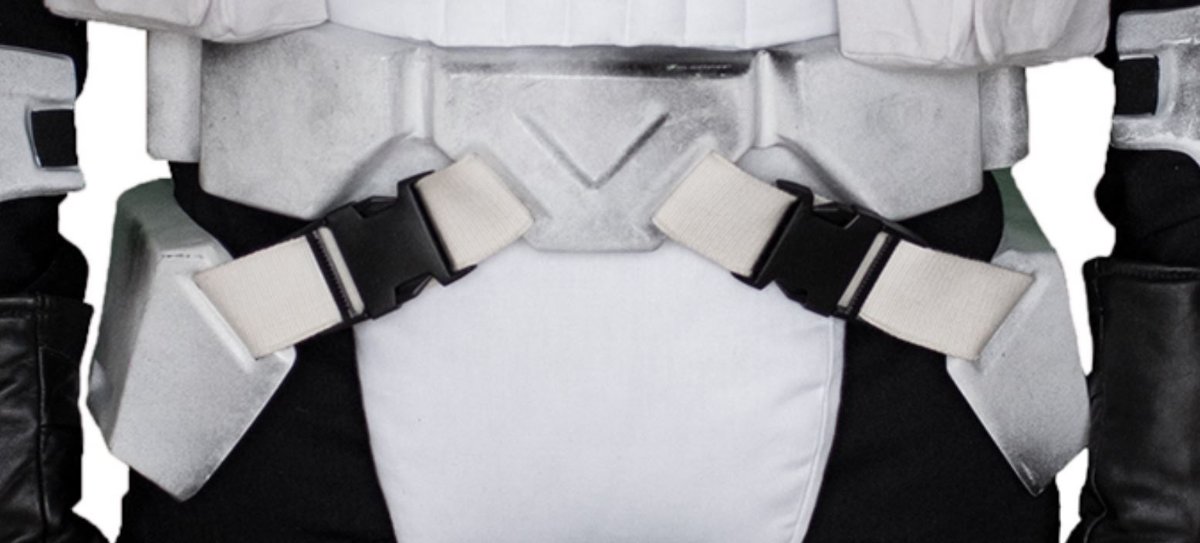
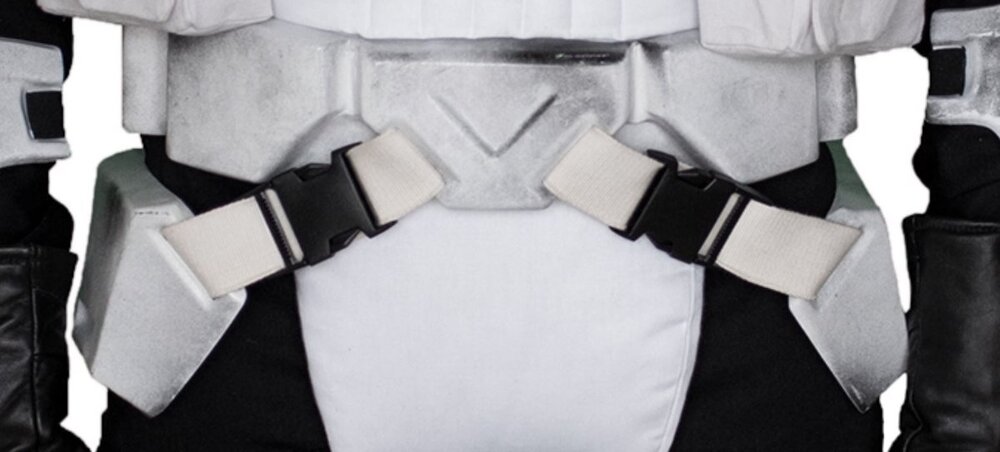
I want to clarify what the CRL says, because it's not only 1/2" elastic that's allowed: Knee armor strap may be 12mm (1/2 inch) OR 20mm (3/4 inch) wide and passes through the side slots of the knee armor. You can use either width. Also, the slot is fine as is. Look at the screencap below -- plenty of space.
-
Don't trim, at least not yet. I think the armor just needs to come forward a bit. When I did my flak vest I put some velcro on the front to keep my chest and back armor from shifting back and forth.
-
This is an older post, but have you seen this yet?
-
Excellent
-
What you are describing is a Level 2/Lancer specification. For basic clearance, it is not a requirement. For Level 2, you can use 1 and 6 bars without the trapezoid. If you want to use 4 bars, then you need the trapezoid and they 4 bars need to be double thickness. OPTIONAL Level two certification (if applicable): Only 1, 4 or 6 "rank bars" on tank are acceptable: If tank has extra trapezoid detail on the center tank pin striping, only 4 thick rank bars are acceptable.
-
Huh. I've seen plenty of Mon Cal armor over the years, but I honestly can't recall him putting a big screw hole like that at the bottom of the tank. @Retrofire Pete, have you seen this on your radar in the past? One option is to glue a piece of plastic over the hole on the inside of the tank, then use some white scrap plastic, like the trimmings from your shoulder bridges, to make some abs paste: https://www.whitearmor.net/forum/topic/51562-how-to-apply-abs-paste/ Once it dries, you can sand it at increasingly high grits and you should be able to smooth it out to the point that it's not noticeable.
-
Re: images, we don't have the budget for unlimited image storage, so you'll need to use a hosting site: https://forum.501stpathfinders.com/topic/23053-faq-how-do-i-post-images/ How big is the hole in the MC tank? Once you get images up and running, I'd like to see it before getting into repair methods. I used pop rivets and washers when I attached my clips to the det tubing.
-
This may help in a general sense: https://imgur.com/3k4k43m
-
Do you by any chance know who made the files?
-
Hi Wes, just to clarify, is snowy_menace the designer of this scout kit?
-
I really don't think the final effect will easily look "finished". I recommend that you remove the holster from the boot. Do you have a steel 1/8" drill bit? You should be able to remove the rivets by carefully drilling them out through the middle, which should allow you to remove the holster from your boot.
-
The item that's most clearly specified in the CRL is the velcro. For Level 1: The boots are secured up the back using 25mm (1 inch) white hook and loop fastener. I do think the grain on the vinyl you used is a little too much. Sometimes there's a little grain, which is okay, but the material in the photos looks "pebbled". Check with your GML.