Chopper
-
Posts
4,886 -
Joined
-
Last visited
-
Days Won
271
Everything posted by Chopper
-

TB-81998 Lancer Deployment Request (APPROVED)
Chopper replied to BikerScout98's topic in Lancer Deployment Request
Scot, yes Studio Creations is a trusted vendor for scout armor and parts. Also please note that, as our DL mentioned during the team review, the damaged bicep armor you mentioned outside of this application will also need to be fully repaired or replaced in order to proceed with the application. If you are already getting parts from SC, you might want to look at their bicep armor as well. -
Oh a custom color! Very nice!
-
Nice. What color did you end up using?
- 254 replies
-
- 1
-

-
- lady
- rs prop masters
- (and 4 more)
-
RoTJ Biker Scout WIP by Kashew (First build)
Chopper replied to Kashew's topic in ROTJ Biker Scout WIP
Hi Frank, You seem to have self-identified most of your issues, with your shoulder bells being the biggest item to correct. Also, check your pouches, which are on the wrong sides. The diagonal on the flap should be facing inwards (see photo). Try and adjust the back of your belt. The rear connection, where the straps attach and the det box is fitted, looks skewed to the right. This is also making your boxes sit unevenly. Your boots look ok. Overall pretty good. Just a few adjustments and you should be on your way.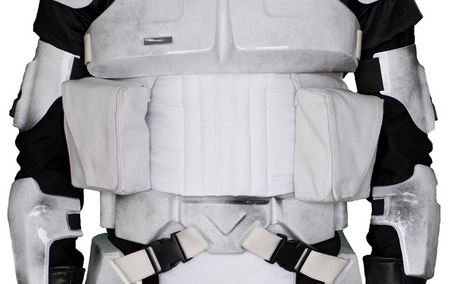
-
The first of a thousand questions about my build...
Chopper replied to RZill's topic in ROTJ Biker Scout Armor/Helmet
If you have a SC helmet, then you can use the Kropserkel youtube video. For the most part, the assembly is pretty similar: -
DreadPirateRobert's Armor Build (help needed)
Chopper replied to DreadPirateRoberts's topic in ROTJ Biker Scout Armor/Helmet
GML dependent, but as far as basic clearance goes, I think you'll make the minimum cut for basic clearance, provided that you do some adjustments first. I'd also encourage you to replace some parts as well -- Correct, you need elastic to secure the shoulder armor White webbing is all you need to join the chest and back armor -- cotton or synthetic or elastic is fine. Bridge covers look fine. If you want to use off white straps on the drop boxes, then you will also need to use off-white pouches and side straps. Check strapworks or Amazon if you're looking for pure white webbing. If your belt is falling down, then you can help secure it with some velcro on your cod, though that'll have to wait until you get your new soft goods in hand to do so. The rear webbing on your belt should connect with a single rivet on each side -- you have two. You'll need to drill them out and fill with abs paste...or get a new belt. You can get the black belt clips for the det tubing here: https://www.theclip.com/store/metal-belt-clip-661 Consider replacing that snout greeblie and rotator bolts, plus the black border area looks scratched https://www.amazon.com/Fibre-Metal-Honeywell-FM4001-Quick-Lok-Adapter/dp/B002BUMS8Y/ref=psdc_7491811011_t1_B015MG1SMK https://www.studiocreations.com/howto/bikerscout/forsale_bike_replacementparts.html -
The first of a thousand questions about my build...
Chopper replied to RZill's topic in ROTJ Biker Scout Armor/Helmet
There isn't a lot to adjust, really. Nice work. Bring your right pouch in a bit. Take the shoulders out a bit more. Bring up your belt. Your belt boxes look like they're kicked forwards a bit. Also, bring up your cod slightly and loosen the strap, so it's not crunching so much.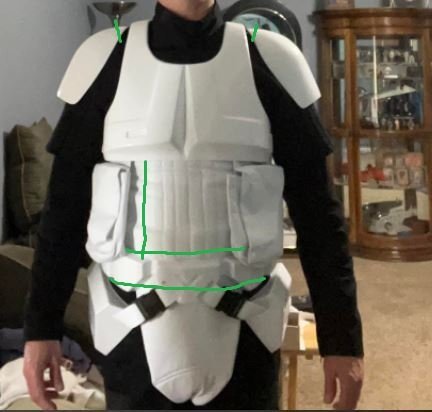
-
The first of a thousand questions about my build...
Chopper replied to RZill's topic in ROTJ Biker Scout Armor/Helmet
Sounds good. We'll take a look when you're ready. -
Yes, the Strider build is still one of the best Level 2 assembly threads. The CRL has changed slightly in the years since then, so you should still double check it against the current CRL. For example, off the top of my head, I think one of the changes since then was the width of the bridge cover strapping.
- 254 replies
-
- 1
-
-
- lady
- rs prop masters
- (and 4 more)
-
The first of a thousand questions about my build...
Chopper replied to RZill's topic in ROTJ Biker Scout Armor/Helmet
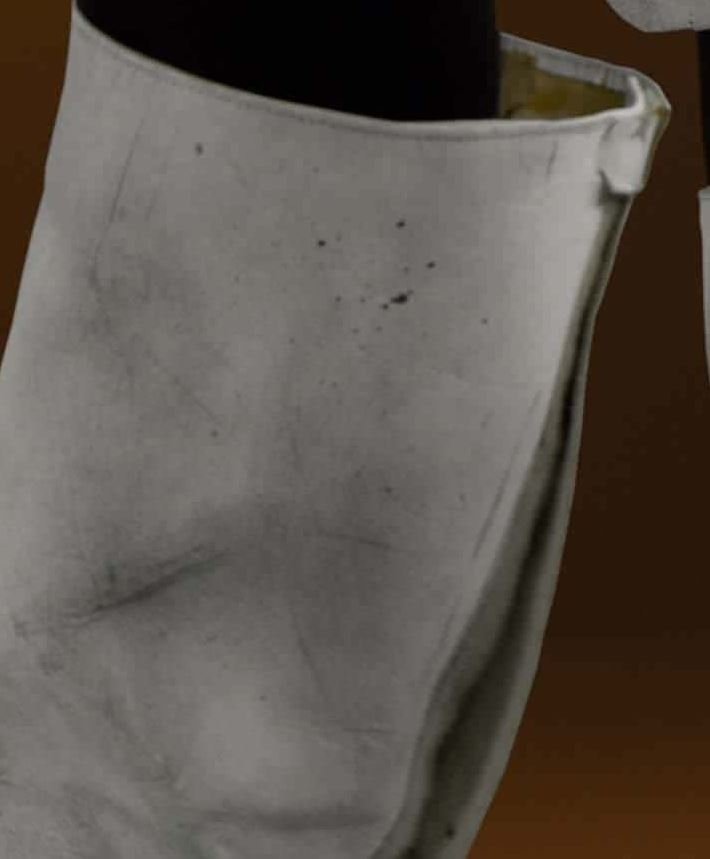
As I said, you're already in the ballpark, plus the velcro is adjustable anyhow -- absolute exactness isn't needed here. If you want to get a perfect measurement for fitting the side strapping, then do it with the appropriate underparts fitted as well. In this side shot, some of the bund is under the chest/back armor and side strap. I've trooped quite a bit in my current set of armor and I have not yet experienced excessive or noticeable wear from the hook side velcro getting passed through the slot in the armor. -
The first of a thousand questions about my build...
Chopper replied to RZill's topic in ROTJ Biker Scout Armor/Helmet
You're in the ballpark. Since you don't have your bund on, I'd leave enough space to fit that as well. With velcro, it's adjustable, so if you leave enough loop side velcro, you can adjust the strapping a bit more once everything is on. -
The first of a thousand questions about my build...
Chopper replied to RZill's topic in ROTJ Biker Scout Armor/Helmet
Those clips will work, yes 👍 -
Folks are doing it that way, b/c the photo evidence indicates that's how it was done with the production boots. That said, which velcro side is facing inwards on the back of the boots is absolutely not stipulated in the CRL, nor is it something that we look for in Level 2 reviews. If you want to do it the other way around, then you're free to go that route and it's a non-issue.
-
The first of a thousand questions about my build...
Chopper replied to RZill's topic in ROTJ Biker Scout Armor/Helmet
Out of stock on Amazon, but shipping on the 18th via here: https://www.theclip.com/store/metal-belt-clip-661 -
Harbinger’s TB WIP (501st/Lancer Approved - but never done!)
Chopper replied to Harbinger's topic in ROTJ Biker Scout WIP
For basic clearance it should be fine. For Level 2, the velcro shouldn't go over the top edge like that. Can you trim it?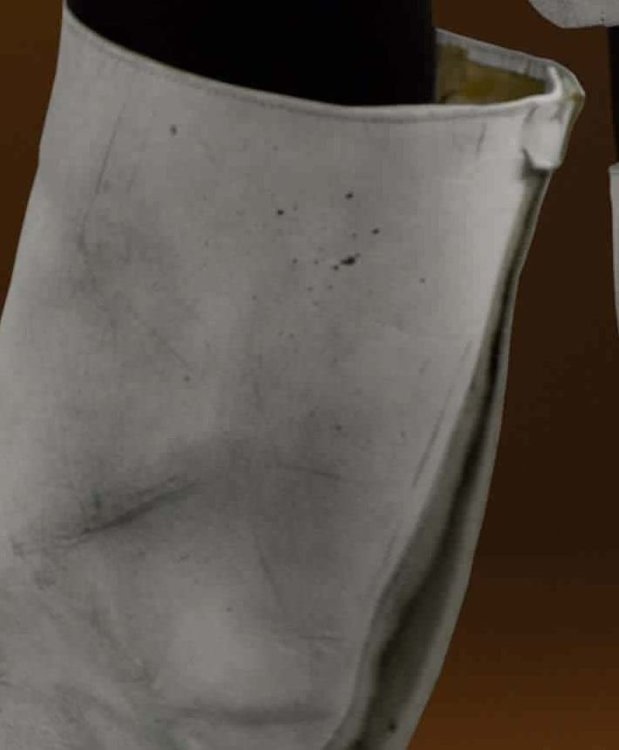
-
For basic clearance, what you have is fine as is. For Level 2, they should go all the way through.
- 254 replies
-
- 1
-
-
- lady
- rs prop masters
- (and 4 more)
-
Hobart 770580 Face Shield Canada
Chopper replied to ImperialWalker's topic in ROTJ Biker Scout Armor/Helmet
@Dart any guidance here? -
If you wanted to do Level 2 Lancer in the future, then yes, the Kingshow boot would need to be painted to have a single color "wheat" sole. The first boot you posted would be good for Level 1 and 2.
-
No prob dude!
-
Depends -- are you going for Level 1 basic clearance or Level 2 Lancer? Level 2 requires a single colored sole, but for basic clearance you can have the two tone sole, like in the example above. You can use acrylic paints to cover up a two tone sole, but it's easier to just have the single color one to begin with. If you're only going to basic clearance, then the kingshow boot above is fine as well.
-
The sole color on those looks okay. If you don't mind sharing, what brand are they? Folks recently have had a hard time getting the Kingshow boots with the single color sole, which is why I'm curious.
-
WIP wannabe Lancer by OnkelPaschulke
Chopper replied to OnkelPaschulke's topic in ROTJ Biker Scout WIP
Hey Arne, that gap def looks okay for filling with ABS paste. And nice work on the ear cuts. -
The first of a thousand questions about my build...
Chopper replied to RZill's topic in ROTJ Biker Scout Armor/Helmet
That looks about right. -
The first of a thousand questions about my build...
Chopper replied to RZill's topic in ROTJ Biker Scout Armor/Helmet
Shoot for this, if you can --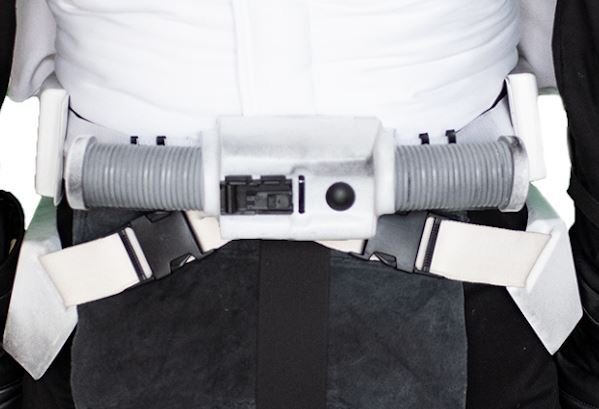
-
The first of a thousand questions about my build...
Chopper replied to RZill's topic in ROTJ Biker Scout Armor/Helmet
Drop box position looks good, Ron. Where are your straps joining in the back?