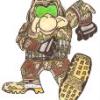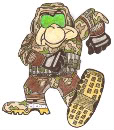
Grumpy
-
Posts
821 -
Joined
-
Last visited
-
Days Won
6
Everything posted by Grumpy
-
It could work. I have never tried it like that. (Have a Garrison buddy zip you up.) But, around that area, it could work like the back pouches. Since they cover up the separation of the cummerbund on the back, the small side pouches could do the same. Or have the separation between the pouches. Your arm and the armor should cover the other parts. Have a go at it and see how it turns out.
-
It's a thin piece of green reflective tint. I got a big piece from Lenox61 a few years ago.
-
Really? Grey drop pouches?? Um...no. The belt and buckle are listed as grey. Why don't any of the GML's ever consult with us? I've read, re-read, and even looked at the CRL that I helped with. And the camo pattern can be the same. The dang clones painted them all the same. I have some of the reflective green tint. Well, I have a couple of pieces left. I think they are the appropriate size. I'll send them to you Brent, and if you could get a piece over to Tim. (At least I hope you are in the same area.) How's that?
-
Yup. When it's flat, they should be pretty close to each other. When it wraps around you, you will be able to see between the pouches. Drop them down a bit. The two front tall pouches can hang over the belt a little. Along with the other two tall pouches. (They sit about the same height.) And the small pouches next to them can go a little lower as well. That way the chest and tank pieces won't hit them. But, with the way the chest sits on everybody, that shouldn't be a problem. It's just watching the back, so the tank will have clearance over the two back pouches. Check out Brent's test fit pics, to see how it fits on him, as a reference.
-
Plenty of very helpful people on here!
-
The black tank stripe is about 1/8" wide. Black pinstripe tape from an auto parts store works just fine. It goes across the top part of the tank. Maybe a couple of inches from the top and then ends under the small side parts. My tank (Older style) My wife's tank (Newer MrBungle style) After I put it on, I gave it a coat of flat clear.
-
Helmet looks awful. Send it to me for a proper burial.
-
Cummerbund looks great!
-
It's not a big deal. It can be there or not. (It also depends on who made the armor. Each maker is different.) There was a small point brought up that it was either the bottom of the chest armor or the top of the cummerbund. (And that was in one of those "highly-controversial pre-production and not screen accurate reference pictures." ) However, if it was the top of the cummerbund, where the straps fold over, then it would be on the outside of the armor and constantly move and show the under suit. To me, like the Biker Scout, you would want the chest armor to stay on top of the cummerbund. Just make sure that the cummerbund goes up under the chest piece, and that you have enough under there, so when you move around, the under suit stays covered in the front.
-
Same question here. The thigh pouch should stick out from the leg and be at least 1" thick. Is the pouch laying flat or can you place a piece of foam in it to give it dimension, like the cummerbund pouches. Yes, make the modifications, if you need to, before you dye the fabric.
-
How's that belt holding up?
-
Yeah, the little resin "box" thingy will sit just a wee bit towards the front. No problem guys.
-
Yup. The DC-15 blaster and the DC-15 rifle are the preferred weapon of the Kashyyyk clone. It's what they used in the movie. Remember, a weapon is not required to have your costume approved. But, it looks pretty cool with one.
-
Well, was that fast enough? Here they are... First... My wife's right side: My wife's left side: My wife's left side back view: My son's left side back view: My son's left side front view: My son's right side: My daughter's right side: My daughter's left side back/side view: My daughter's left side front view: Mine...right side...(it's the original style...so, don't judge! ) Mine...left side...(yeah, it's the older style...don't hate! ) Hope these will help you guys and gals in your builds! Cheers! - Grumpy
-
Either way is good. It's just a matter of weathering them, which gives them that "worn in" look.
-
Gimme a little bit and i'll post up pics of mine, my wife's and my son's. Heck, I'll even post a pic of the home-made one I did for my daughters Jr. Kashyyyk Trooper.
-
Base color: It's between #1 & #2. They both look good. #3 is too light, and #4 has a green tint to it. (From what I see on my computer screen.) Brown: The center color looks good. The first brown could also be used in some of the "less shadowy" areas. Possibly mix the two...maybe. Green: The second shade of green looks good. Not too olive and not too dark. Weathering will give a faded and battle-work look as well. Paint colors are always hard to deal with, since the colors are all made by different manufacturers around the world. So, it's more of a "it-needs-to-look-as-similar-as-possible-to-this" kind of thing. Welcome to the Kashyyyk madness!
-
Hey Patrik, First...welcome to the Swamp area of the Pathfinders. Glad that you chose the Kashyyyk. It's an interesting build, to say the least. The old camo veterans and the shiny new builders (You guys are doing great!) will help you with whatever we can. Pouches: Yup, I still make them. Gloves: Yep, you can make them yourself or have someone make them for you. Glove gauntlet greeblies: Check with BikerChick...she might make them and have them with the kit now. Cheers until later, Matt (Grumpy )
-
It should be fine when it goes around you. It would be attached to the cummerbund, so it should follow along with that. It's a real flexible rubber, though. But, when I put it around me, it seemed okay. It's one of those "not-really-noticeable-except-to-us" kinda things. The snaps just hold the belts together. Colors; Looks like the same grey nylon strap that I use. The grey fabric looks okay to me.
-
What?? Where?? Checked everything from here to Facebook to my email....found nothing. What's up?? (I'll keep checking.)
-
The back part of the bicep where the "huge square" goes. I made my own out of a flat sheet of foam. I couldn't get the rubber piece to stick. (The rubber was too hard and not flexible enough.) As far as the the thin strap parts, like Drew said...it goes with this also...sand the bottom of the rubber first. I used E-6000 to glue it to the bicep. And then added clamps and left it overnight. The rubber bounces back...sometimes. Sometimes there are marks from the clamps...and that equals..."Battle Damage." (Along with spray paint weathering.)
-
I put one fan on the side right near my right eye. It blows air onto the lens and then it bounces onto my face. The cord from the fan goes around the inside of the helmet to the battery pack at the back of the helmet. Well, I experimented with the belt. I took the nylon belt that came with the kit and removed all of the plastic parts. That way there is one big strip of the black nylon belt left. It's just a little bit longer than the rubber belt. The idea of putting snaps inside the squares is what I used. You could sand those down and paint them black. But, with how I did this, they might not be seen at all. It all depends on placement. Now, I just used the snaps to be able to attach the rubber belt to the nylon belt. (That was fun...not.) And, in some whacked-out brain-fart I had, I tried to use the sewing machine to add additional support on the belt. It didn't work very well. (If the lip of the rubber belt was a bit taller, it could have probably been sewn directly to the cummerbund. (The cummerbund would sit well on a belt with a taller lip...that's how the nylon belt came into play...for this way.) To get a lip to either add Velcro to, or sew directly to the cummerbund, is the reasoning for attaching the rubber part to the black nylon part. Clear as mud?? Well, since the machine didn't work, I resorted to hand sewing more of the rubber belt to the nylon belt. That gave some more support to just having the snaps hold them together. Now, on this version, the snaps are just to hold the rubber belt to the black nylon belt. No more than that. For me, I would then sew the cummerbund to the belt. On the cummerbunds that I have done, I attached the belt and drop pouches directly to it. That way it's all together. Anyway, here are some pics to add to the confusion. The top piece is a MrBungle style of belt. Note the taller lip. Using my wife's cummerbund as a reference This is showing the back of the belt. I let a little bit of the rubber belt hang lower, so the black of the nylon belt doesn't show. Epic fail with the sewing machine...(Don't try this at home kids!) Continuing with snaps in certain locations. Usually where a pouch will hang over them. The cummerbund over the top of the nylon belt "lip." Pouches on... Hope that helps a bit. It might not be the perfect solution, but it's one possibility. Now...breathe....and PUSH!!!
-
I have one of the new sets of BC's armor. I'm trying to figure out a way to work with the belt. I have some ideas that involve snaps or a little bit of sewing. I'll pop back in on here or DR's build thread. The ideas are rattling around, so I'll explain it when I try something. Oh, and the new belts are lighter in color. To me, don't worry about the color of the belt. My wife's has a green-grey tint to it. Just as long as you get it to work. Now, to experiment...
-
I think the first thing you need to do is send me that Mustang...for proper disposal. I'll take care of that for you. The dye on the soft parts looks good. Just like everybody else's. (Purple tinted. But that's normal.) The base paint color looks great. The colors for camo, nicely done. More weathering...in my opinion. I can't see the sides of the helmet very well, but it looks like the discs on the sides are silver. Shoot some black on them. (If that's the case. If I'm wrong...I'm old and don't know any better...) For the knee greeb straps...you might have to add snaps to those. That rubber doesn't like any form of glue. There seems to be enough room to add a snap. Not all of the ends of the greeblie will show outside of the knee armor. Check Recon's build thread. If it's thin enough, you could use the heavy duty snaps on it. (The kind used on thick leather.) I had to do those on my wife's and son's knee straps. Overall...looking good. Remember....Mustang....ship to Grumpy.... Overall appearance...two thumbs up. Not too much camo, but just enough so there's not a lot of the base color. ....weathering....more of it....
-
Let us know how that E-6000 holds up with those rubber parts. What's the snap on the elbow / forearm armor for? (Just curious...) And Ghost doesn't look too impressed. I mean you cut up the litter box...