


Strider
-
Posts
769 -
Joined
-
Last visited
-
Days Won
47
Everything posted by Strider
-
TB-12579 Requesting Lancer Deployment (Approved)
Strider replied to Jakeputt's topic in Lancer Deployment Request
Thanks for your application - we'll review and get back! Cheers -
Thanks for chiming in, Jez. Really enjoyed your excellent review on this and other helmets! Cheers
-
The new pics are amazing! I wish someone could lay their hands on an original and cast it
-
Btw, here's a great review on the efx limited edition helmet from Starwarshelmets >>> http://www.starwarshelmets.com/EFX_Scout_Trooper_Limited_Review.htm
-
Congrats!!
-
Ah, interesting, that explains why they had to alter the original mold; the fibreglass and the padding are much thicker than the ABS used for the originals. That's why they had to widen the jaw so that it wouldn't touch/scratch the helmet. Unfortunately the proportions of the bikerscout helmet are quite delicate - alter a little bit and it may change the appearance entirely.
-
TB-61016 Requesting Lancer Deployment (Pending)
Strider replied to Atheris's topic in Lancer Deployment Request
Hi Atheris, thanks for your updates - almost there now just two points: - The chevron of the cod piece needs to be sewn lower (see initial observation) - The pouches should be about an inch apart from the last rib respectively Cheers -
While I was taking some new CRL pics I thought it would be fun to replicate the well-known bikerscout pose from Star Wars Costumes book Many thanks to my buddy Alex (OpiWan) for bearing with me during the shot!
-
Whoop! Here it is: http://forum.bikerscout.net/index.php?showtopic=17305&view=findpost&p=172271
-
The Boots While this isn't a full blown tutorial about making the boot (I would still point towards the excellent build tutorial from Pandatrooper in this regard >>> http://forum.bikerscout.net/index.php?showtopic=9781&view=findpost&p=92449) it's just to show how to assemble the holster and attach it to the boot. I start by cutting a slit on the part that attaches to the boots about 0,4-0,5cm from the edge almost from top to bottom (see picture) so that the other part can slide into it (no glueing required here). From the other part the horizontal slits are cut out as well. To make both cuts above I'm using this dremel tool here >>> Once I've done that I slide the upper part into the holster and determine the position where to glue the front part (again, see pics for reference). In order to glue the front part I'm using a piece of scrap ABS which is formed to about an L-shape (using a heat gun and something to bend it over with to get a straight line). You have to make sure that the scrap plastic has the right shape so that it touches both the parts and the glue gets enough "meat" to stick on. I like to use super glue because it works much faster than e6000 and I can just hold it while it dries (you can use any glue but clamping that particular area is a bit tricky). When the holster itself is assembled 4 holes are drilled near the edges to attach the rivets (the holster is just riveted to the boot, no further glueing). Vice versa 4 holes are punched or drilled into the boot where the holster is to sit (make sure you attach it to the correct boot. In all that excitement I messed that up the first time, haha.) Any questions just let me know. Cheers
-
Hey, thanks for the heads-up - I'll add it to the Lancer Build thread tomorrow! http://forum.bikerscout.net/index.php?showtopic=17305&st=0
-
Troops: I am very happy to announce that Ken, TB-17621 (762s), has been awarded the Lancer rank. Please join me in congratulating him on this accomplishment. Well done trooper! http://forum.bikersc...l=&fromsearch=1
-
TB-17621 Requesting Lancer Deployment (Approved)
Strider replied to 762s's topic in Lancer Deployment Request
Hi Ken, the team has awarded you the rank of Lancer and your profile has been updated. Please send an action pic to Cheyenne (Forest Ranger) and we'll get you added to the wall! Cheers -
Hey gang, since Mickey posted the old catalogue page with the Esprit gauntlets a while ago, me and my buddy Alex got the Rain and the Tour gauntlet and thought a quick comparison might be nice Here's the comparison together with the wampawear gloves: From left to right: Tour gauntlets, Rain gauntlets, Wampawear Rain vs. Tour gauntlets Rain gauntlets with red fabric inside Rain gauntlets with open compartment showing rain cover Cheers
-
TB-17621 Requesting Lancer Deployment (Approved)
Strider replied to 762s's topic in Lancer Deployment Request
Wow, that was quick ! Please stand by for final review. -
TB-17621 Requesting Lancer Deployment (Approved)
Strider replied to 762s's topic in Lancer Deployment Request
Hi Ken, thanks for bearing with us. That is one fine looking scout! We could just find a few nits to pick ;-) - Biceps armor should face to the sides - Vest sleeves should be even on both sides - The drop boxes should sit a tad bit higher an be evened out - The jet pack should sit straight (it's a bit skewed to one side on the pic) - The mud flap is a bit long I would reduce it by at least an inch - The gap between cummerbund and belt at front should not be too large All in all no biggies mostly just issues of straighten out the armor pieces Cheers -
TB72822 Requesting Lancer status. (Approved)
Strider replied to Dragon_a's topic in Lancer Deployment Request
Hi Tony, looking good so far! I'm just waiting for the pics of your upgraded boots before starting the final review. Cheers -
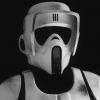
Unbelievable that this has finally seen the light of day ;-) But I have to say I'm not impressed; the jaw flare, the silghtly skewed snout greeblie and of course the decision to use fibreglas. Funnily, on the first impression it looked more like a Lonewolf to me. However, that is critique on a very high level, we're speaking 100% screen accuracy here. All in all, it's a fine addition to the exisiting helmets (albeit an expensive one, lol). Cheers
-
TB-17621 Requesting Lancer Deployment (Approved)
Strider replied to 762s's topic in Lancer Deployment Request
Hey Ken, thanks for your application. We'll review and get back to you (if we're still in charge after the election, lol ;-) Cheers -
Dangerously close to Lancer status now, buddy ;-) The only things I can spot on this pic is the cod and the slight flaring of the vest. Should you choose to redo the cod I would also lower the ark. This actually changes the look of it drastically and gives it more of the round shape you see on the mannequin. Other than that it looks awesome! Cheers
-
Very cool! It's the first time I see my upgraded gear suited up I may be biased but I think it looks terrific! 2 things stand out for me atm though: The cod piece has a bit of a camel toe and the shaft of the boots looks a bit too wide. The rest is probably due to the test fit. But to be clear - this build is top notch! Cheers
-
TB-61016 Requesting Lancer Deployment (Pending)
Strider replied to Atheris's topic in Lancer Deployment Request
Hi Atheris, thank you for your submission for Lancer. We've reviewed your gear and would ask you to make the following changes: - Please dial back some of the weathering. While there were some scouts that did have more pronounced weathering spots than others those spots were only used minimally and not all over the armor. - The TD tube should be medium gray. In your pictures it appears to be white(ish) - Helmet bolds should be 3m replicas - The cod piece should sit tighter at the botton and the chevron needs to sit lower - Butt flap should be wider Additional observations (at this time not required for this Lancer app): - Visible seam line on the bottom of the flak vest sleeves. - Slight weathering on blaster (the screen used blaster where not weathered) - Pouch flaps not covering top of pouches completely. - Black paint around snout is a little rough, also decal just above snout is on an angle. - Boots: Dog bones on boots appear too big, pointed on corner and loose. - Helmet: Large gap between faceplate and backplate of the helmet, right side, a little on left side also. - Excess material on the belt (below the last right box in particular). -
About the trim lines...I tried to cover that in my Lancer build tutorial. If that doesn't solve the questions just let me know!
-
Yeah, we did have a lot of discussion about higher levels but unfortunately it couldn't find a majority. I would absolutely support the introduction of an ultimate level of accuracy for the scout similar to SWAT at the MEPD.
-
Looked poop then, looks poop now. Hahahaha, just messing with you. Seriously, we're happy just doing the new Lancer approvals otherwise we might have to quit our day job ;-) Cheers and keep those upgrades coming )
