Retrofire
-
Posts
3,699 -
Joined
-
Last visited
-
Days Won
135
Everything posted by Retrofire
-
The cod is looking good nice work there and on your riding patches and thigh straps. One thing I’m noticing is that your belt weathering is looking a little on the heavy side. Remember that less is more with the weathering you don’t have to add too much to get that well worn Scout look.😉
-
Hi Andreas! From the picture I would agree that there is a bit of bulking going on there. I don’t think that would be an issue for your basic approval and it’s something that you can remedy later. I think you’ll have to tailor that area and take the material in. You’re looking good and I wish you the best of luck with your submission!
-
Hi Pedro! Looking at your flight suit your thigh straps are looking a little bit loose. I also noticed what look like pockets on your flight suit and those should be removed per the CRL “The suit is free of any visible labels, logos, zippers or pockets.“ The bund is looking pretty good and the only thing I see there is that the back isn’t fully closed at the top. It’s always helpful to keep a copy of the CRL about as a “checklist” so you can compare each of your build steps against it. https://databank.501st.com/databank/Costuming:TB_Scout_trooper You’re doing a great job so far so keep those questions coming and keep up the great work!
-
You’re doing great Phil! You’re dedicated and talented and that shows in your thread. Although frustrating at times the end goal is to enjoy your costume and bring smiles to everyone....You got this bro!
-
You're doing great Joe. Keep taking it a step at a time and don't get yourself frustrated with anything. We're here to help if you need so don't hesitate to reach out.
-

Hello! Thoughts about my costume for approval?
Retrofire replied to Aurel's topic in ROTJ Biker Scout HQ
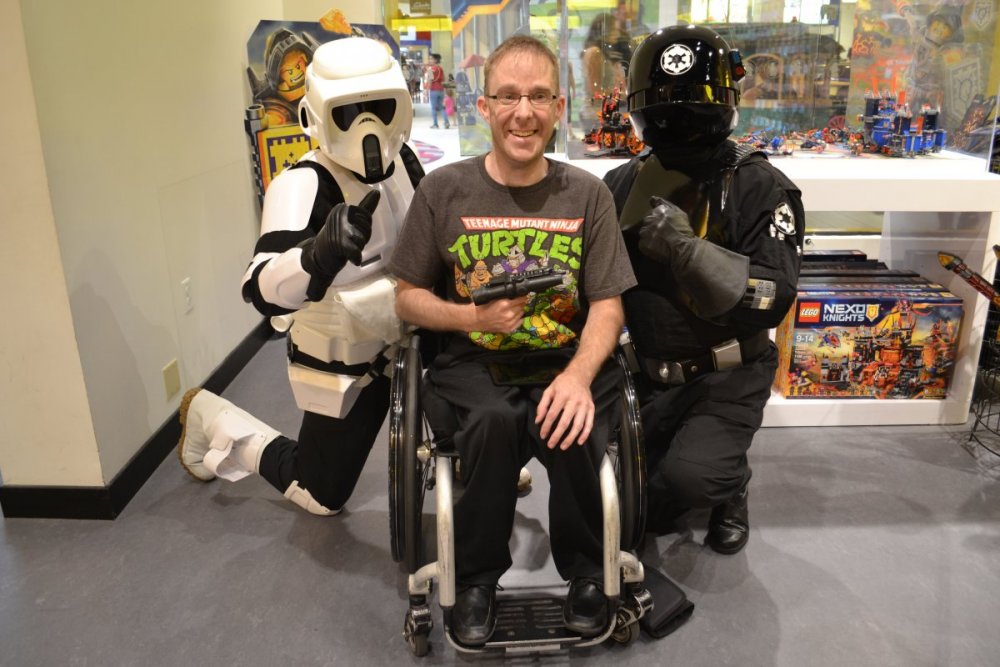
Salut Aurel et bienvenue chez les Pathfinders! In order to give you a good once over we'll need your left and right sides and a back photos. Make sure you do this without the DLT-19 so we can focus on your costume. The one item I see that might hinder you some for basic approval is that your cod piece is much too large. You'll want to make it smaller as shown in the CRL photo below. We're here to help you be successful so please post up a few more photos and we'll do everything we can to help you out.
-
TB-82919 Requesting Lancer (WITHDRAWN)
Retrofire replied to DJMoore's topic in Lancer Deployment Request
We'll be happy to answer all you have DJ. MoTM is the Magic of the Myth show where they exhibited one of the screen used ROTJ Scouts from the LFL Costume Archive. -
TB-82919 Requesting Lancer (WITHDRAWN)
Retrofire replied to DJMoore's topic in Lancer Deployment Request
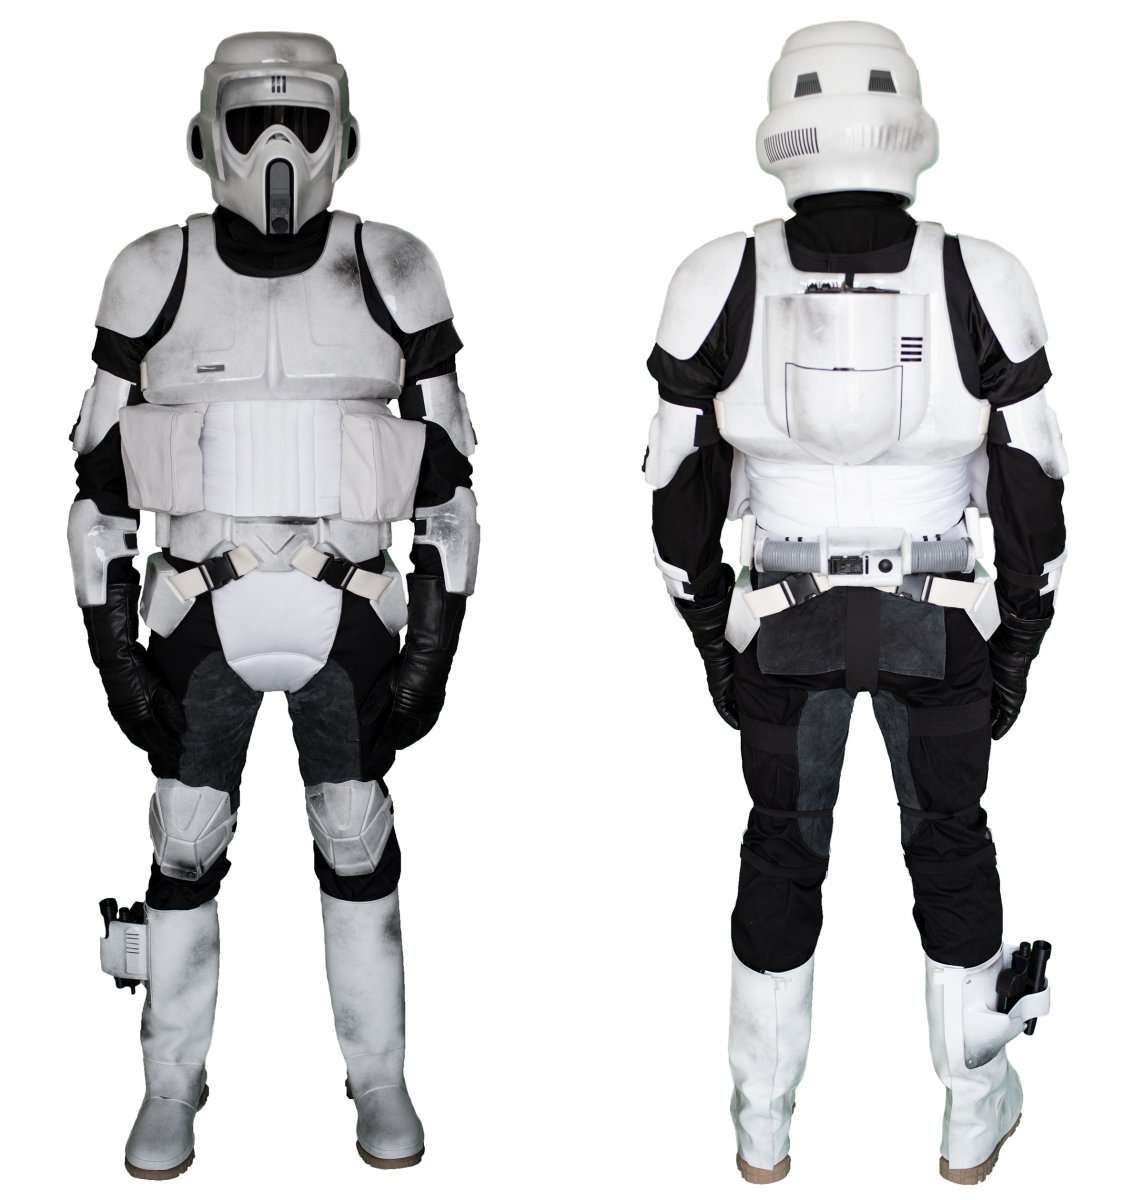
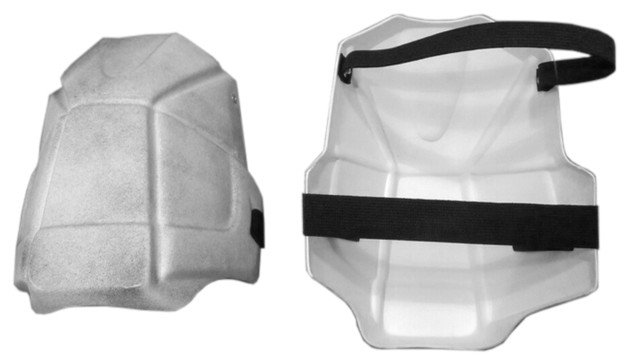
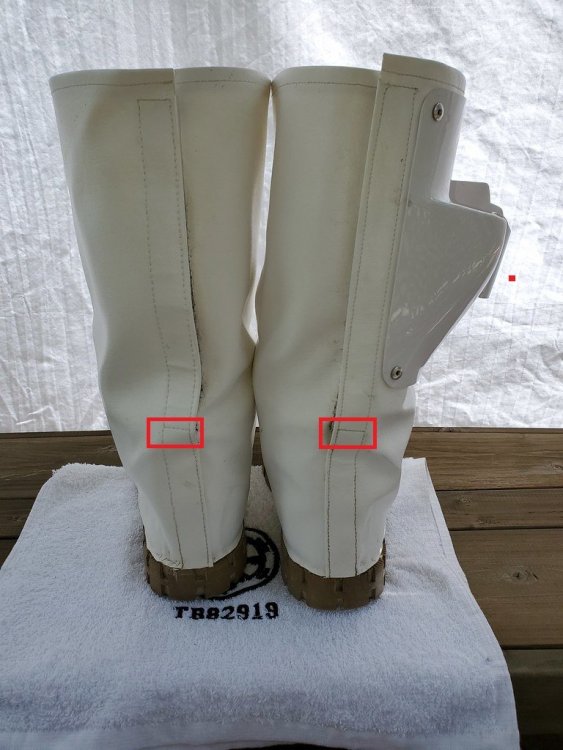
DJ, Thank you very much for your application! After a thorough review the team has come up with the following items. Flight Suit -Take about 1.5" to 2" vertically off of the butt flap Shoulder Armor -We'd like to have some additional photos of your should bells from the front and sides. Upper Arm Armor -Bicep armor should be at approx 90 degree position -It looks like these can be trimmed around the circumference to help them sit flat against your arm. Can you provide additional photos of the back and sides? Forearm Armor -Forearm armor should be at approx 45 degree position Back Armor -Back armor needs to come up. Front looks good. Might need to do some shoulder bridge trimming on the back to even it up. -The mini-strip on the center of the horizontal tank pin-striping was only seen on the 4 stripe scout (the one who catches Leia). Recommend removing two stripes to match that Scout. Cummerbund and Cod -The cummerbund is tucked under belt. Should sit just over the belt. -A stiffener piece can be added to the lower cod piece to help keep it from flexing. Pulling the bund up to bring it above the belt may also help flatten the cod piece. Belt and Detonator - From the way the boxes are sitting with your belt we think the proper look would actually be better achieved by bringing the boxes down a little bit in excess of the 1" listed in the CRL. They should sit comfortably on your thighs. -End caps on detonator are too wide, the excess should be trimmed down about a quarter inch. -Center buckles on drop straps Knees The knee armor you have is an older version and does not match the CRL photo for the ROTJ Biker Scout. These will need to be replaced with a newer set. Tank Tank Rivet location: The rivet on your tank assembly is much too low compared to the screen scouts. We recommend that you remove this rivet replace it with a 1/8" rivet and relocate it closer to the location shown in the MoTM screen used armor in the pictures below. Holster -There seems to be a hole in the back part of your holster where the horizontal piece fits in. Can you provide a close up of that area? -The rivets used for these areas look oversized. The screen used versions used a 1/8" rivet and we recommend changing these rivets out with the proper sizes. Chopper has had experience in drilling out rivets and he recommends that you use 1/8" DeWalt Cobalt drill bit for removing aluminum rivets. He says that it goes through them like butter and should not heat the surrounding ABS. Boots - The horizontal seams should be either removed or camouflaged with white paint. I realize it seems like a lot but you should be very proud of what you've accomplished so far. Your overall kit is well done and just needs some fine tuning to get you over the line. If you have any concerns or questions please feel free to reach out to us at anytime.
-
I think the 3.2mm (1/8th") will do nicely. If you want to drop in a pic we'd be happy to verify that for you.
-
Sounds good. Recommend checking out Christina's build thread for some excellent insight on weathering this armor.
-
Darth147s (Studio Creations) Scout Build-WIP
Retrofire replied to Darth147's topic in ROTJ Biker Scout WIP
So far so good. Looks like the cod is getting pulled under and that's causing it to fold. Pull your bund up higher towards your pecs to get it under your chest armor and that should pull the cod a little flatter to the front. Also check to make sure the cod strap isn't too tight. You'll need to paint/decal your chest indent medium grey. If you can bring your thigh boxes up to around 1"-1.5" from the bottom of your belt. Things will tighten up once you get those finishing touches on so keep up the great work! -
Congrats DL!
-
Play nice you two or I'll ban ya😁 I'm sure both of your armor builds will be amazing!
-
Wanted, gloss white lancer level holster
Retrofire replied to fil5117's topic in ROTJ Biker Scout Armor/Helmet
Does the stock holster look like this?
-
You’re doing great Phil and you’re almost at the finish! Keep up the great work and let us know if you need anything.
-
That’s odd. The one on the right is the one you’ll want to use for your build. The left one has much too big of a cut out on the lower half of the box.
-
Frederick your thread has been moved as requested. Best of luck with your build and be sure to reach out if you need any help.
-
Yeah those pieces are too tight a fit around your calf. It’ll be rough to get those closed around your flight suit and the holster is sized for a wider diameter. That’s more a riding boot diameter than a typical scout boot diameter. Check out this tutorial for how best to measure the vertical portion of the boot. It should be about halfway down on the first page.
-
Darth147s (Studio Creations) Scout Build-WIP
Retrofire replied to Darth147's topic in ROTJ Biker Scout WIP
Hi Art! I hope it’s the photo but it looks like your pouches are reversed. The straight side of the flap should face your belly button. The Velcro on the bottom of the pouch flaps is ok and that’s how I have mine.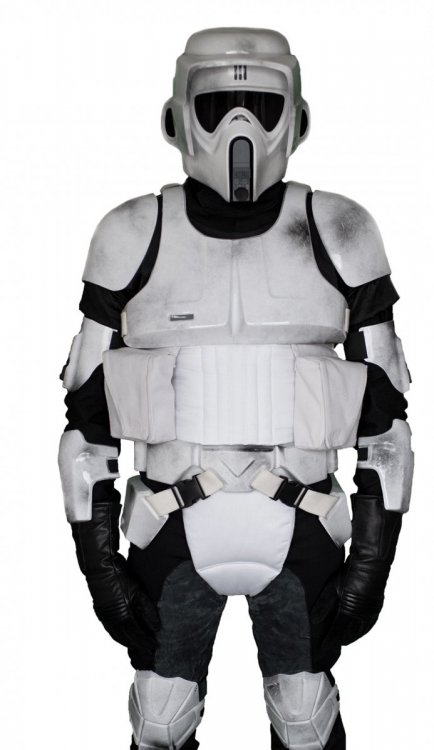
-
Welcome to the Pathfinders Cory! Looks like you’ve been well taken care of. We’re here for you should you need so don’t hesitate to reach out.
-
TB - Scout Trooper - The Mandalorian is now LIVE!
Retrofire replied to BikerScout007's topic in Announcements
Well done team! What an organization! You folks are amazing! -
Can you post a pic? You should have two hip boxes in your SC kit did you get more than two?
-
Our DL recommends this place for all your clip needs. https://www.theclip.com/store/metal-belt-clip-661-tempered-belt-clip.html Also if you’re still looking for a holster MonCal sells pieces so I’d shoot him a PM and see what he can do for you. I recently replaced my holster with a MC as I had to get a new pair of boots.
-
If you need something a little lighter you can use the air pack shipping cushions (plastic bags filled with air) that usually come in packing boxes. That will give you the “bulk” without the weight.
-
Looks like you're off to good start Nathan. There are a lot of options available for your boots. As you're in Tucson looks like we're going to be in the same Garrison, I'm up in Scottsdale, and you'll be with the Jundland Wastes Squad. You're off to a good start with your WIP thread so keep us updated and if you need any help or have any questions post them up. We're here to make you successful!