

Retrofire
-
Posts
3,697 -
Joined
-
Last visited
-
Days Won
135
Everything posted by Retrofire
-
 No need for apologies Christina. You have taught all of us fantastic techniques for weathering armor and in my book that’s a huge win! If you need to redo it then that’s fine you work until you’re satisfied. F we can be of any help please don’t hesitate to reach out to us. Looking forward to seeing this move forward again.
 -
BikerScout007's Patrol Trooper Build!
Retrofire replied to BikerScout007's topic in Patrol Trooper WIP
That’s NOT funny🤨....if Spec Ops gets wind of that........🤣 -
TB-60446 Lancer Deployment Request (APPROVED)
Retrofire replied to Aradun's topic in Lancer Deployment Request
That should work just fine Dennis. Depending how porous the green stuff is you might want to seal it with with a think layer of CA glue before you paint it. We’re here for all the help you need to work this so let us know if you need anything! -
TB-60446 Lancer Deployment Request (APPROVED)
Retrofire replied to Aradun's topic in Lancer Deployment Request
Dennis, We'd like to commend you for the excellent work you've done on your armor. You've done an outstanding job and you should be proud! I'd personally also like to commend you for how active you've been on the boards reaching out to new scouts and providing advice and encouragement. It's the hallmark of this detachment and you've really exemplified that. After a thorough review against the Lancer specs we have the following findings: Boot: You have some boot droop on that right boot. This is a common problem and is due to the weight of the holster and blaster. You can attach some elastic with hook and loop Velcro to the interior holster connections to help keep the boot shaft straight. Holster and Knee Rivets: The rivets used for these areas look oversized. The screen used versions used a 1/8" rivet and we recommend changing these rivets out with the proper sizes. Chopper has had experience in drilling out rivets and he recommends that you use 1/8" DeWalt Cobalt drill bit for removing aluminum rivets. He says that it goes through them like butter and should not heat the surrounding ABS. Tank Rivet location: The rivet on your tank assembly is much too low compared to the screen scouts. We recommend that you remove this rivet and relocate it closer to the location shown in the MoTM screen used armor in the pictures below. Again you should be proud of what you've accomplished so far. Your overall kit is excellently done. If you have any concerns or questions please feel free to reach out to us at anytime. -
I’m not seeing any showstoppers with that kit Eric. Looks like it’s time to weather. Check out Christina’s thread for some great tips! BTW is that a Hab’s jersey behind you? Big fan from back in the Roy, Savard, Courtnall, Corson era!
-
Oh then you should be fine with that. You just want to make sure your surface is dust free before you shoot your primer. Follow the recommended can distance from your work and give it time to dry/cure before shooting the next layer and you should be fine. Keep those great questions coming!
-
It may be that you’re a bit too far away when you spray and what could be happening is that the primer droplets are drying as soon as they hit the surface causing that “dusting” effect. You can knock that down with some scotchbrite. I would also recommend that you wipe your bucket down with some isopropyl alchohol to clean any sanding dust or oils off before you shoot it with primer. Once the primer dries check the surface and correct any issues with sandpaper or scotchbrite before shooting your first white coat. Ensuring the base layers are clean and smooth will make for a nice final product. Chopper hit the nail on the head with suggesting that you do a few test shoots on scrap before you shoot your bucket. You’ve done some fine sanding work on that and we don’t want you to have to redo it.
-
Looking forward to seeing your primer on this. We’ve been seeing quite a few paint issues cropping up in the build forums so make sure you have good compatible paint/primer products and give yourself plenty of drying/cure time between coats. Oh and not sure of the English weather but watch that humidity too☔
-
If you need some rare earth mags I have some 1/4” dia that I can give you. I also have some 5/8-3/4 dia but those might be a touch too strong. Let me know if you want some so you don’t have to buy a bunch.
-
Studio Creations armor/helmet kit
Retrofire replied to Vraeden's topic in ROTJ Biker Scout Armor/Helmet
That’s looking much better. It’s a good size compared to the CRL pic below. Keep up the good work and keep those questions coming!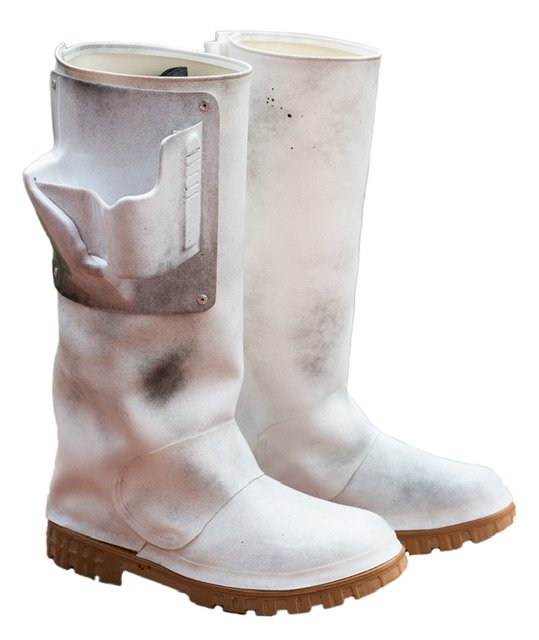
-
You take your time Christina family first!
-
Hi Tyler and welcome to the Pathfinders! You can scale down the armor for specific people as long as the look is maintained. No body type is the same so folks will have to trim here and there to get it all to fit them. As I mentioned as long as the CRL is followed you shouldn’t have any issues. Best of luck!
-
Well done on the TD Phil keep up that great work!
-
Congrats Pathfinder!
-
It’s looking good so far Sabrina. Remember to go slow and remember that you remove plastic but not put it back on. Here are some build threads of the CFO that might be helpful to you as a reference. Keep those great questions and pictures coming!
-
It’s looking really good. Keep up the great work and let us know if you have any questions!
-
Don’t stress yourself too much sir. You most certainly can build to the Lancer spec but we can address those particular pics when you’re ready to submit and post them up in the Lancer submission forum. Best thing now is to focus on your basic submission. The GMLs are only going to focus on that. I was a GML for about 2.5 years so I can help you with what they’re going to focus on. Can you post up a pic of your helmet showing the areas that are causing you some issues?
-
So it looks like Christina will be the first one through the new CRL. While we’re anxiously awaiting her pics. Let’s review what we have so far for the written CRL so we have a solid submittal to the LMO. Please post up any updates, clarifications, you find. Thanks everyone! The draft is on the first page of this post...
-
Fantastic job Christina!
-
Thanks for all your hard work, wisdom, and helping hand to the Det Stefan you will be missed! Melody congrats on the new role and welcome to the lvl2 review team!
-
Ryi'nocks Biker Scout WIP [Approval Ready?]
Retrofire replied to Ryi'nock's topic in ROTJ Biker Scout WIP
If you loosen up the cod strap and pull the cod up a bit in front it should help alleviate those “crunchies” a fair bit. Apart from that you’re looking good. Best of luck with the UKG GMLs mate! -
Be sure to sand those edges nice and smooth or you’ll tear up your vest and it’ll hang up on you when your donning or doffing your chest armour.
-
Clayorrnot 3D printed helmet progress
Retrofire replied to clayorrnot's topic in ROTJ Biker Scout Armor/Helmet
It’s looking pretty good to me. The visor return seems a bit too thick to me and typically the helmet bolts are inset but I’m not seeing anything that would keep you from clearing basic with it. I would replace those silver bolts with the grey 3M versions though. There is a sale thread for the kit that comes with a headband or you can just get the bolts themselves from Amazon. -
Congrats Pathfinder! I think it’s great that you’re going to go for Lancer. Please review the pinned posts here before you submit: http://forum.501stpathfinders.com/index.php?/forum/51-lancer-deployment-request/ I would also recommend that you review a few of the approved Lancer applications to get an idea of what you’ll need to do. Any questions please feel to let myself or @Chopper know and we’ll be glad to help.
-
Studio Creations armor/helmet kit
Retrofire replied to Vraeden's topic in ROTJ Biker Scout Armor/Helmet
We typically recommend that the boxes sit anywhere from 1”-1.5” from the bottom of your belt. You’ll want to measure from the inside of your belt front to inside the boxes and leave a little extra to adjust if you need. Since the buckle is there only for show and is just threaded through the strap you can slide it up or down to get it in the middle. You can use tape to attach the straps to the belt and boxes temporarily so you can put the belt on and adjust from there.


