Retrofire
-
Posts
3,699 -
Joined
-
Last visited
-
Days Won
135
Everything posted by Retrofire
-
Wow...just wow! The level of detail you put into the interior is fantastic. Really nice work Brix. Did you make all those greeblies yourself?
-
 This ☝️ We’re here to help you be successful Mike so keep asking those questions! @Strider Thanks very much for weighing in on the flight suit. Guys like you are the Jedi Masters of the Scout soft goods!
 -
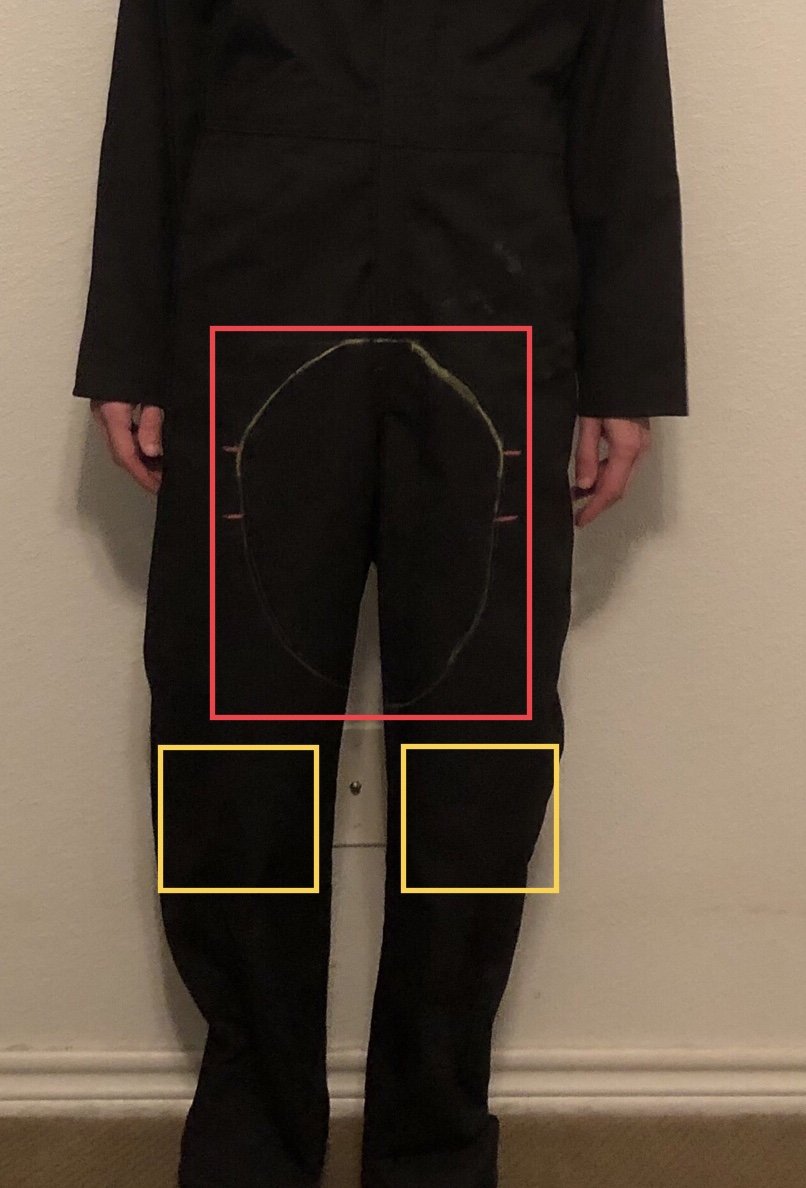
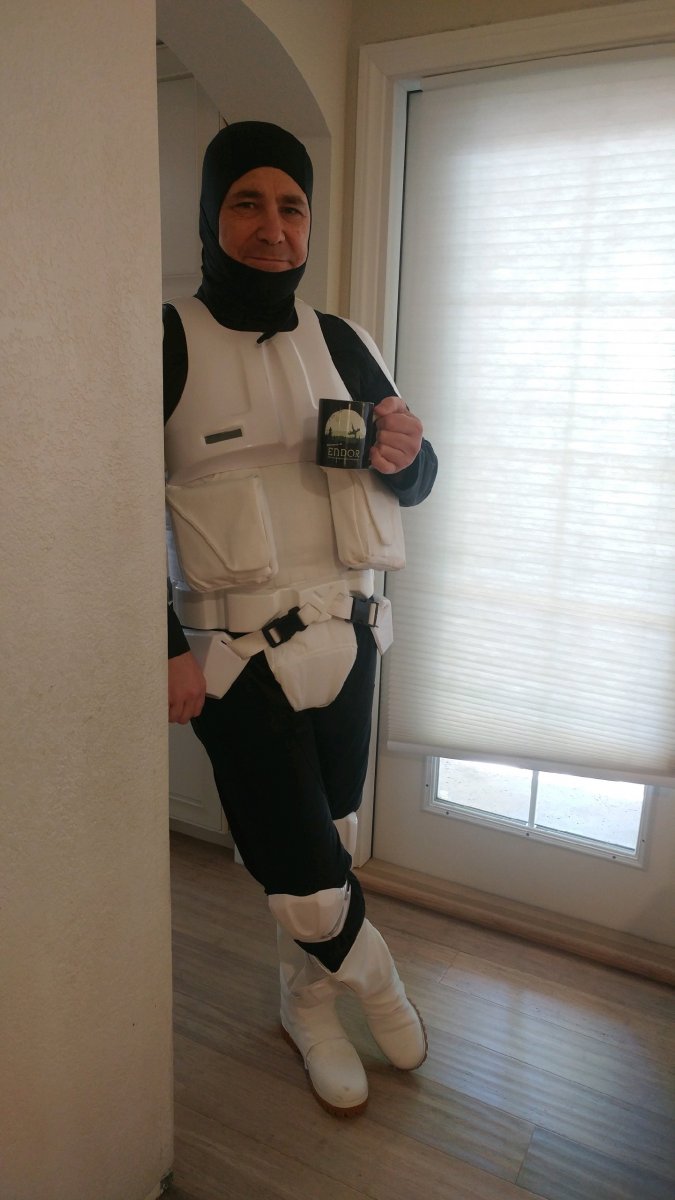
Dennis has a point about making a pattern. That will ensure your markings are consistent and even. The rounding at the top looks pretty good and I see you listened to Bikerscout007 and relocated your thigh straps so those look good too. Looking at your pic it seems that your lower patch marking on the left (your right) leg is higher than the right (your left). Another good gauge it your knee armor and you can see the distance between the knees and the patches on the CRL model. The model is @Strider and he’s a pretty tall guy like you so that’s a pretty good pic to judge your distances with. In your pic you can get an idea of what I’m talking about. You can see the differences in height of the patch chalk lines there. Maybe it’s just the pic but it would be a good idea to verify. The yellow boxes are where I’m assuming your knees are to give you a sight picture against the CRL model. You’re doing great Mike keep it up and keep asking those questions.

-
As Newton said “the only reason I have seen further is because I’ve stood on the shoulders of giants”. I had so many folks watching my build and offering advice and encouragement I can’t even name them all but I couldn’t have done it without them. This is what this det is about at the end of the day fostering Camaraderie, community, and charity. We love what we do and helping others is what we’re about. There are so many here dedicated to those ends and I’m just honored to be part of it. What you’re doing with your thread is awesome so whether you know it or not you’re part of it too. There are a lot of folks who will be looking through this for ideas and suggestions so good on you for keeping it up!
-
Nice work on the TD Dennis. You can see that the wire wrapped one has a bit of heft to it. As Mickey mentioned your due diligence in keeping this thread so well updated will be a great roadmap for fellow Scouts to follow so I commend you for that. I’m glad you went the “less is more” route with your weathering as well it’s easy to overdo. I also like that you’re keeping your E11 close by as you work in your shop. A++ for preparedness as you never know when one of those furballs will show up😃
-
Hi Mike looks like you got some good advice from @BikerScout007 over in the soft armor thread here: A word about cross posting. When you have a build thread going try to keep everything within your WIP thread. That way you don’t have multiple threads floating about and the Armourers can focus on a single thread. If you find you do need to cross post then add the thread link so the information flow stays harmonious. It makes it easier to ensure you’re getting the information that you need. You’re doing a great job so far! Looking forward to seeing that armor come in. Keep up the great work!
-
Oh and another thing to keep in mind is that your end caps might not fit once you wrap it. So be prepared to “shave” down the cap ID. I tried to force the first set and cracked them requiring a wait for a new set. You also may have to trim back the TD openings for the tube as well. Just take it slow and don’t force anything. Measure and trim in small increments if it becomes necessary. That RS is really nice so don’t go acrackin it.😉
-
Really nice work Christina! This is really coming along and your talent with weathering is formidable.
-
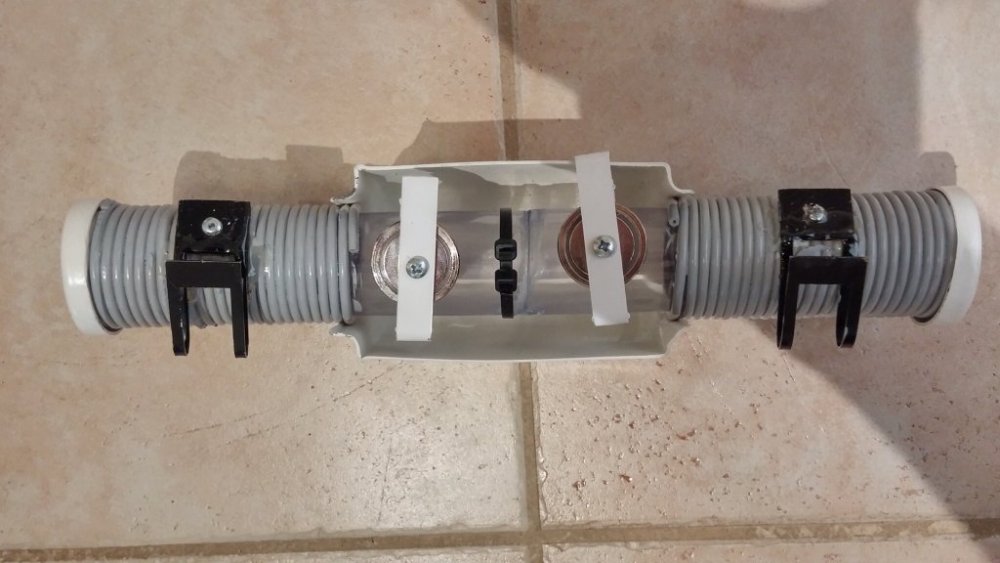
I ordered two of these magnets on my TD from Amazon the rest I got from Trooperbay but you can get get them pretty much anywhere. The mags in the belt are 0.5” dia and they are sewn into pouches that are in the left side of the picture. I learned that from Terry “Pandatrooper” when I was building my armor. I’ve had it drop off a couple of times when trooping and it self destructed both times requiring some attention. That’s why the clips seem a little sloppy as I added epoxy around them to give them more strength. Corey is right that although it’s accurate it can be a bit of a nuisance for everyday trooping. The Armoury team is actually looking into some alternate products that will give the accuracy without the drawback of the weight so more to come in the future on that.

-
Congrats Retrofire, new Captain of the Guard!
Retrofire replied to BikerScout007's topic in Announcements
Thanks for all the well wishes! You folks are members of the best det in the whole five oh first! It’s an honor to serve and if anyone needs anything the door is always open! Cheers!
-
Keep in mind that when you do this you will increase the weight of the TD significantly! It’s not required to do that for Lancer so it’s something that you might want to think about. I have a wire wrapped TD and it’s HEAVY. I added rare earth magnets to it and my belt to keep it locked in place. Make sure you have sturdy belt clips and that they are well attached to the tube. Not trying to discourage you here just want you to know the possible draw backs and make sure you are in the know on how to best make it work. We’re here for you so if you decide to go that route we’ll help you all you need.
-
Heheheheh you said “blorp” heheheheheh
-
Can you trim out the fabric around the ear vents on the inside with an X-a to knife or similar?
-
Fibre-Metal helmet bolts (3M substitute?)
Retrofire replied to BikerScout007's topic in ROTJ Biker Scout Armor/Helmet
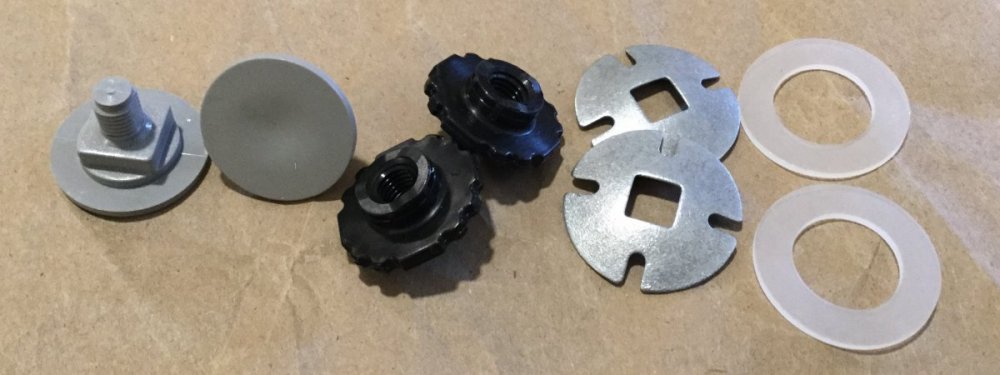
Here’s the set I got today. This set is just the bolts and no suspension but it’s spot on to the 3M bolt set.
-
Hi Diego. Another important thing is what brand of paint did you use as well? Chopper is right on the money with curing times and prep. He and I have talked quite a bit about the need to use compatible primers and paints. So it would be helpful to have an idea of your paint as well. Fear not we’ll help you as best we can get this worked out.
-
Fibre-Metal helmet bolts (3M substitute?)
Retrofire replied to BikerScout007's topic in ROTJ Biker Scout Armor/Helmet
Darn you I just ordered a pair yesterday from Amazon to check too! Nice man! -
That’s great to see Dennis! So did you put on your lid and check in the mirror at how cool you look? So now’s the time to go slow and steady. Use the whole measure twice, cut once mantra. Test fit everything as much as is possible before you commit to make sure of fit/function and it meets the CRL. Remember also that with the weathering “less is more” so don’t overdo it. Take a look at the CRL model for a good reference. As always we’re here for you so if you have any questions post them up.
-
Congratulations Pathfinder! Make sure you update your profile and make a post for Pathfinder access here: http://forum.501stpathfinders.com/index.php?/forum/162-access-requests/
-
Well done! Congratulations Lancer!
-
TB-42134 Lancer Deployment Request (APPROVED)
Retrofire replied to mickeymark34's topic in Lancer Deployment Request
Hi Mark and thank you for your application. The team will thoroughly review it and get back to you when we are able. Stand by Pathfinder! -
No word from my email to Walt. Does anyone know a better email addy? I don’t have FB so anyone who is of mind to feel free to get a hold of him there so we can solve the shoulder strapping issue. On the weathering front I think we should add a section to the CRL like the MEPD has for the sandtrooper here: https://databank.501st.com/databank/Costuming:TD_sandtrooper_weathering Maybe we can add some good pictures of the CRL model (when we have one) to help round that section out?
-
Hear hear! Excellent work Christina! That weathering is screen worthy! Looking forward to seeing you complete this armor.
-
That’s great news Sean! When you get ready to start to build I would recommend starting a build thread here: http://forum.501stpathfinders.com/index.php?/forum/96-biker-scout-wip/ You can ask questions, post pictures, and keep a record of your build. We have a great team of armourers who will be happy to answer any questions you might have regarding becoming a scout. Make sure you keep the Costume Requirements Listing (CRL) handy as that’s what your Garrison will be judging you against: You can find that here: https://databank.501st.com/databank/Costuming:TB_Scout_trooper This detachment is focused on helping those that want to build and encouraging them along it’s all part of what we do. As I mentioned in my earlier post we want you to be successful in all you do so let us know if we can be of help in any way.
-
Looking for thigh patch pattern
Retrofire replied to Pledford's topic in ROTJ Biker Scout Soft Parts
This was a post from the forum that Bootlegger mentioned. He’s right on point with that suggestion and I’d recommend that you give it a good look through. Take those measurements and make yourself up some paper or cardboard patterns and try them out on your flightsuit and then tailor them to your size. The CRL photos are a good reference on where they should sit along with the approved WIP threads. The flight suit detail page also has some good, clear reference photos and you can find that here: https://databank.501st.com/databank/Costuming:TB_scout_trooper-suitdetail Please feel free to post up what you come up with in your WIP thread and we can help you adjust should you need to. Good luck and keep asking those excellent questions!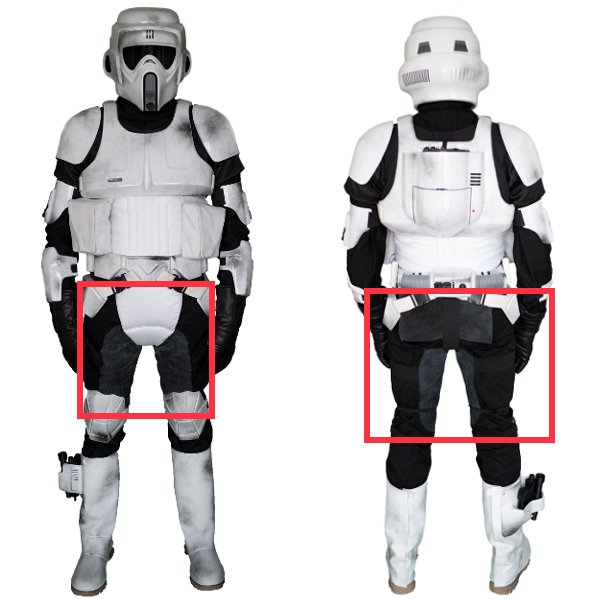
-
Hi Sean and welcome to the Pathfinders! I think it’s great you spent some time over with the Stormtroopers learning about some of the basics in starting this hobby. We have whole forum sections dedicated to that very same thing so you can learn everything about our costumes. Most people starting are don’t have any experience and I was one of them. I learned everything though the fantastic people here and sharpened my skills over my years in the Legion. You are in good company. If you already haven’t I would like to encourage you to reach out to your local Garrison there in Malaysia which would be the Malaysia Garrison here: https://www.my501st.com/ There you can find additional resources and members that are close to you for help and resources should you need it. They are also the Garrison that you will be submitting for approval with so it’s good to get to know your future fellow troopers. Some good places here to start are: http://forum.501stpathfinders.com/index.php?/forum/81-getting-started/ and http://forum.501stpathfinders.com/index.php?/forum/91-biker-scout-hq/ These two forums are a good jumping off place to learn about the various pieces and parts that make up this costume. From there you can read the various forums that break down the costume and even give you tips on how to build. Much of this costume is made up of soft armor so if you can sew you can make most of it yourself and save your funds for a good set of hard armor. As always we are here to help you be successful so don’t let all this overwhelm you. We have an amazing staff who are available to answer questions and provide pointers so if you got questions post them up. We want you to be successful!