

Griffin-X
-
Posts
6,808 -
Joined
-
Last visited
-
Days Won
188
Everything posted by Griffin-X
-
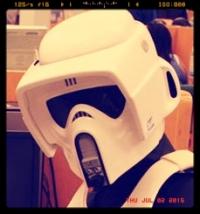
Few tips on putting my SC armor together
Griffin-X replied to a topic in ROTJ Biker Scout Armor/Helmet
Yeah, I would not use a glue gun for that stuff. Your best friend is E-6000 (or super glue) for sure. -
Great topic idea...interested in everyone's take on it. I like this Wiki article (below) with corresponding blaster links. IMO...the blaster was put together quickly for the scout costume and movie. I don't believe a lot of thought went into its' name and/or origins until much later on when Ep 1, 2, and 3 came out and a connection could be made with "older" holdout blasters. In various books and comics, scouts carry the E-11 (and even have an E-11 sniper rifle). Of course in games we can carry a DLT-19 sniper-ish kind of blaster. http://starwars.wikia.com/wiki/Scout_trooper http://starwars.wikia.com/wiki/Scout_trooper_blaster_pistol
-
How to make knee armor comfortable
Griffin-X replied to Dart's topic in ROTJ Biker Scout Armor/Helmet
Great idea. -
My adventures in Scout Armor
Griffin-X replied to Uplandmacenter's topic in ROTJ Biker Scout Armor/Helmet
Great work so far! Couple of comments: I agree with Chimei on the belt front; the webbing should loop through slots or openings in the belt "buckle" portion. You don't want to rivet that part. For the belt rivets in the back, it's (1) rivet on each side of the belt back for Lancer approval. For general clearance you should be fine. -
MLC helmet snout paint recommendations
Griffin-X replied to a topic in ROTJ Biker Scout Armor/Helmet
I have seen a variety of takes on this one and used a satin-ish black on mine. The original looks to be a satin or maybe a dulled gloss black. Some scouts do this in flat black and it looks good too. -
Few tips on putting my SC armor together
Griffin-X replied to a topic in ROTJ Biker Scout Armor/Helmet
Agree with Chimei...I used 1/8-1/8 rivets for the belt and holster and 1/8-1/4 rivets for the boots. A glue gun is good, but what are you going to use it on? -
SC Kit Purchased - anyone want to help?
Griffin-X replied to Uplandmacenter's topic in ROTJ Biker Scout Armor/Helmet
I think this is a GREAT idea. If you are willing to do it there will be some really happy upcoming scouts. -
Good deal Jeff...you rock.
-
My first armour build
Griffin-X replied to broodingventress's topic in Kashyyyk Trooper Armor/Helmet
Cool! Get some pics posted! -
Wow Sara, nice work on your outfit. Great way to show off your pics too. Top notch!
-
Cool idea!
-
Yeah, I was really impressed with Redkap too. For the price, it's quite a deal. I have been trooping since Oct '11 in mine and it's awesome.
-
''lancer'' knee armor questions!
Griffin-X replied to mariellejaworski's topic in ROTJ Biker Scout Armor/Helmet
Pm sent... -
Awesome work Jules!
-
Noooo...don't do it man. Use some double-sided tape or a Velcro strip instead. I've heard of folks using an ABS shim too.
-
PM sent...
-
can some one help me out with the riding patches???
Griffin-X replied to mariellejaworski's topic in ROTJ Biker Scout HQ
Yeah...fabric glue won't hold or last long enough. -
Sorry man...you need to rivet the holster to the boot. I don't think the magnets will keep the holster secured. I do know of at least one person using Chicago screws so it could be removed. That was okay since it still looked like a rivet.
-
You should be fine; I would not change it at this point.
-
can some one help me out with the riding patches???
Griffin-X replied to mariellejaworski's topic in ROTJ Biker Scout HQ
Yep, it's typically just sewn onto the suit. -
It's a great deal for the price and I have been totally happy with mine. Just doing my scout duty to help others!
-
can some one help me out with the riding patches???
Griffin-X replied to mariellejaworski's topic in ROTJ Biker Scout HQ
Yep, you'll need to sew it onto the undersuit along with the 2" elastic straps. I used stick pins on the undersuit to layout the patchwork, then made a paper template based on the pins. After that, I cut the material, then had it sewed onto the suit. The toughest part was getting the elastic tight enough (but not too tight) so it looked okay. Just take your time and you'll be fine. You've done a great job so far and overcome a lot. -
I sent you a PM Matt...
-
Congrats Matt...I know you've been looking for a while now!
-
Cheers Marielle! Good to see you smile - be proud of your progress!
