Dart
-
Posts
2,465 -
Joined
-
Last visited
-
Days Won
51
Everything posted by Dart
-
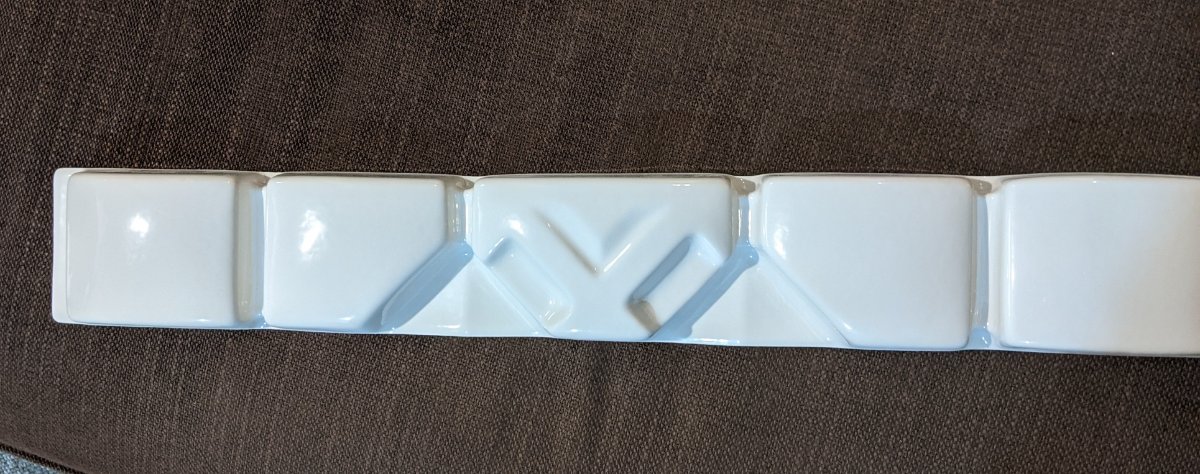
Dimensions: Tie bit: Length: 41mm; Width: a hair over 15 mm; Depth: 6mm Harley bit: Length: 33.5mm; Width: 30mm; Depth with fins: 13.5mm; Depth w/o fins: 8mm Hex size: Width(flat sides): 2.5mm; Depth: 1.5mm Complete T-bit length: 49mm The Tie bit is from the original 1978 MPC Darth Vader TIE Fighter model kit. The Harley bit is from the Tamiya 1/6 Harley Davidson FXE1200 AMF Super Glide, however the sprue that I bought was (apparently) from a Tamiya 1/6 Harley Davidson FLH1200 AMF. From what I can tell by looking at both kits, they have some similar parts, so any of the 1/6 kits that are like these two should have the correct sprue (Sprue C). This is how the Harley bit looks off the sprue. It has these little bits on the sides which we will need to cut off to make it look right... You'll notice that the fins at the bottom edge of the Harley bit are rather tall (5mm). I think for the movie, they were probably trimmed down as I can totally see how they'd get caught on stuff or just snap off. Also, from a molding/casting perspective, those would be a pain to reproduce quickly so trimming them down would make sense to begin with. Fun fact about the Tie bit: it's not universal. There's a left and a right piece that are mirrored/reversed. I did check the Blu-ray image and found the correct one, which is shown in the photos here. I sincerely hope they didn't mess with us and use the other side for the other bicep piece, and given the time crunch that's usual on a movie set, I doubt that would've been practical. You can see the depth of the parts when put together. And how the Harley bit isn't raised or shimmed, but it's the correct height. You can also see just how tall those fins are. Also, you can see how the edge of the Harley bit is curved, not stepped. Just a nice gradual curve from the side to the top, no step into a 90 degree corner at all, anywhere on the piece.
-
Congrats, bossman!
-
Depending on the base material (ABS, fiberglass), you might be better off to try and clean off what you've done by gently sanding it back. If you didn't paint it initially, it might be difficult to get the right shade and tone, so I agree with Corey above, maybe feather the edges a bit and make it look like a bit of weathering.
-
Yeah, a loooooooong time ago, probably around 2005/6, MonCal used to add this as an option.
-
Congratulations! Well done!
-
Donezo!
-
If I may add, if you're looking at a second-hand machine, the new ones are fine, but older can be better. The reason being that machines from the mid-late 80s to now have a lot of plastic gears unless you pay for a heavy duty machine and they're best for light sewing (which is much of what the scout is). The older ones are physically much heavier but they're all metal inside and some are able to punch through thick layers and even leather. If you find a good deal on a machine that was made either domestically or in Japan from between the 50's to the 70's, you're golden. Most of them are still able to be serviced, especially if you go with a name brand (google search before buying). Good luck and happy sewing!
-
Congratulations! Great looking suit!
-
Congrats Mike!
-
First Bucket Ever Completed!
Dart replied to EC-17 Holdout Blaster's topic in ROTJ Biker Scout Armor/Helmet
Looks good! -
Yup. You can get by on just the speaker to cut down on the wiring. I have an Aker in my left pouch with the headset wire under my balaclava, routed through a small hole in my flight suit and then under my flak vest/chest armour behind the pouch.
-
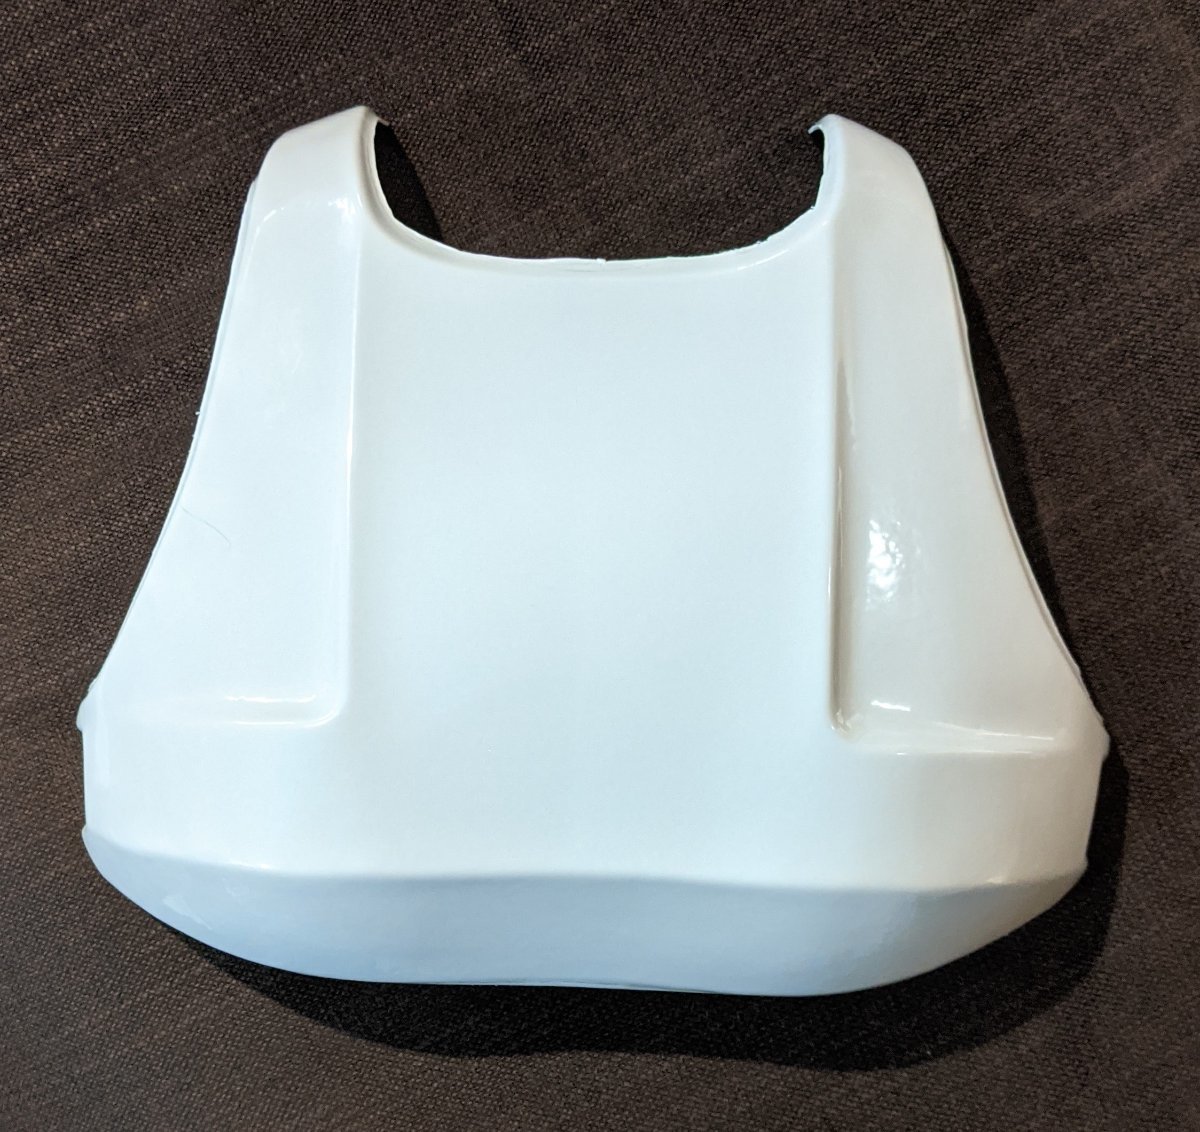
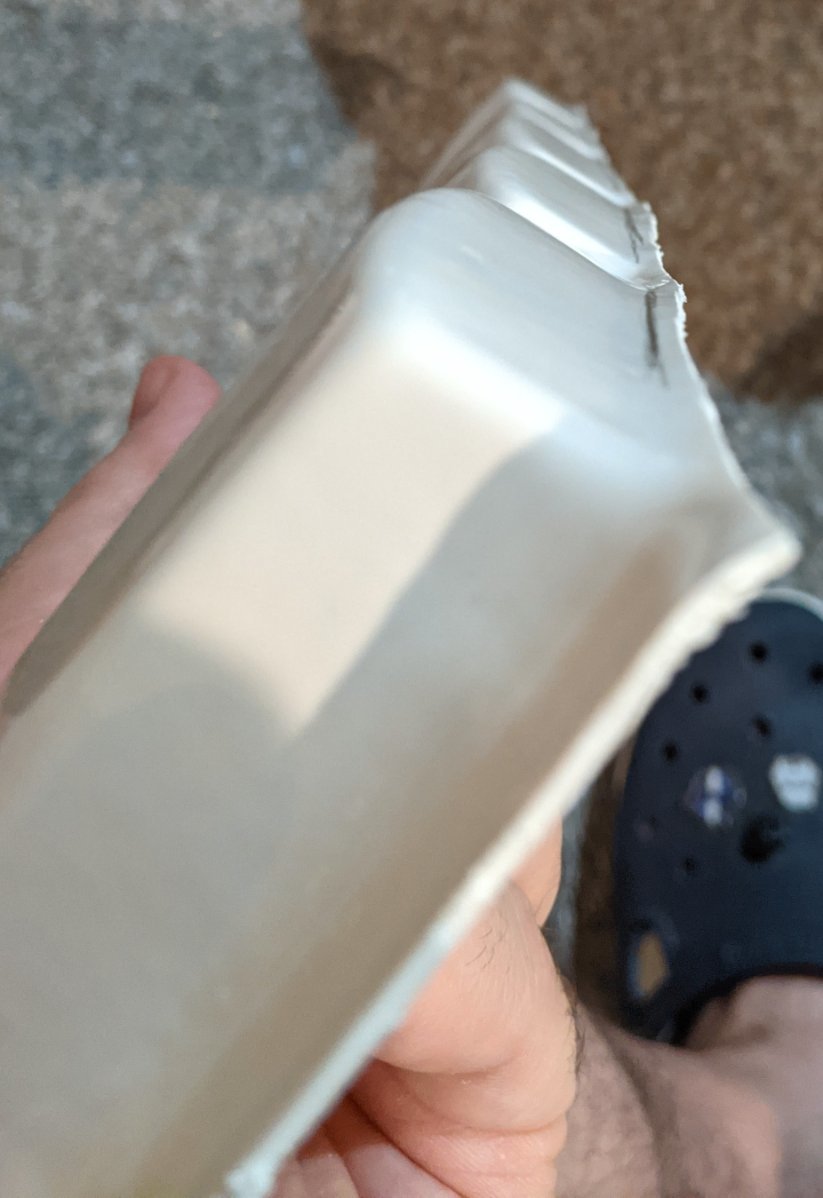
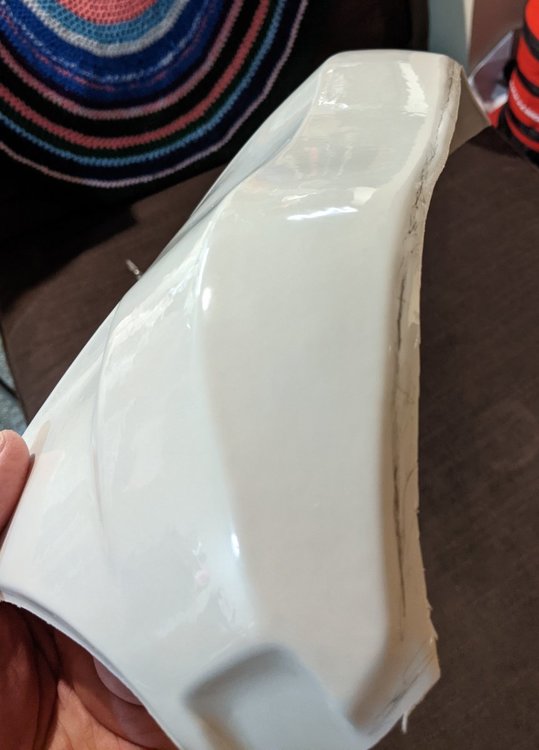
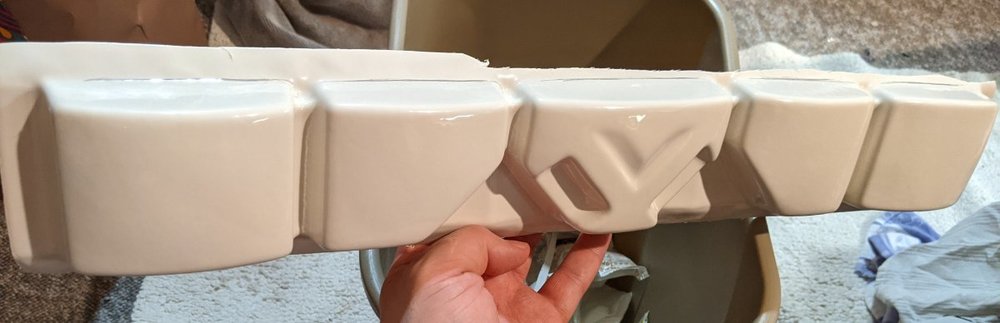
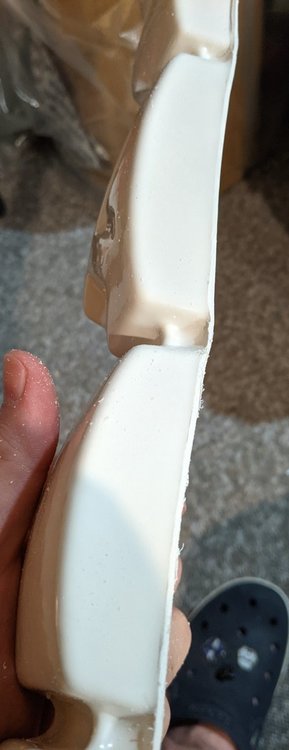
Soo, the belt looks 95% donezo (first pic). Just needs some holes and heat and bending. Next up: the back plate. I should also mention that I was kinda surprised at how thick the plastic was on this kit. There's still some thinner spots, but for the most part, it's a good 1.5mm thick. Also, I didn't realize that the back plate was so contoured at the bottom. So used to seeing armour that was flat across the back. Makes sense. Third pic is just me doing my second cut on the bottom of the back plate. I've used my handy-dandy pencil to trace the line so I can cut near it.


-
First bit: the belt. It comes as a flat piece that will need to be heated and bent, but today's goal is just to get it in shape. The pieces in the kit are all roughly trimmed so I've busted out my lexan scissors, a pencil to mark the lines with and a foam sanding block to help finish the edges after using my 4-in-1 rasp (my favourite tool evar!) First pic is just after I did the first round of cutting. Don't ever try to cut the exact shape right away because you don't want to accidentally cut too much off. The second shot is my marking lines. I take a pencil and find the natural corner and make a line. Due to the nature of this kit, the belt is rather wonky, so I have to make the best of it. I trim close to the lines, but not right up to them. Third shot is a good reason why sanding sponges, or foam sanding blocks, are really useful for cleaning up edges. The bottom part of the photo shows what things look like after using my rasp to get the plastic down to where I want it, but it leaves a rough edge. The top part is all nice and smooth because I used my sanding sponge. It wraps around the plastic and cleans things up nicely.

-
So, like a few others (including our illustrious DL), I took the plunge and picked up some RS Props armour. I also have a helmet of theirs that needs building so that'll be here too. Not gonna rush this but I will be building to Lancer specs. I will likely update this every 2 weeks, so hopefully I'll get this done sooner than later.
-
Agreed. I would stay away.
-
I think he just finished his last ever run, so unless someone doesn't pay from his last run, you may have to entertain other options. Some folks have gone the way of 3d printed blasters and there are a few decent files out there.
-
Very cool! Always nice to see someone working on yet another Patrol Trooper!
-
Those are some neat figures, very cool! As for adding the binocs to the CRL, we try to keep that close to what we see for the source of that costume (movie, tv show, etc...), so we're a bit picky about what we add. That said, you're totally free to use the binocs if you'd like, just check with your garrison to make sure it's ok as they typically have the final word when it comes to trooping with optional accessories like these.
- 1 reply
-
- 1
-

-
Congrats and welcome aboard!
-
Pathfinders Virtual Armor Party 7 March 2021 (w/ Video)
Dart replied to MrPoopie's topic in Announcements
Good times! Thanks everyone for coming out! -
I've also gotten the Hobart shields for other kits. As far as flexibility goes, they're 4mm which is probably the thinnest you're gonna find for those things.
-
That's a good photo to see how the riding patches sit and end above the knee. Good find!
-
The competition was stiff, but you won. Congrats! 🤣
-
If I may suggest, don't use the snout sticker that comes with a KS helmet. Just paint it. It'll look better. Also, the KS has a huge return edge, so don't feel like you have to keep all of it. Good luck, fearless one!
-
Happy BBB day! Hope it arrived safe and sound.