


Dart
-
Posts
2,467 -
Joined
-
Last visited
-
Days Won
51
Everything posted by Dart
-
Ok, there's 2 different ways you can build the cummerbund: 1. Big rectangle of cloth with the lines/velcro stitched in and a separate cod piece that attaches to the flak vest (with velcro or snaps - screen accurate) 2. Big rectangle of cloth with the lines/velcro stitched in but with cod attached (most common form) There's a template floating around in the gallery (I think) that has some general measurements to assist your tailor.
-
You can wear black coveralls, but be sure to tailor the arms and legs if they're on the baggy side. As long as it looks good and has what it needs to have (see OP's list), it's good to go. We'll never find the original Esprit suits, so we'll have to be content with what we can figure out. I guess it's true that they give the hardest assignments to the best troops...
-
As scouts, we're very fortunate that speaker size isn't an issue. I've been rockin' an Aker speaker in my left pouch for 5 years. I don't bother with an iComm since the scouts were heard very clearly without the static. Plus, I've had some garrison mates have major issues with them. The aerator speakers are cool but they're not very powerful. The small cone diameter doesn't really allow much volume, so if you're in a noisy convention hall, they're not as useful.
-
Yes. I have my front and back connected by some webbing with snaps. I snap my right side first, then slide in and snap the left side. Then I do the bottom straps after I route my mic wire through my soft parts.
-
 Yes and no. It's an older model kit (late 70's - early 80's) and at that scale, they're not super easy to come by in a complete form. I paid a bit for mine and I got a deal.
 -
If you look along the bottom edge, you'll see some extra bits that aren't on your version. Otherwise, really nice work!
-
Ideally, the riding patch should be visible from the front. It really should come around to almost half way around the front of the thigh, and about a hand's width above the knee. Lots of examples in the gallery of the original suit.
-
While nice, never take an artist's image as canon. There's always some variance and most don't get all the parts looking just right.
-
Also, on the blu-ray, you'll notice that the undersuit is super tight. Most likely is that it's a TK undersuit with the neck seal attached. Also, the blu-ray has the thermal detonator upside down so, yeah, the people dressing that suit were obviously not studying photos before.
-
While I'm not anyone who has a direct line to RS, I'm sure they'll be delivering their products. They're not known for taking money without eventually sending the product. Besides, it's kinda to be expected. At least you're not waiting on an efx scout helmet (which is currently overdue by about 9 or 10 months). The one constant with costuming is that things almost always take longer than expected. Hang in there and you'll have yourself a beautiful bucket with actual lineage to a production made helmet and built in the same way. Can't get any better than that.
-
1st Helmet Purchasefor 501 approval/trooping
Dart replied to vonzipper's topic in ROTJ Biker Scout Armor/Helmet
I dunno about the NI lid, but I have a 23.5" inch head and I can't fit it into an MLC. -
I sew my bund to my vest. No issues there.
-
For sandpaper grades, I wouldn't go any lower than 180 grit and as high as 400 grit. Just be sure to only hit the edges so you don't scuff the smooth, shiny armour. A few of those sanding sponge pads is probably all you'll need.
-
Wampa Wear is currently the only choice for accurate scout gloves.
-
Yup. Ideally, you have a good strong nylon band holding the pieces together and the gap is simply covered by the loop of fabric.
-
If you're using a more coarse/textured material, like canvas for your pouches, you can just use that for the shoulder bridge strap covers.
-
Just turn it inside out and pop it in the wash on cold. As for the armour, I usually just have a towel to wipe out my armour. Every so often I take some 99% alcohol to them to clean the a bit better. You might consider just sticking some velcro to the inside of your arm bits and sewing the other side to your suit. I do that and my arm bits never come loose.
-
Marcel has quoted the general size of the pouches. I'd like to mention that one way you can figure out how big they should be is by measuring the distance between the top of your belt and the bottom of your chest armour. The pouches should not exceed that length, ever. From there, make a cardboard template and cut varying rectangles to see what fits well, if you really need. Ideally, the belt should sit at the top of your hips. Best way to figure that out is by sitting down. If you're sitting on your belt, it's too low.
-
Perhaps when the helmets were being pulled, they decided to fill the 8th/9th vents on the vacforming buck and that's why we have some that have fewer vents and some that have more vents? I wouldn't be surprised if that was the case. Maybe they noticed that there was a few that had vents too close to the seam and instead of throwing those pulls away, they just used them anyway. Let's not forget, they didn't have a long time to crank these helmets out during production. It's highly likely the helmets would've been done within a couple or three weeks, from start to finish.
-
I did mine similarly, but I also threaded the nylon webbing that holds the halves together through the loop and stitched them together at the bottom. That way, the loop is nice and snug and also doesn't slide around.
-
Honestly? You don't need a cooling vest. Unless you're someone who can't tolerate any heat, you'll be ok. 99% of the time, you'll have somewhere you can duck into to take your helmet off and take a water break. Combine that with making sure you're always drinking fluids before, during and after, and you'll be just fine. You really do get used to it. You'll get sweaty and warm and you'll have days when you take your bucket off and water will pour out, but that's part of the whole dealio. Just know that everyone else is going through the same thing.
-
If you're not gonna work on the armour for a while, and you prefer the looks of the MC kit, go for it. I managed to get mine much faster (bought an unassembled kit from a member here) but it's nice stuff. You really can't go wrong either way. It's all down to how long you wanna wait.
-
If you can use a similar material to your pouches, that's good enough. As for width, Rob nailed it above. Smaller is better, but it all depends on the gap in your armour.
-
Actually, it really isn't. Assuming you've got someone who's got a sewing machine/serger, it can be done relatively quickly. Get someone to paint everything that needs to be painted black, get someone to sew and get someone else to help you with the fitting of the chest/ back. It's probably one of the easier armoured troopers to do, really.
-
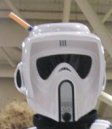
I used a satin for mine. Just be sure that you go around the edge of the snout far enough. I've seen several scouts that don't have enough black painted. Make sure the black part goes halfway across the ridge that forms the front edge of the snout. Check out the gallery for better views of an original scout helmet to see what I mean.
