Chopper
-
Posts
4,889 -
Joined
-
Last visited
-
Days Won
272
Everything posted by Chopper
-

TB-77520 Lancer Deployment Request (APPROVED)
Chopper replied to Hoda's topic in Lancer Deployment Request
Thank you for your application, Eric. The team will start their review and get back to you. One request -- could you possibly link to higher resolution photos for at least the overall shots? It's difficult for us to zoom in at the current resolution. Thank you! -
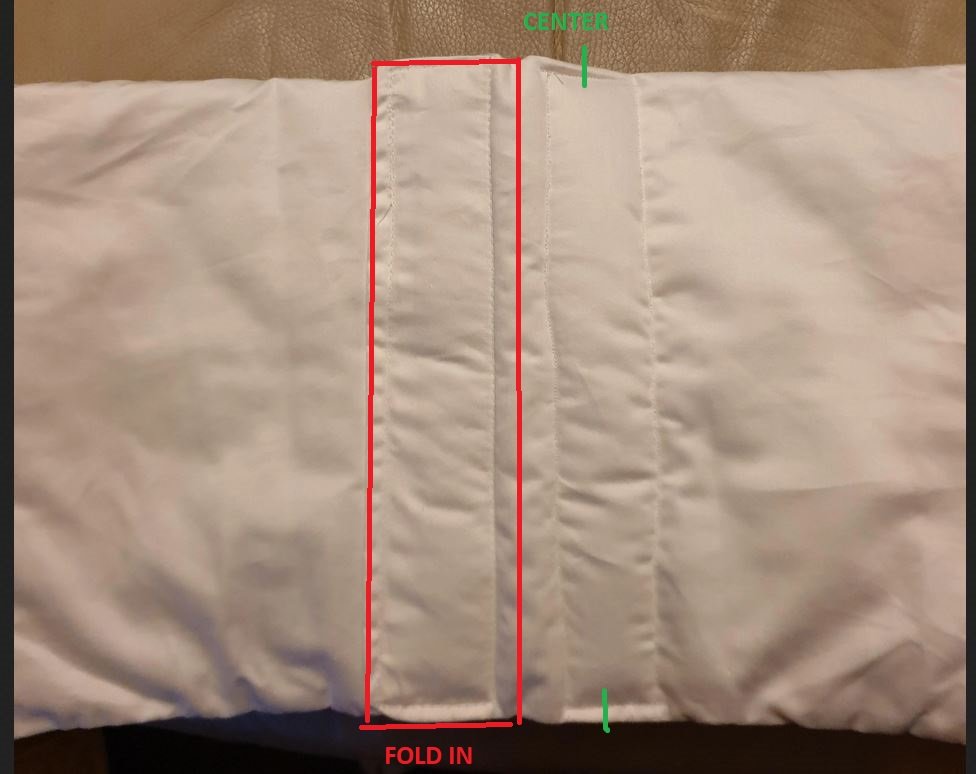
Listen, Phil, I know it probably sounds like it's been a lot of rough feedback lately. I really don't want you to get discouraged and give up. Take a break, get some take out food or something, do what you need to do to decompress not feel frustrated. Believe me, we really do want you to succeed here. Sincerely. Keep in mind that the CRL is not purely a textual document, it's a combined image and text document. The general centering I mentioned about the seam is because you have been asking about a Level 2 build -- so in our feedback, we have been giving you Level 2 advice. If you're looking for basic clearance, then the centering of the bund in the back is less of an issue. That said, having two visible sewn strips of velcro in the back of either the vest of the bund would be an issue As per the CRL Level 1: Vest: Secured at the back using 50mm (2") black hook and loop fastener. Bund: Closes in back with 50mm (2") hook and loop fastener. If the second set of sew lines were not visible externally, then you can close the back with as much velcro as you wish.
-
Hi Phil, thanks for clarifying. Again, I'm terribly sorry to say this, but you'll need to remove the stitching for one of the velcro strips. Only one should be showing externally, which is why I asked if this was the inside or the outside of the bund. Don't worry, as this shouldn't be too bad of an adjustment! The velcro on your bund, when fitted properly, should be about at the middle of your back. Regarding the excess portion, you'll need to open the vertical seam at the end of the bund and trim and fold the extra fabric. Then you can resew the seam closed again. As with all things, measure twice, cut once!

-
Hey Phil, is that the inside of the bund or the outside? Which velcro strip is the new one?
-
Congrats boss!
-
Of course.
-
You could probably close the holes up with a carefully glued vinyl patch on the other side.
-
Don't give up, dude. If you get a 1/8" cobalt steel drill bit, you should be able to drill out the aluminum rivets.
-
Phil my dude, I hate to say this, but you may want to check the placement of your holster on your boot -- especially if you're looking to apply for Lancer after you clear basic approval with UKG. While there isn't an exact measurement for where the holster should be positioned, if you look at the CRL images, it's maybe a half inch from the top of the boot. That isn't an exact measurement, and there's some leeway, even for Level 2, but it should be generally positioned in the ballpark of the CRL image.
-
Wanted, gloss white lancer level holster
Chopper replied to fil5117's topic in ROTJ Biker Scout Armor/Helmet
Since you're in the UK, you could reach out to either Cast From Original (Cf0) or Chef's Creations for spare parts. Who made your current armor? -
The webbing on top looks white enough, yes.
-
TB-82919 Requesting Lancer (WITHDRAWN)
Chopper replied to DJMoore's topic in Lancer Deployment Request
Thank you for your application, DJ. The team will take a look and get back to you soon. -
New Boot Goofin -review- Scoutboots
Chopper replied to DukeMedic's topic in ROTJ Biker Scout Soft Parts
Thanks for the vendor review, Sean. Those look like nice boots. The only item I can see is that in images 1-4 he uses a two-toned sole, which would need to be painted a "wheat color" for Level 2/Lancer. Photos 9 and 10 in the shop look like he's using a single color sole. Do you mind me asking which variety you got with your order? -
TB - Scout Trooper - The Mandalorian is now LIVE!
Chopper replied to BikerScout007's topic in Announcements
Nice. Great job to all those who contributed, or were involved. -
TB-50106 Lancer Deployment Request (APPROVED)
Chopper replied to order-66's topic in Lancer Deployment Request
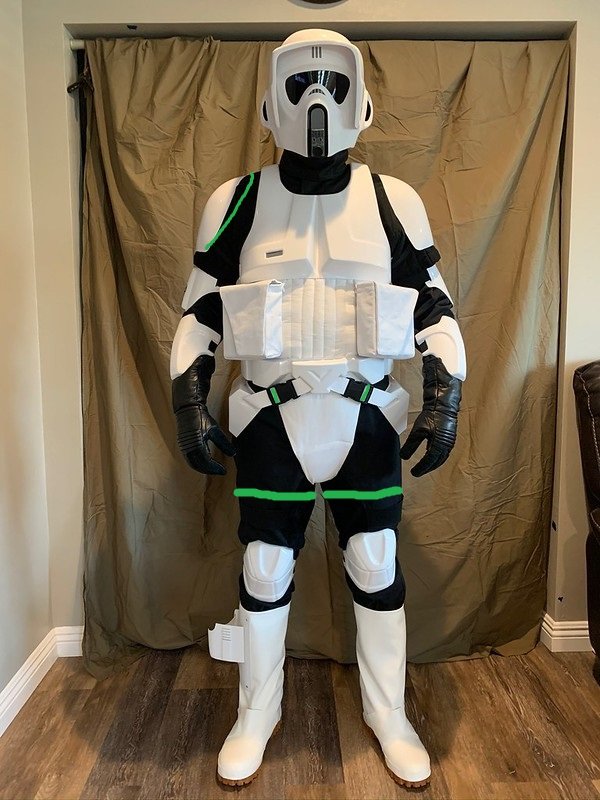
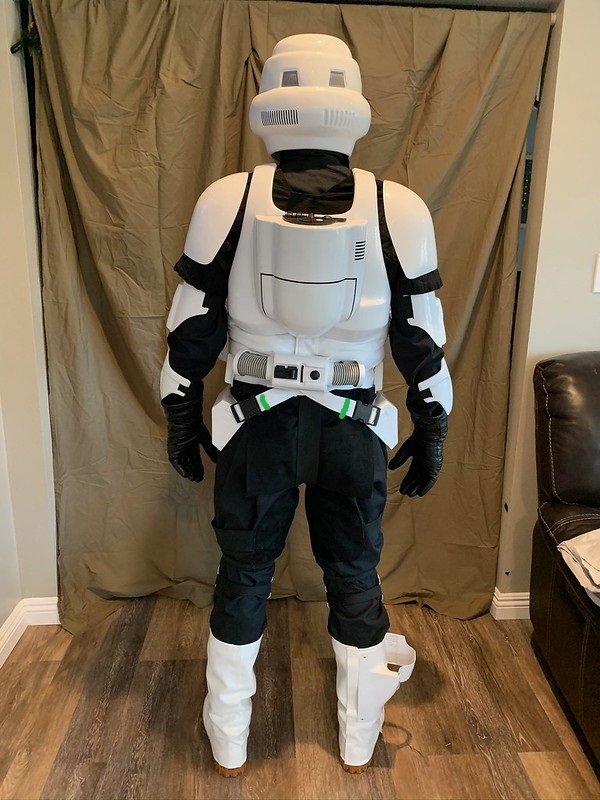
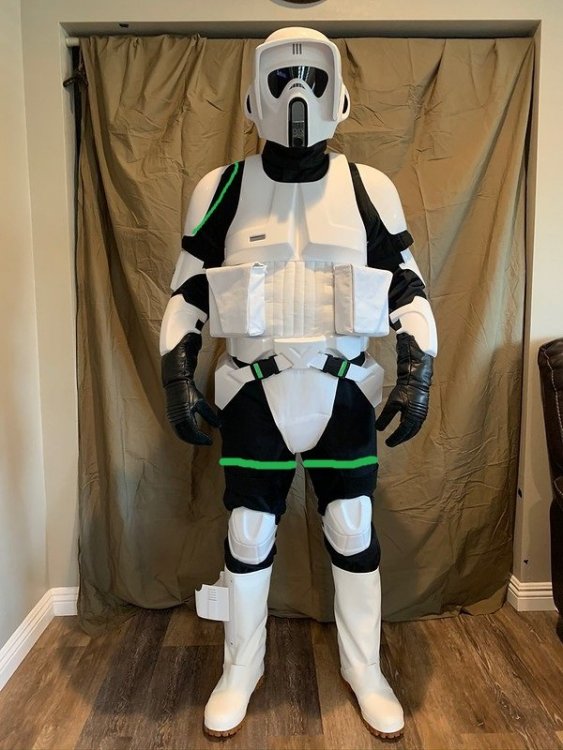
Hello! Thank you again for your patience. The Lancer Review team has gone over your application and we have the following comments for you to address: Flight Suit The butt flap on the back side of your flight suit appears long. You will need to trim it vertically about 1.5" to 2" Your thigh straps are positioned low. They should ideally be about at the halfway point of your legs. Estimate that they should come up about 2". See photo. Also, when you move your thigh straps, they will need to be more snug against your leg. As is they are too loose. The legs of your flight suit appear to be baggy. However, we would like to see how it looks once you've moved the thigh straps up and made them more snug, before we get into additional tailoring. Shoulder Armor Your right shoulder should come in a bit to match the left. This may just be a dressing issues as the positioning looks about right from the back side. Belt and Detonator Please center your drop box strap clips on the webbing, particularly on the rear side. Knee Armor The lower elastic for your knee armor looks to be 1" in width. According to the CRL it should be either 1/2" or 3/4". Cod Dressing issue -- Your cod isn't laying flat and looks slightly angled to your left. If you raise it slightly it should help a bit with getting it to lie flat on the front of your body. Bund The bund should ideally sit on the top of your belt and should not be tucked into your belt. If you're not able to raise the bund up, so it's sitting on top of the belt, then you may need to do some tailoring to re-size the vertical height of the bund. Helmet Can you please provide a top down shot of your helmet? The SC helmet features a two-piece "back and cap" construction, which is fine for Level 2, but the seams will need to be filled. Also, the return edge on the top of your visor appears uneven. Please trim the upper visor return edge on the your right to match the left. I've marked the section we're referring to, as well as the suggested trim. See photo. Bicep Armor Again, this is just a dressing issue, but please rotate your bicep armor so that they're facing outwards at a 90 degree position on each arm. They look like they're in the right place in some of the photos, so they may just be moving around a bit. You may want to look at using velcro to keep them in position, if you haven't already. Overall, a very good job on your application! With the exception of the visor trimming, most of these items are dressing issues and some tailoring adjustments, so hopefully it will not cause you too much trouble. Please let us know if you have any questions, or if you need any guidance on putting the adjustments in place.

-
TB-50106 Lancer Deployment Request (APPROVED)
Chopper replied to order-66's topic in Lancer Deployment Request
Hello and thank you for your Lancer submission. The team will get back to you shortly. One thing we ask -- could you please change the permissions settings for access to images on your flickr page? It asks for a login to view the full resolution photos via the links. Thank you. -
Jeff has been a longstanding supplier to the Pathfinders community and his armor is probably the most common type you'll find in the states. And there's a reason for that! He does a great job with his goods and he has great customer service.
-
Looks great. The only other suggestion I would make is to put a folded up sweatshirt or something not too bulky in the bag to slightly pad it out a bit.
-
Thigh patches material question.
Chopper replied to Nathanzx10r's topic in ROTJ Biker Scout Soft Parts
This is basically what you're looking for. Should be more than enough material. Link -
Thigh patches material question.
Chopper replied to Nathanzx10r's topic in ROTJ Biker Scout Soft Parts
Hey dude, you want to get the black pig suede for your riding patches and butt flap. There are usually scraps available on eBay. Let me find a link for you. -
I think gun metal gray would be too light. This is a photo from the screen used DLT20A in ESB: If you look at the hues in the rifle's color, it appears that the color is black, but but with some significant weathering and bluing effects.
-
There's no specific distance prescribed for Level 2, but as Dennis said , the crl photo is your best guideline. There is some wiggle room though. The knee armor should generally fit over your kneecap and should not touch the top of the boot vinyl or go inside your boot. There should be some space in between the knee armor and vinyl, which would be around 1sh to 2ish+ inches. There is some leeway, but the fit should be in the ballpark.
-
Excellent work, Eric.
-
The curve on the bottom of your cod looks a little flat for Level 2, but I wouldn't go changing anything until you get fully suited up. The bund also looks a little bit long, but again, it's easier to tell these things once the armor goes on with the soft goods. When you suit up, you'll also want to check your knee armor position in relation to your boot tops.
-
Yes, Chef's boots should be a-ok for Level 2.