


Southscout
-
Posts
523 -
Joined
-
Last visited
-
Days Won
8
Everything posted by Southscout
-
Hi here's a link to the vest which I bought from Diana at Artemtiscuts. You see where the velcro is attached on the top.
-
I have a piece of velcro on my vest, it start on the top, just where the shiny fabric connects with the "other" fabric. It then goes straight down approx 2 inches. For me it works like a charm, I don't have to use the T-straps even though I have them (I just tuck them in under the shoulder bell). Oh, and the strap that Marcel mentions is very good to have, and real simple to do. Let me know if you need a picture, I can probably scrounge one up for you.
-
PM sent
-
Hi Micke try to move the bags a bit outside the chest plate, that way they won't appear so big as when they lie flat on your belly. Our GML had a good pointer for me, the right bag should start somewhere just inside the grey stripe on your chest. I also cut the edges of the foam inside the bags at an angle to get them to not be so 'perky'. And of course, what I said over at NG with the bund and the clips on the side boxes. /P
-
Here's good post with a blue print as well. I knew I had seen it before. http://forum.bikerscout.net/index.php?showtopic=8160
-
And approved! TB-52583 at your service! (May 25, 83, premiere date for ROTJ...)
-
KS thermal detonator ?greeblies?
Southscout replied to tk5144's topic in ROTJ Biker Scout Armor/Helmet
I don't what KS supplies, but the CRL says: The correct thermal detonator greeblies must be attached to the box, the rectangular part of the TD greeblie is the same as used in the rebel endor troopers rank badge, which is fixed on the left side of the TD, on the right the same round greeblie as what is used on the scouts tank topper. The DonJarr greeblie is however very nicely done. -
Thanks for the tip mate, I'll check it out. My GML claims that my pouches are too big, and should not extend outside my chest armor. But I can't understand why! They look normal to me, and in some screenshots they do go outside the side of the armor. Is she right, and I'm wrong?
-
I will certainly try for Lancer after basic approval! Thanks! I'm going down to my ladies in the fabric store today anyway to check for possible fabric for new pouches. Thanks for the extra piece of the fabric you used, it's perfect to try and find a suitable one in off-white.
-
Hi Marcel yes, it's off white straps and white pouches. Is the requirement for white/off-white only for lancer, or also for basic approval? I plan to get off-white pouches, either by dying the ones you made for me, or sew a pair of my own since I think it looks better. But I wanted to get basic approval first to join a troop in 1.5 weeks. Because in the "normal" CRL I see: - Pouches may be white or off-white. - Hanging from the sides of the belt are hip boxes, also made out of plastic. These are connected to the belt by textile straps. And in the Lancer CRL: - Two pouches [...] ( off white if using off white drop box/ side armour straps) Since my riding patch and buttflap is made out of faux suede, and the elastics on the biceps armor is 2", not 1 & 3/8", I haven't planned on going Lancer yet. Sorry for being picky, but I spent a couple of years reading ETSI 3GPP (mobile phone) specs, so I always follow the specifications to the letter (actually the sentence "pouches may be white or off-white" means that they could be any color, even green. It should say "must", "may" is just recommendation, not a requirement ). /Ss
-
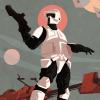
So, since the information on this part is "finished" armour, I thought I'd move my finished armor from my build thread to here instead. I'm still working on the helmet, but since that involves 24 hour turn-around times between coats, there's not much left to do unless I get some pointers. All parts are velcroed to the flight suit, so they're moveable. I also basically just threw everything on me, so maybe some part is a little off in the placement. Feedback is most welcome.
-
Did you spray paint the black around the snout?
-
It works fine with the buttons supplied by MC. I hammered mine on a concrete floor but they turned out nicely.
-
check out the poppers that Clas Olsson has. it comes with a small tool and buttons to last you a lifetime.
-
Southscout MC armour build thread
Southscout replied to Southscout's topic in ROTJ Biker Scout Armor/Helmet
And the armor is DONE! Let's start with a classic build-pic with all the classics, Lexxan scissors, E-6000, clamps, snaps etc. And here's the end-result! (yeah, yeah, I need a shave... long nights of building do that to you...) So, now I can focus on the helmet -
Southscout MC armour build thread
Southscout replied to Southscout's topic in ROTJ Biker Scout Armor/Helmet
So I managed despite the good weather today to get some more parts done. Finished the chest strap with some nice elastics: Re-did the hole for the tank. Fits much better. And I finished the snout for the helmet. Tomorrow I will try to finish the armor since it's only the fitting of the chest remaining. The helmet was supposed to get its final layer today, but I somehow lost my mind and tried to remove some runny paint while it was still wet... short story is, I have to sand a bit on the faceplate and redo a part of it. -
Southscout MC armour build thread
Southscout replied to Southscout's topic in ROTJ Biker Scout Armor/Helmet
Thanks! I have to try that. Did you fill in the old hole? -
Southscout MC armour build thread
Southscout replied to Southscout's topic in ROTJ Biker Scout Armor/Helmet
And of course also some progress.. Made the shoulder straps tonight. I already have velcro on the vest, but some more can't hurt. I also sewed on the straps on the chest piece. Will measure the correct length during the weekend and add the fastex clips and some elastic. And here's the finished belt, it's a bent a little, when I put it on it's only a couple of cm's to be pushed in so no major force is needed. I chose the velcro way of fastening it in the back. It's looks really good with the TD on. The helmet also got a new layer of paint tonight. I think I just do a small touch up during the weekend before the clear varnish goes on. -
Southscout MC armour build thread
Southscout replied to Southscout's topic in ROTJ Biker Scout Armor/Helmet
You don't happen to have a picture of it from the inside? How much did you have to move it? -
Southscout MC armour build thread
Southscout replied to Southscout's topic in ROTJ Biker Scout Armor/Helmet
So, a picture-less update. The belt is done now, I'm quite happy with the end-result. Helmet is sprayed again, will put on a (hopefully) final layer of white today. Sanded away some imperfections yesterday so I basically only need to cover them up. Next (and final armor) thing to do is to get the chest and back done. One concern is that the tank doesn't fit very well when using the hole and screw supplied by MC. Does anyone have any good advice on that? -
Southscout MC armour build thread
Southscout replied to Southscout's topic in ROTJ Biker Scout Armor/Helmet
Thanks! No, it didn't really fit into the groove, it had around 1.5 mm of clearance so I had to make a shim of some plastic I found in the shed which I sprayed black and glued underneath to make it fit better. -
Southscout MC armour build thread
Southscout replied to Southscout's topic in ROTJ Biker Scout Armor/Helmet
So the TD is finished with the Makita clips mounted. Looks and feels good. Also started to measure out the drop boxes. Any comments on this placement? -
Chest plate - help needed on placement
Southscout replied to Southscout's topic in ROTJ Biker Scout Armor/Helmet
Ok thanks! How much is "a bit"? An inch or so? The arm pieces are still not in their final spot, need to add some velcro to the undersuit to keep them from slipping down too much. -
Southscout MC armour build thread
Southscout replied to Southscout's topic in ROTJ Biker Scout Armor/Helmet
Started the work on the helmet today. Gave it 3 really thin coats and going to let it cure now for 48 hours before sanding it down and giving it a couple of final thin coats. I also put on the 35mm elastics on the shoulder bells per the lancer spec (plus I like the looks) And I couldn't resist putting everything on while I was checking the chest placement. Any comments on it? -
Chest plate - help needed on placement
Southscout replied to Southscout's topic in ROTJ Biker Scout Armor/Helmet
Your wish is my command, Terry. Side: Front: Back: And yes, I couldn't resist putting everything on me that's done...
