

chimei
-
Posts
396 -
Joined
-
Last visited
-
Days Won
6
Everything posted by chimei
-
just finished my build the past weekend...it's not that difficult, but trimming will take it's toll on your fingertips...take your time and lots of breaks. i've found lots of great folks on BSN and tons of great info. the support is wonderful...so ask away - the aswers are here for sure. good luck
-
wore mine for the first time today...and it actually got a bit "toastie"....so i can't imagine how it will be in the summer (hot and humid here in NYC)...i may lose some weight doing this. when i was a US Civil War reenactor, i lost 6lbs by marking in the wool uniform. i'll compare that to a racing suit, and plastic armor!
-

Brooklyn TB - Looking for comments before sending pics
chimei replied to chimei's topic in ROTJ Biker Scout Armor/Helmet
thanks andy - actually, there is no mudflap - just a fold that makes it look like a mudflap...still have to make that. i may put a "backing" on it since feaux suede is thinner than real suede. when i where the belt down, it actually fits well...but i will be dropping the boxes a bit. i made them easily adjustable with velcro on the inside...so no prob with that. "shrank" the pouches this morning by about 1/2" and they sit much better...but it was a quick fix for halloween. i'll sit down and actually do proper sewing this weekend...then take new pics. also painted the white dot on the tank topper and added red to the "dial". so the question is, do i keep the "guy in the movie with four big stripes, we never see this version" thicker four stripes or swap them out for thinner ones? i remember reading somewhere on the boards that the trim is 1/8" and the rank are 1/4"...did i misread? -
Brooklyn TB - Looking for comments before sending pics
chimei replied to chimei's topic in ROTJ Biker Scout Armor/Helmet
Can't tell if the knee rivets are white and dirty or if they silver. -
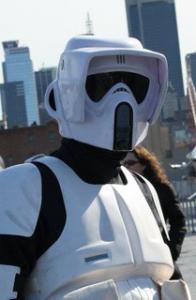
hi... well, i've done it. i think i've finished. so here are the pics. i'd love to get some feedback before i send final pics to get approved. this is a racing suit, KS bucket, SC seconds (so i've lightly weathered the whole thing to hide small differences in color, scratches, etc.), homemade bund, pouches, and boots. 1) i used the measurements for the pouches, but still think they're a little big, so even though they are accurate, i'll be shrinking them about 1". 2) i'll also be adding the mudflap and riding patches to the thighs, as well as making a flak vest so i can go for lancer. 3) pistol is still drying...hard to do with the moisture in the air after the snow storm. 4) have to paint the red stripe on the tank topper and the little white spot as well...left the paint markers at work 5) haven't added greeblies to back (going to use MOM version until the new greeblies are in production) other thoughts or suggestions???
-
looks stellar! i'm hoping to have my pics up and submitted next weekend. congrats!!!
-
hi... others may have additional advice or comments, but here's some info that may help. old and new may refer to the styles. another way to think about it is "less accurate" and "more accurate". the bucket kits come with stickers that "look like" the film snouts, but are not accurate at all. then the small snout needs to be glued to a sticker - not a great idead for longevity or wear and tear. you can see the pics of the KS snout and see the appearance of the sticker and snout. the pic here is of the KS snout that came with my kit. the riser plate is screen accurate and should be added. the MC snout is great in that you can get it all as one piece (less gluing and less hassle). the solid or hollow question relates to the "tube" portion of the snout. the first picture has a solid snout, one that has the mesh screen sculpted into the piece. the MC solid looks much better than the KS one. the second picture is the MC hollow. it has a mesh screen that needs to be added and painted. this is great for accuracy, but that small detail will "disappear" from a few feet away. i hope that helps. others may have additional thoughts or opinions...
-
MY LW build explaination video. lol
chimei replied to Darth Voorhees's topic in ROTJ Biker Scout Armor/Helmet
i'm struggling with the visor and faceplate. the sides of the visor look so shallow and close to the cheeks...love the narrow look, but seem so tight compared to the KS i'm building at the same time. send LW a PM for advice. i'll post pics as they happen...maybe later in the week -
i'm actually going back and forth between my KS and the LW. as one dries i work on the other....hoping to have them both done by this weekend...fingers crossed.
-
i just opened my LW kit...and wow. i can't believe the quality of the ABS. it's so thick and sturdy. i'm trimming it tonight. i'm also surprised by how easily it cuts. almost like butter. two or three light scores with an exacto knife, and snap - it's off.
-
LoneWolf helmet build thread
chimei replied to Eddie TK Head's topic in ROTJ Biker Scout Armor/Helmet
so excited. my LW arrived today and my fiancee is bringing it home...feels like christmas!!!! where can i get BONDO in NYC so i can get started??? -
ok...next question. where do i trim the side of the visor? i've left the "wrap around" indicated by the red arrow. i don't think it'll fit into the back fo the helmet unless i cut it at the black arrow...and cut in at the corner indicated by the purple arrow. the yelow arrow is where the faceplate will sit. help?
-
ok. so i think i've finished the eye "port" and will be putting in the lens later tonight. i primed the snout plate (can i leave it this color?) and used some black tape to make the outline. of course i need to paint the "bulb" part black. that's another day. is the black line the right thickness? i tried to follow the pics i've seen on BSN...ending just before the edge leading to the cheeks...is it too thin? too thick? i think it needs to be a little thinner on the sides toward the bottom. the MC snout plate is much thinner than the KS scout groove. thoughts?
-
so i can use the primer grey (krylon) for the nose plate and leave it? no need to paint it another grey?
-
i like the idea of a soft and light hockey bag. but the hard totes add some security...oh, boy...choices, choices.
-
hi.. as i near the completion of the costume (still working on the helmet)...i'm wondering how to transport all the armor. what is a good method? i'm in NYC and would need to carry this around on the subway...up and down stairs, etc. At home, i have it all in a big plastic tub...but without a car, that isn't practical for getting to and from troops. so what are the rolling options? anyone know the size of a suitcasethat is "perfect"? thanks
-
so i've started the KS build. i have a few questions...and hope someone who has successfully built one can help. i've only begun trimming excess...haven't done any sanding of the edges thought. 1) how much of the side do i trim off? i know i need some for the velcro...but is there a measurement i need to keep? 1/2 inch? 2) is the dome in the right direction? it looks like the squared section fits into the back of the bucket. so i think this is right... 3) are the edges of the eye piece shaped well? more rounded? more straight? 4) are the ear holes large enough? i've drawn a line to guide the cutting. 5) do i need to bondo the edges of the dome and the back? or is the visible seem acceptable? as always...appreciate all the ideas and suggestions...the bucket is my last hurrah! so i'm super psyched to get it together.
-
LoneWolf helmet build thread
chimei replied to Eddie TK Head's topic in ROTJ Biker Scout Armor/Helmet
so excited to see the progress. still waiting for my kit to arrive...can't wait to get started. -
LoneWolf helmet build thread
chimei replied to Eddie TK Head's topic in ROTJ Biker Scout Armor/Helmet
wow...looks great. can't wait for mine to arrive. i get it all except for the rectangular piece under the chin-strap elastic. what is that one? -
so i've finally gotten some serious work done. my boots are set (pics in the boot section) and i've finally received my KS bucket - and that is next. so here are some pics of what i've gotten done this weekend. the armor is SC (seconds), gloves by SA, undersuit is from speedway, and the soft parts and boots are by me. the chest and back are not together as i'me still fumbling with getting the tank to stay on - thus only front shots, and no shoulder bells. the full body pics are from just before i started weathering the goods. feedback is more than welcome.
-
so i spent the weekend doing more and more. so here are the boots (other stuff is in the armor section). this was done with acrylic paints mixed with windex. i started with laying down layers of burnt sienna. next i did some overtones of ivory black. finally, i took one of those sponges that is yellow on one side, and green on the other and used the scrubby side to remove the paint "strokes" so it left the gritty dirt look. it's similar to what some folks do to get sand troopers to look so gritty. thoughts and comments are welcome.
-
i made some suggestions at this "zombie" thread (http://forum.bikersc...?showtopic=8807)... you can also: 1) put on the bund and belt with all the trappings 2) put on latex gloves 3) get some mud and mix it with charcoal. make sure it's thick. 4) get the palms and fingers muddy 5) take off the uniform pieces - wait a bit (letting stuff dry on the gear and gloves) - then put it on again 6) repeat a couple times 7) wash it all in cold and very little detergent 8) repeat until the color is warn in and in all the right areas (buckles, where one would holde the belt to put on, flap corners of the pouches, velcro back, etc.) it won't look like you were picking your favorite spots to throw dirt onto this should begin to leave noticable and naturally accurate weathering within two or three passes. we did this when we were aging clothes for "fiddler on the roof"...the trick is really good mud! hope it helps
-
would bondo work for hiding the seems?
-
@witness - completely off topic, but that screencap is a perfect shot to show that there is no mesh in the earholes...as we can see the back armor through the earhole.
-
ok...three questions: 1) where did you rivet the headband to the bucket? 2) how did you hide them? 3)is that KS bucket next to the LW?
