Aradun Posted January 2, 2022 Share Posted January 2, 2022 Dude, that looks great!!! Awesome!I was cringing while reading your helmet posts and seeing photos of you peeling the weld from the bucket. At least it peeled away without messing up the ABS. Hopefully it’ll be easy to redo now that you have what you need. A little set back, but you got this in the bag. 1 Quote Link to comment Share on other sites More sharing options...
Zv288bot Posted January 4, 2022 Author Share Posted January 4, 2022 So I got the elastic strapping all taken care of today. Here is what I did to connect the chest and back together.So I blue tape the front and back together at the shoulder straps.This is the elastic I used to connect the side pieces as well as the shoulder bridges.I pretty much mirrored the process I used with I built my TK.Popped a hole, fold it over and insert line 24 snaps.Here is what the finished product looks like.Sent from my iPhone using Tapatalk Quote Link to comment Share on other sites More sharing options...
Zv288bot Posted January 4, 2022 Author Share Posted January 4, 2022 So here is the strapping for the shoulder bridge. I will attach the shoulder bells for the next update!Sent from my iPhone using Tapatalk 1 Quote Link to comment Share on other sites More sharing options...
Zv288bot Posted January 5, 2022 Author Share Posted January 5, 2022 Got the shoulder Bells attached today!Just like my TK shoulder bells. This set up makes it really easy to attached them myself. I actually also put the whole top on like a shirt. It took some wiggling around but it worked.Sent from my iPhone using Tapatalk Quote Link to comment Share on other sites More sharing options...
Zv288bot Posted January 5, 2022 Author Share Posted January 5, 2022 I glued the gun holster together. Honestly I forgot about it. I noticed from some of the other build threads that the pieces are actually butted against each other as opposed to over lapping. I am using some CA glue and sign parts to glue it together. Since I will need to bondo and paint I figured I should add the extra strength since I hopefully will be carrying a blaster around in this.Sent from my iPhone using Tapatalk Quote Link to comment Share on other sites More sharing options...
Zv288bot Posted January 5, 2022 Author Share Posted January 5, 2022 Speaking of blaster! I couldn’t be 1000% more happy to have guessed correctly. I literally created this blaster in tinkercad based on reference photos and TV stills. Not having any idea of the actual size of the holster check it out!This shot is where you can see, like [mention]ScaryGuy [/mention]mentions the actual holster is pulled in a mirrored image. It should be opposite and honestly would probably hold the blaster almost perfectly.Here are some more reference boot pics. Walt has the flat part on the outside but it really should be on the inside. The angled piece should be on the inside.No worries, it will work.Sent from my iPhone using Tapatalk 2 Quote Link to comment Share on other sites More sharing options...
Zv288bot Posted January 5, 2022 Author Share Posted January 5, 2022 Working on the belt boxes. As mentioned in previous threads the come without any back. I decided to fill them with some craft foam and add an elastic loop to the back of each box. Once I have them in place I will E6000 them into place. I took a similar approach with my ammo pouches on my TK.Two “buckles” come with the kit. One for the front and one for the back. Slots need to be cut to feed the buckle straps through.I just scored all of these with a exacto knife several times until I was able to cut through the plastic.Sent from my iPhone using Tapatalk Quote Link to comment Share on other sites More sharing options...
Zv288bot Posted January 5, 2022 Author Share Posted January 5, 2022 I originally was going with floor mat EVA foam to fill the boxes in but I thought it stuck out to far and made the boxes sit funky on the belt. I found some craft foam that was half the size and felt way better about it.Again, I looped some elastic and E6000 it into place. Once it completely drys I will thread the belt through and when the placement is correct I will E6000 the elastic strap to the belt.Once so sanded the boxes to be relatively all the same depth I literally pushed the box into the foam to “score” the pattern to cut.This is the craft foam I ultimately went with. It was half the thickness and I felt it just conformed to the belt better.A couple of globs of E6000. I will place on end of each of the elastic strap into the glue and sandwich the craft foam on top.Not to shabby.The front and back buckles will need a different method.Sent from my iPhone using Tapatalk Quote Link to comment Share on other sites More sharing options...
Zv288bot Posted January 5, 2022 Author Share Posted January 5, 2022 While I was working on this I just pushed through and sewed and E6000 the straps to the front and back buckle.The belt is going to fastened close in the front by Velcro. So for the back of the belt. I decided to do the same as the rest and add an elastic strap and E6000 the strap into place. No idea about mounting the front buckle yet.Sent from my iPhone using Tapatalk Quote Link to comment Share on other sites More sharing options...
Zv288bot Posted January 5, 2022 Author Share Posted January 5, 2022 The belt. I basically found a narrow tactile belt that I really liked for a base. I created a “sleeve” out of the same material I used for the bund and cod piece and slid the belt in to cover it to make it match. The belt with the cover comes in just under 2 inches.Sent from my iPhone using Tapatalk Quote Link to comment Share on other sites More sharing options...
Aradun Posted January 5, 2022 Share Posted January 5, 2022 This is an excellent and well documented build that will really help others. Keep up the great work! 1 Quote Link to comment Share on other sites More sharing options...
Zv288bot Posted January 5, 2022 Author Share Posted January 5, 2022 So glue has dried. I have the boxes temporarily in place. Once I am happy with the spacing I will add some E6000 to the back of the straps.I applied the front buckle to the belt using E6000. I’m hoping that will be strong enough to hold. Time will tell.Here is the belt. I need to finish up the pouches for it, E6000 the boxes in place and it should be all set.This is the front of the belt from the inside. The belt fastens with Velcro.Sent from my iPhone using Tapatalk Quote Link to comment Share on other sites More sharing options...
Zv288bot Posted January 6, 2022 Author Share Posted January 6, 2022 I spent most of the day working on the belt today. More specifically these pouches. Mid last year I made one using [mention]ScaryGuy [/mention]pattern. Then I let it sit because I couldn’t really size anything with the hard parts. Anyhow, not gonna lie, was dreading these. I made 5 (?!) of them before landing on the 2 I used. Originally I was going to use these plastic mesh pieces to add support to the box. It didn’t quite pan out so I’m gonna just cut some EVA foam instead. I and just doing a general fit test and pouch placement test.So I forgot to sew the straps in while I was putting the pouches together! At this point I am just gonna sew them to the back of the pouch. Sent from my iPhone using Tapatalk Quote Link to comment Share on other sites More sharing options...
Zv288bot Posted January 6, 2022 Author Share Posted January 6, 2022 Here are some pics of sewing the straps to the back of the pouches. I just went for placement. Making sure they where as close to the same as possible.Here is another shot of marking the areas for the straps.Cod piece. Same deal, couldn’t really make this without having the hard parts. Now that I do we are chugging along.Stitched the free handed pattern inside out. Attached the strap that will connect to the back of the bund.Just add some fluff.Sent from my iPhone using Tapatalk Quote Link to comment Share on other sites More sharing options...
Zv288bot Posted January 6, 2022 Author Share Posted January 6, 2022 Ok, did a test run to see how it is all coming along.Again I made the bund back last year before I got the hard parts. I will cut it down to fit with the chest and back piece better.Sent from my iPhone using Tapatalk 1 Quote Link to comment Share on other sites More sharing options...
Zv288bot Posted January 7, 2022 Author Share Posted January 7, 2022 So I sanded all of the greeblies today. They are cast resin and definitely needed some clean up.I took them to the belt grinder. I marked off an area each to have the thickness more consistent with each piece. I marked them with a pencil and sanded down to the line.Sent from my iPhone using Tapatalk Quote Link to comment Share on other sites More sharing options...
Zv288bot Posted January 7, 2022 Author Share Posted January 7, 2022 I used this fill and primer to just try and get some of the sanding marks taken care of. I just did one coat before I painted them with their permanent color. It’s cold her in Georgia and the weather isn’t conducive to painting.Not to bad.I painted these with a “closer to the decals that came with the kit” gray. Now to just go and paint all of the small details with black paint!Sent from my iPhone using Tapatalk Quote Link to comment Share on other sites More sharing options...
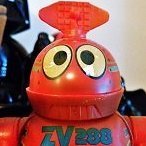
Zv288bot Posted January 7, 2022 Author Share Posted January 7, 2022 I’m really not excited about the overall cast of the nose aerator or mic. I am going to take a file to grooves and try and clean the up.This is the raw cast.After hitting it with Primer Filler.I went back in with a mini file and just made the grooves more pronounced. I like the look much better.And here they are painted! Ready to be installed once I get the helmet complete.Sent from my iPhone using Tapatalk 1 Quote Link to comment Share on other sites More sharing options...
Zv288bot Posted January 7, 2022 Author Share Posted January 7, 2022 The top of the tank greeblie was just painted black and I used E6000 to mount it to the top of the tank. I went heavy with it. There was a lot of area to cover.The bicep parts I painted as well. I used The paint I bought to use on the helmet once I have it ready for paint. This Rustoleum paint is glossy white but I am not liking the contrast to the white used for the ABS. I think I may need to research paint a little more when it comes time to paint the helmet.Almost forgot, I added the Tank decal as well.Getting super close!Sent from my iPhone using Tapatalk Quote Link to comment Share on other sites More sharing options...
Aradun Posted January 7, 2022 Share Posted January 7, 2022 You may want to look at an appliance white, but test it on some scrap ABS before applying it to your helmet to see how it looks and if there is any issue. If you have any scraps left from the Mohawk you could use that. I’m sure@Chopper will have some recommendations for paint.Great work and detail as always. 1 Quote Link to comment Share on other sites More sharing options...
Chopper Posted January 7, 2022 Share Posted January 7, 2022 "Appliance White" might match better, if you can find it at the hardware store or home depot. There's also Tamiya TS-26 Pure White, which is a brighter type white. https://www.hobbytown.com/tamiya-ts26-pure-white-lacquer-spray-paint-100ml-tam85026/p-xuychffqcqsbg4yz 1 Quote Link to comment Share on other sites More sharing options...
Zv288bot Posted January 7, 2022 Author Share Posted January 7, 2022 Thanks guys [mention]AradunFF [/mention]@chopper. I will check those out!Sent from my iPhone using Tapatalk Quote Link to comment Share on other sites More sharing options...
Zv288bot Posted January 9, 2022 Author Share Posted January 9, 2022 It’s pretty cold here so it’s cramping my “getting my bondo/paint on my helmet on!” off!I realized that I do need to trim down the bund. I originally made it back in July when I didn’t have the hard parts. I specifically made it longer because I had no idea what I would need knowing making it smaller would be easier.I thought I had pictures of it before sizing it down. It was sticking about a good 1 to 2 inches above the elastic strap. I realized that I want to attach the bund to the chest armor. So I “shaped” under the arms to go lower to he hidden by the elastic strap on the side but still have enough fabric to attach to the chest plate and enough to go above the back plate without any concerns of “pulling out”Sent from my iPhone using Tapatalk Quote Link to comment Share on other sites More sharing options...
Zv288bot Posted January 9, 2022 Author Share Posted January 9, 2022 Some Chicago screws that I ordered arrived today so I took the opportunity to glue on side to the helmet bolt covers.Weather is not permitting me to be able to do any additional work on the helmet.I’m gonna use the same screws to mount the holster to the boot.Sent from my iPhone using Tapatalk Quote Link to comment Share on other sites More sharing options...
Zv288bot Posted January 9, 2022 Author Share Posted January 9, 2022 Ugh, I need to sing the rain rain go away song at this point. My patience has totally disappeared with my old age. Anyhow, I realized that I need to still bondo my holster as well as mount it to the boot. I did swing by home depot today to pick up a piece of plastic for support in the boot. I got a piece of plastic used for picture frames. I’m hoping it won’t be to brittle. It did splinter when I tried to cut it with scissors. I wound up doing the old score and snap with an exacto.Using Chicago screws to mount everything.Sent from my iPhone using Tapatalk Quote Link to comment Share on other sites More sharing options...

Recommended Posts
Join the conversation
You can post now and register later. If you have an account, sign in now to post with your account.