


Chopper
-
Posts
4,444 -
Joined
-
Last visited
-
Days Won
218
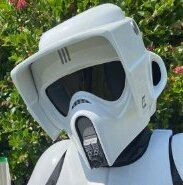


.thumb.png.0203e6f759a851191b32d71c1bccd0bb.png)
About Chopper

Recent Profile Visitors
3,312 profile views


-
The divot on the chest is a known stress point. Get some sheet abs and trim it to cover the crack from the inside of the armor. That's your splint. Use a heat gun if you need it to form the abs splint as needed to fit where the crack is. Glue the abs splint to the inside of the armor using devcon plastic weld. Some people will tell you to make abs paste to fill the crack. And that will work, but without a splint it will just crack again.
-
Chef's boots are fine for L1 and L2
-
Looks good
-
You may need to follow the instructions here to post images. Unfortunately we do not have unlimited hosting space on the site.
-
I would try semi gloss first.
-
You can use a toothpick dipped in 90% iso alcohol to clean up the black curved portion on the snout.
-
That's not a huge difference in shade. I think the primary issue is that the finish is very different. If you put a gloss or semi gloss coat on the armor, I don't think the difference will be as apparent.
-
Matte black is the color to use. Most people use spray paints, but either spray paint or an airbrush should work fine. Go with whichever one you feel most comfortable using.
-
@OnkelPaschulke are you able to help with the paint selection options?
-
Hey there Matt-- I noticed that the pull on this part looks looks a bit off, as it looks like there's a dent of some sort on the corner? Maybe it's the angle of the photo? Looks like it's the wearer's lower left portion of the visor shroud? -Pencil marks look fine, outside of my comment above, which is really about the pull from the mold. You may end up needing to trim a bit more around the eyeslot and earholes, but I'd start with what you've marked right now. Whenever you're trimming, start with less, then carefully trim more in increments. If you take a careful approach, you should be fine. -The return edge comment in the CRL is talking about the bend in the end of the visor shroud. The Kropserkel helmet has it, so you're fine. -Yes. Ditch the decal and the right side snout greeblie from your photo. The greeb on the left is the one you want to use. -You'll need to smooth the print lines on the top of the snout greeb Let us know if you have any further questions and good luck with your build.
-
You can also try emailing New Image to see if they can tell you the exact color or brand that they use.
-
I can't say for sure what New Image uses for their exact paint color and I am not sure what it would be called in Germany, but if you can get a can of what's usually called "Appliance White", then that should be close at least to the helmet color. Otherwise, you may need to try a few brands of pure white on some scrap plastic to see how well they match. Note that the helmet and armor do not need to be an exact pantone match for clearance, but drastically noticeable color differences may be an issue.
-
What you're asking is essentially a chemistry question. In general, anything white has a risk of yellowing and discoloration over time, even if it's not in direct sunlight. It can have something to do with the specific paint used, or it can have something to do with any clearcoat that's used on top of the paint. There's really no way to know in an absolute sense, just that's there's probably a difference in the types of paint used on each helmet. And there's no permanent way to proof something against yellowing, only that a lot of sun exposure will certainly accelerate the process. But as you've experienced, sometimes items will start to yellow regardless.
- 1 reply
-
- 4
-

-

DLT-19X front end - muzzle / flash hider part query
Chopper replied to TreeHuggerMatt's topic in ROTJ Biker Scout Weapons
As a general rule, all 3D print lines or other rough modelling aspects should be finished, so that they are not visible. -
DLT-19X front end - muzzle / flash hider part query
Chopper replied to TreeHuggerMatt's topic in ROTJ Biker Scout Weapons
If you reference the MG34 that the DLT it based on, that part should be round:
