


Strider
-
Posts
769 -
Joined
-
Last visited
-
Days Won
47
Everything posted by Strider
-
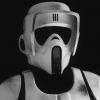
Yeah, that looks like a decent job. They even replicated the wear and tear of the decals. They've cut out a little too much around they eyes but that's not a biggie. I hope all their future helmets will be up to this standard.
-
Well done, buddy! Congrats!
-
Great job, sister!
-
TB-86079 Requesting Lancer Status (WITHDRAWN)
Strider replied to opi wan's topic in Lancer Deployment Request
Hi Chex, thanks for your swift feedback. Yeah, you're right, I just noticed the wrong shoulder. We had a big scout shooting that day and his right shoulder got mixed up with the one from his wife (TB-18987). Please see one of the pictures above for the correct right shoulder. We had the drop boxes pretty much straitghtend out, might just be the angle. Shall we retake the picture from a different angle? Cheers -
I hear you, buddy. Been through numerous iterations myself and still not 100% satisfied. Yeah, the left one could be a tad bit smaller but I like the roundish shape and the soft edges. For the part under the arch you could also try thin foam rubber or buckram. You'll get there!
-
Softer edges are closer to the original IMO. But great job, looks really good!
-
That's an interesting observation! I like the left one best.
-
As Tim said, I wouldn't take my chances with hips armor for trooping. Who's using it for a biker scout helmet?
-
Hm, interesting. That is actually a great looking helmet. A little too good to be true particularly at that price. Maybe some of the other guys can chime in on this.
-
LW and RS side by side comparsion
Strider replied to Darth Chridan's topic in ROTJ Biker Scout Armor/Helmet
My guess would be that the quality of the pulls varies between the helmets because the ABS of Sergiu's helmet did look rather thin. But then again I would wonder what the reason is given that they have a new top notch vac forming machine. -
LW and RS side by side comparsion
Strider replied to Darth Chridan's topic in ROTJ Biker Scout Armor/Helmet
Great comparison, buddy. I think the "major" differences are the traps (nearer to each other on the RS) and the tears (sharper on the LW). The RS bucket looks fantastic but if I had to choose I would go for the LW for troopability. Cheers -
Uh, not good...
-
Looks great, brother!
-
Thanks for all your feedback. The foam is 1cm thick, you can see it in the background of the picture along with the adhesive buckram I've used. @MJ: I see your point but the only issue that could arise is that the edge where the padding stops pushes through the CB. At least that's what happened when I velcroed the cod piece at the back of the bottom of the CB. It's not a major thing though and if it works for you all is good.
-
Thanks, I'm pretty happy with it now (after endless iterations...). The buckram was fairly easy. It's adhesive when ironed and I cut it to the same shape as the cod piece (minus 1cm seam line). I used the sewing machine for the black elastic as well. Decided to attach it to the front as seen on the mannequinn in the star wars costumes book. The top end that is sewed to the cod piece is folded by some mm. I prefer using foam instead of padding for the cod piece as it it a bit stiffer than the CB.
-
I've done some more experimenting to further improve the CB, cod piece and pouches. It's really incredible how much there is to learn from these simple pieces. These are the things I've changed: - Layout of the CB: Small reduction of the width and the cut is now straight and not tapered - Layout of the cod piece: A little wider and a more roundish shape (when sewing one usually tends to sew straight lines) - Cod piece materials: Buckram to make it stiffer (I believe that was the material used in the movie as well) and foam to give it that puffy look. Also the cod piece is now attached on the top back of the CB - Pouches made of off-white heavy canvas I'm going to take this design to a sewer near by to see if it can be made at a fair price so I would be able to offer this to the community. Cheers
-
Good job - congrats!
-
Comparison of MLC, D'chef, LW, SC Armor and Helmets
Strider replied to Strider's topic in ROTJ Biker Scout Armor/Helmet
MonCal / Far Away Creations -
Thanks, M.J. I'm still experimenting a bit with a slightly different layout, cut and materials trying to find a good compromise between accuracy and troopability. For example they've used materials inside the CB which are also used in hats to keep the brim stiff. The problem with that is that once you wash it it will shrink quite a bit so I'm trying to find a material that will accommodate both. Stay tuned
-
Does anyone display their armor on a mannequin?
Strider replied to CoffeeBlack762's topic in ROTJ Biker Scout HQ
I would look for one that is fixed to the stand at the lower leg (so you could leave one boot slightly open at the back). The one BlitzJaeger recommended is great for a TK/TD but you would have to cut your jump suit on the back to put your biker on it. Similiar problem with the DIY method where you would have to cut a hole in your boot Cheers -
Comparison of MLC, D'chef, LW, SC Armor and Helmets
Strider replied to Strider's topic in ROTJ Biker Scout Armor/Helmet
It's a German maker I'm in touch with. He has sent me his new chest armor for evaluation. He is still reworking his current molds but what I've seen so far from pictures he has sent me it looks really promising. -
Today at a Troop we had the opportunity to make comparative shots from different armor and helmet makers. I thought this could help future scouts in making an educated decision and to consider the pro's and con's of each armor/helmet. Reference pictures from Star Wars Costumes book: Comparison of LW / D'chef / MLC Helmets Belts and drop boxes D'chef / MLC / SC Chest armor D'chef / SC / MLC / New maker Back armor and jet pack D'chef / MLC / SC SC / MLC / D'chef
-
Biker Scout knees and other
Strider replied to CosplayFreak's topic in ROTJ Biker Scout Armor/Helmet
Hi Lara, welcome to the BSN! Please feel free to shoot me a PM so I can direct you to our German BSN outpost:) Cheers -
Thanks guys, glad you like it. The cod piece should be about 'one size fits all' give or take a bit to adjust it to the CB. Mine is 22x35 cm (measured at the widest points). Cheers
-
After having experimented a while to find the right proportions of the CB and cod piece I like to share my results and show the process. The first thing was sourcing the right materials. I've tried out a variety of webbing and fleece materials and found the ones below most suitable (the actual fabric/type is unknown): - White cotton Garbadine style 440g/m (may be heavier but shouldn't be much lighter) - Volume fleece 200g/m (I used it for both although I think the cod piece had actual more "volume" than the CB) - White foam rubber for the lower section of the cod piece - 2 inch black elastic - 2 inch white velcro (male/female) To achieve screen accuracy I did the CB and the cod piece seperately (since it took me about 5 iterations of the cod piece to get it right it also saved me quite a bit of work ;-) As this is something that has to be fitted individually there's really no use in creating a template. To get the measurements you basically measure your chest width and your waist (tapered fit) and then add some lenght for the seam overlap. Here goes: There are 6 seam lines (or 5 chambers on the CB spaced out by an inch each) I've scaled up a picture of the cod piece from the Star Wars costumes book as a rough guide for a template (including seam overlap). Altough in the picture you can see the black 2 inch elastic is attached to the front of the CB I've decided to attach it to the back as it is not seen in the film. Test fit and comparison (no weathering added yet). Hope you like it!
