


LENOX61
-
Posts
164 -
Joined
-
Last visited
-
Days Won
1
Everything posted by LENOX61
-
Hello Eric.....Welcome to The Swamp. Your costume looks like it is coming along nicely. I agree with Grumpy and Heatshock about the yellow in your camo scheme. Otherwise........it's looking SWEET so far. Keep the pics coming if you can.
-
alternative material for upper glove
LENOX61 replied to chilledmilk's topic in Kashyyyk Trooper Soft Parts
Grumpy is right. -
K.A.M. (Kev's and Mr.B's) Kashyyk Armor Makers
LENOX61 replied to kwdesigns's topic in Kashyyyk Trooper Armor/Helmet
Lookin' good! -
If you are using spray paint, I can suggest using Krylon - Almond for the base color. This is what I used and I applied about 2-3 coats.
-
I updated my photo link with a few additional pics. I agree with Grumpy.........Denny.........you gotta get that armor from the airport. I can't wait to see you get it done. Sorry I didn't get a chance to say goodbye (one minute I was taking some photos with some kids at the bunker, and the next .....we got separted). I also went on your links......your pics look great as well.
-
Hey guys........I just got back from C-6. I just want to thank everybody who arrived for the photo shoots and made them unbelievable. It was awesome to meet some additional Kashyyyk comrads from around the globe (Mr. B, Major Payne, Falcon One). I think this was the biggest gathering of Kashyyyk Troopers to date. To my knowledge (and forgive me if I missed ya), the following Kashyyyk Troopers met and were captured on film: Grumpy RN Jedi Major Payne Wyseguy Havoc Mr. Bungle "Darth Zil" aka- little Grumpy Falcon One - who was there but not in armor Mosi - was there without armor Gree - Woodman Randy (from Florida) Here are some teaser pics from the "Swamp Shoot" : Call to arms!!!!! Not on my Shift!!!!! Hey buddy............toss over the keys. Anyway, you guys all rock!!!!! Even though we all somehow missed the Pathfinders pic, I think we did OK. Here is a link to a few additional pics we managed to capture during the event- http://s1203.photobu...yyk%20at%20C-6/ Until next time.............. Wyseguy
-
HAVOK - - - HAVOK - - - HAVOK!!!!!!
-
Nice!
-
Lookin' good Drew.
-
Mike- The brown is model paint -- Tamiya - Flat Earth color code - XF-52. Here are a few photos of what the colors look like with my helmet . note - I did green wash the helmet. I also added some grime and weathering; but, the almond, brown, and green colors do show and stand out. I know others have used different paints and techniques. Theses are the ones I found that are identical to the color code Mr. B provided back in 2010. I hope they work for you. If youo have any other questions, you an shoot me a PM or just ask here.
-
For the base coat (listed above), I used Krylon spray paint -- Almond Flat. You can get this at most Walmart's or K-mart stores. This is identical to the color chart. As far as the Flat Earth Brown, I used the model paint Mr. B suggested. For the green color, I matched the listed chart color to FolkArt's Acrylic Paint......Outdoor Barn Wood 1641. You can buy this at most craft stores like AC Moore or JoAnnes Fabrics. I hope this helps ya.
-
My weathered Biker Scout Helmet
LENOX61 replied to lonewolf's topic in ROTJ Biker Scout Armor/Helmet
Nice work! -
I used grey marine vinyl for my riding patch. It was a pain to sew and you must take your time placing it on the pants. BUT......it is well worth it in my opinion. It shows a leather appearance and it is durable. Here is a picture of my original pants (I have since made a second pair identical to what you see) -
-
MB is retiring from making KT's.............but!!!!
LENOX61 replied to mrbungle's topic in Kashyyyk Trooper HQ
Great news........keep'em rollin'. -
Nice Mark.
-
-
Way to go Mike. I see another Kashyyyk in the near future. I also agree with James and Grumpy concerning the shoulder bells. They can be heavy and you may have to use the elastic to keep them in position while you move around. I also noticed your belt buckle appears to be on the inside of your belt. If possible, the buckle should appear on the oustide of the belt. Also, the grey pieces used to bridge your chest and back armor (across the top of your shoulders) appears to be lifting. You might want to try afixing velcro the under sides to keep them down, or.......I actually constructed new ones using a small piece of grey Marine Vinyl. The vinyl is a lot more flexible and willl stay down while hiding the gap between your armor pieces if you use velcro on the chest and back armor. Otherwise, you are looking great.
-
Looking great so far Thomas. I do have some suggestions if you would like to hear them. I agree with Grumpy on the toe armor and the "clean" appearance. I would suggest toning down any and all of the white parts of your costume (boot straps, belt buckle, glove / knuckle padding, back side of boots). Misting either dark grey or black will help give a more weathered appearance. Also, your cumberbun appears to have a purplish tint (I don't know if it is the camera, lighting, or just the hugh as a result of dying it). Again, I suggest lightly misting a dark grey and or black onto the cumber bun. When I did mine, I had the same issue. I sparingly used spary paint which immediately did the trick.
-
Nice bucket. I managed to aquire one of the originals (same style) for my CB that you have. If you have any questions about where to start, shoot me a PM. I took plenty of pictures if you want to see my progress. Here is one of my finished bucket:
-
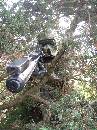
LENOX61 aka- "WYSEGUY" / CB-5761 / GARRISON CARIDA / DECEMBER 6, 2010 : When I started my build, I had a idea of creating a Kashyyyk Trooper had had just been involved in a fire fight. My vision was to let the observer see a battle torn, blown apart trooper who had just left the trenches with the Wookies and or had just been to hell and back. I used several heavy weathering techniques which include scratching / ripping the armor, green washing, adding sand and other natural items to give the illusion of battle debris and shrapnel. With that in mind, here are some pictures of my "Dirty BARC Trooper " or "Swamp Thing" : Here are some close up pics of my bucket - Here is a few close up pictures of my filthy cumber bun, belt and custome made (canvas) ammo pouches - Here are some pictures of my gloves, cruddy shin armor, and boots - and finally...............Here are some pictures of my completed costume. Please excuse the right front ammo pouch which appears to be lifting off the cumber bun . I recently aquired a voice amp and hid it in the ammo pouch but did not realize it was lifting at the time of these pictures. I also added the black tank stripe to the rear armor - KASHYYYYK TROOPERS RULE ! EXECUTE ORDER 66!!!
-
If I could get away with wearing my CB to work every day, I would do it in a heart beat. Thanks again Tom.
-
MB is retiring from making KT's.............but!!!!
LENOX61 replied to mrbungle's topic in Kashyyyk Trooper HQ
Thank you Tom my AWESOME CB kit. It has........... and will always be worn with pride. -
Welcome to The Swamp Heather.
-
Congratz.........well done!
-
Kashyyyk Trooper CRL discussion - consultation close Mar 2012
LENOX61 replied to mrbungle's topic in Kashyyyk Trooper HQ
Hey guys...... I agree the camo colors should definately be identical. As far as the camo, there really isn't two KT troopers which are identical. I also used a sponge to apply my camo pattern. I studied every frame from EPIII involving the KT trooper and depending on where in the sequence of events you see them, some camo appears to be defined (sharp edges) while others appear to be more digital or blended. In the opening frames of walking onto the beach front, those troopers walking near the Jedi's with the camera frame definately have a green tint to their armor. While observing the battle, the troopers on the cliff and the poor sap who looses his head with Gree have more of a tan / less weathered appearance. I think they would all be acceptable considering the different varibles of the pre and post fire fight. As far as the black stripe on the tank, like Darren.......I do not have one either. I just examined and studied the sequences (again) and there are plenty of stills (both close up and a far) from EPIII which do not show any clear, black pin striping. I know we are technically considered Clone Scouts and a part of the 41st Elite, but we are not Biker Scouts (at least not yet). Like Grumpy, I also like the idea of having reference pics in a gallery for future KT builds and future members of "The Swamp". I agree a variety of resources would be beneficial to anybody who wants to tackle one of the hardest costumes to build. As far as weathering, again......depending on the of sequence of stills, you have relatively clean armor, you have armor with dents, dings, chipped paint........and then you have getting blown apart with the Wookies. I personally enjoyed weathering my costume to reflect being in the trenches and in the middle of the fight. Nate- Thanks for this discussion and all of the ideas floating around. If the gallery does get a lift off, I would be willing to help out where-ever needed. Thank you Tom (again) for creating an amazing KT kit. Your accuracy with the little details (greeblies) and over all appearance is top notch which makes the KT character one of the best in the 501st. . That's just my 2.5 cents.
