


cucblack
-
Posts
276 -
Joined
-
Last visited
-
Days Won
14
Everything posted by cucblack
-
Spookys MLC v3 Helmet "build"
cucblack replied to spookymufu's topic in ROTJ Biker Scout Armor/Helmet
Good job!!! The barcode too high. Maybe you can remove carefully and apply again. Are independent bars decals? -
If the paint job result good, without visible paint-runs... avoid sand paper, is not necessary... Use a "car wax polish", I recommend 3M. Also this wax help to dry the paint avoiding fingers mark. And reduce the smell paint Good Job!!!
-
I tried to get this from 3M store, but they not ship to Bolivia. And also get some one in any where, and with no good results. Always I'm thinking in make them in a resin cast, but I don't have it... I got the correct measures and I made my own resin bolts. Any way the 3M bolts should fit good.
-
You are a big guy. Could put more down the chest armor, like the back armor. Chest look too short in that position.
-
A hard and good work Dylan, Hopping that you receive the soft parts soon.
-
I think the neckline is correct, like the original. In the pics look a little tight, no far too tight as you say. But isn't. The problem with pics is the guy (me), too big for this vest. I'll take new pics!!! Look these pics, this the first vest that I made, but the neckline is the same that the actual vest. This design was modified: Sleeve more adjusted and long. Velcro closure right over the left. And some stitching details.
-
I understand that could be faux or real suede. I copied this point from the lancer requirement: IV. UNDER SUIT - Black real suede, or close faux suede riding patch on the inside of the thighs and over the seat of the suit. -Ideally should have real black suede, or close faux suede square butt patch attached to flight suit at the rear under where cummerbund will sit and resemble those seen on screen, size will adjust slightly from scout to scout, but correct scale must be noted, no external visable stitching. ​Or maybe the Lancer requirements was changed?
-
Wow, you are really tall Tim!!! Your prop looks really good!!!
-
New Chin cup for my CB bucket
cucblack replied to CRISTONAMO's topic in ROTJ Biker Scout Armor/Helmet
Looks really good!!! -
Fiberglass Scout bucket from ebay
cucblack replied to CRISTONAMO's topic in ROTJ Biker Scout Armor/Helmet
I do all the job. I have my own workshop and I supervise all the building process. -
Fiberglass Scout bucket from ebay
cucblack replied to CRISTONAMO's topic in ROTJ Biker Scout Armor/Helmet
The helmet come ready to paint. You don't need sanded. I recommend automotive paint. For get a glossy finish you need paint in a warm or apply heat while do the paint job. Also you apply varnish. -
Hi Guys, Time ago I made this pieces and it was really easy to do. My pieces are made in resin and fiberglass. But make it in plastic is too easy and clean. You only need a plastic sheet and Go Ahead!!! I hope can help for upgrade yours helmets!!! Here are a illustrative pics... Christian. CHIN CUP RISER PLATE
-
- 1
-

-
Ultimate Helmet Comparison Thread!
cucblack replied to Chef's topic in ROTJ Biker Scout Armor/Helmet
Here are the measures: -
Can someone please explain this
cucblack replied to Rainfly's topic in ROTJ Biker Scout Armor/Helmet
Jajajaja I'm agree with you When I received my Don Post helmet, years ago, that was my impression. This helmet need job for give it a good appearance. But is possible change it, the only big problem is too small, special for big heads like mine... For that reason I builded my own helmet. -
Velcro...
-
Fiberglass Scout bucket from ebay
cucblack replied to CRISTONAMO's topic in ROTJ Biker Scout Armor/Helmet
Problem solved!!! I -
Fiberglass Scout bucket from ebay
cucblack replied to CRISTONAMO's topic in ROTJ Biker Scout Armor/Helmet
This the idea... light, sturdy and resistant piece If you are happy, I'm happy too. -
Here the color difference
-
Fiberglass Scout bucket from ebay
cucblack replied to CRISTONAMO's topic in ROTJ Biker Scout Armor/Helmet
Hi Tim, Would you give me your ebay ID? Thanks!!! -
You are right. The gray is darker like original, my supplier don't had a better color. I corrected this detail and now I made new decals: new design and color
-
Great Helmet, congratulation!!! Could you cut and sand the face/visor corner symmetric with the edge around the all area and get a much better result
-
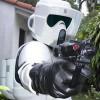
A couple pics of daughters scout outfit
cucblack replied to mattcamaro's topic in ROTJ Biker Scout Armor/Helmet
Great Job. Looks Great!!! -
Perfect!!!
-
Thanks for the good reviews about my work. For the plastic lovers, I'm working in make the helmet in plastic too. Any inquire or doubt about my work feel free to ask any time!!!