


cucblack
-
Posts
276 -
Joined
-
Last visited
-
Days Won
14
Everything posted by cucblack
-
Modify CB helmet to stay open or closed
cucblack replied to Nicore's topic in ROTJ Biker Scout Armor/Helmet
PM sent -
Suit http://www.ebay.com/itm/Kids-Flight-Suit-Coveralls-US-Air-Force-Military-Style-Rothco-7200-/231397869635?pt=LH_DefaultDomain_0&var=530657388356&hash=item35e0634843
-
Great Job Chris. Only need some little adjustments. Looks great. Congratulations!
-
Great Job! Some tips: - Black elastic must hidden, no visible. Attach it under the cummerbund. - Release the elastic the most possible for avoid the camel toe. - If you want the cummerbund more movie accurate, make it shorter. Must placed over the belt. About the suit butt flap. I prefer wider. But yours look good. My two cents!
-
Great Job on the helmet Chris!!! The only thing, the black decals bars looks a little curved to up. Usually happen. I must try 2-3 times until give it the correct position. You can remove the last 7 bars one to one, and give it the correct line position.
-
Agree!!! Lou make a good blaster. Great balance in quality/accuracy/price.
-
Looks good! Glad to see other option armor.
-
Maybe too late. But rubber blaster can painted and will looks real. I have one, I fix it with bondo, primered and painted with automotive paint. Sent from my Lumia using Tapatalk
-
Looking good. Great Job!
-
Merry Christmas and a very happy new year to you all
cucblack replied to 4505Marcel's topic in Announcements
Merry Christmas and Happy New Year -
Do you live in Bolivia? I live in Bolivia too. Welcome to BSN. Any help from me feel free to ask any time. Saludos!!!
-
This was my way to do it whit my old armor. Really easy. https://www.facebook.com/photo.php?fbid=1637434218584&set=a.1564243108852.74580.1318603367&type=3&theater Congratulations for your new project!
-
You must make a 14 mm hole. And external hole must 25 mm or 1 inch.
-
Maybe could make the lenses hole bigger.
-
Looks good!!! - Pouches more on the side and move up. About 1 inch after the last stitching bar. - Release the black elastic strap for avoid the Camel toe on the cod. - Move up a little the cummerbund or move down a little the belt. Belt must placed under the cummerbund.
-
Looks good!!! - Pouches more on the side and move up. About 1 inch after the last stitching bar. - Release the black elastic strap for avoid the Camel toe on the cod. - Move up a little the cummerbund or move down a little the belt. Belt must placed under the cummerbund.
-
1 o 2 inch is not noticeable. More, maybe need cut it.
-
- Vest sleeves need shorter. But before separate more the shoulder bells from the shoulder chest/back armor, 1 inch approx. - Cummerbund oversize. Must more adjusted, like a glove. Easy to fix, only remove the back Velcro closure. - Cummerbund wrong placed, move up. Must placed over the belt armor and Thermal Detonator. And chest and back armor must cover completely the cummerbund too. - When attache the pouches placed 1 inch beside the last stitching bar and 1/2 inch over the bottom.
-
TB Pics from SW: The Costumes TOT - fixes for us all!?
cucblack replied to chimei's topic in ROTJ Biker Scout HQ
Yes, I saw the detail. My assistant (wife) attached the black elastic too tense. I want take pics with the armor, or almost some parts. I'll try to do it for give a better reference. -
Program works with stored in original camera jpegs. Need the camera info.
-
Would be help. I found a program that can get the measures. Only need two different angles from the same pic. But must be take from a camera. Doesn't work with pics downloaded. Thanks!
-
TB Pics from SW: The Costumes TOT - fixes for us all!?
cucblack replied to chimei's topic in ROTJ Biker Scout HQ
As I promised, some pics dressing the new cummerbund and cod. More pics here http://forum.bikersc...pic=10809&st=80 -
BS Mask Project: Tactical/Motorcycle
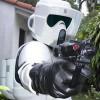
cucblack replied to cucblack's topic in ROTJ Biker Scout Armor/Helmet
Finally finished. Really happy with it. Fit and works perfectly. Good ventilation and goggles lenses no foge. I'll make some pieces in different styles. -
Maybe the 3M speedglass headband Kit, with hold up/down system. Great Job in your Prop, looks great!!!
-
TB Pics from SW: The Costumes TOT - fixes for us all!?
cucblack replied to chimei's topic in ROTJ Biker Scout HQ
You are right Mickey, In fact I made the pouches more squared. But seeing the pics not looks squared because the inner foam are rectangular LOL. Other important point is make the pouches and cummerbund depending your height. I use three sizes depending the body height and the frame body depending the weight. Here a pic with the actual shape:
