


Dart
-
Posts
2,467 -
Joined
-
Last visited
-
Days Won
51
Everything posted by Dart
-
Soon to get started, need some advice on an armor
Dart replied to BlackTaz's topic in ROTJ Biker Scout HQ
To be honest, it looks like it's a recast SC kit. I can understand if budget is an issue, but as the saying goes, "you get what you pay for". It's very unfortunate that the scout trooper in the album is wearing the armour so poorly fit to them. I'm sure it's better than that but... -
another snout painting question...
Dart replied to spookymufu's topic in ROTJ Biker Scout Armor/Helmet
Some use flat, I used satin. I've seen both and I like the satin look, myself. -
The only time I clean up marks or scratches on my kit is if it's a weird colour. I've had red, purple and blue scuffs that I'll carefully scrape off. But otherwise, it's all weathering.
-
Shoulder Bell elastic - question on sizing
Dart replied to kay_dee's topic in ROTJ Biker Scout Armor/Helmet
Regarding the knee strapping, it was decided that the screen grabs were so inconsistent that the bottom strap would be 1". So, regardless of what you see on screen, that's the size you should be going with, purely for consistency's sake. The top knee strap is smaller, so it was decided to set that at 1/2", if I'm not mistaken. Again, purely for consistency's sake. Back to the shoulder bell elastic, you might be operating under the assumption that the bicep strap is 1.5". What I got with my kit (about 5 years ago), was elastic sized around 2". But again, back to practical side. A strap as thin as 1/2" that's attached to a single point on the inside of the shoulder bell, would seem to me to make for a floppy piece of armour, no? I think this whole thread boils down to what's "screen accurate" and what's practical to wear AND still looks pretty close. It's just my personal opinion, but I think the current guidelines are pretty good, if for no other reason than because they're consistent. It saves us all from having to buy 5 different widths of elastic. -
Congratulations!
-
Shoulder Bell elastic - question on sizing
Dart replied to kay_dee's topic in ROTJ Biker Scout Armor/Helmet
Great photos and a great subject for debate/clarification. I agree, the strap does look thinner than the bicep, but I don't think it's quite as thin as some have mentioned above. To me, it looks closer to 1". My reasoning for that is that when looking at those photos, and then comparing that to how it scales on my body (using my 1" wide thumb as a stand-in), 1/2" and 1/4" seem way too small for the scale shown. That all said, it stands to reason that if we're going for consistency, using a 1" strap on the bottom knee, forearm, and (possibly) shoulder cap would be appropriate and seems fairly reasonable from a costume production standpoint. Anytime I see threads like these questioning sizes, I like to try to approach the situation as though I was creating the costume for the movie. Why, as the guy responsible for buying all the costume components, would I buy more sizes of webbing than needed? It makes sense to have the 1" webbing be the strap size of choice for much of the costumes that needed it. I could see them maybe getting a wider size for the bits that need them, and maybe a little bit of the really small stuff for aesthetic/design purposes. Let's remember that even though they had a big budget, it was still a finite amount so they had to make the best use of what they had. TL;DR - If we're considering a size change for the shoulder, it's my guestimated opinion that the elastic webbing shouldn't be any smaller than 1". -
Don't mean to hijack Kath's thread, but I had the pleasure of seeing her in action with it this past weekend. She's still got a few challenges, but it's lookin' good so far!
-
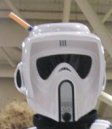
The KS bucket is kinda tricky. I don't have a tutorial for ya, but this is what I did (more or less): 1. bought a helmet, pre-built 2. took it home, looked it over, and had an A.D.D. fit 3. completely disassembled it 4. Waited 3 months time because I was afraid 5. Did a bit of extra trimming and defining where it was needed (made sure the sideburns were the same width and reinforced, trimmed out a bit more underneath the chin of the faceplate, the bottom edge of the helmet was warping so I took some twine, roped it through the ear holes, and twisted the rope while heating the plastic to pull the bottom together x3 or 4) 6. went and got myself some indoor/outdoor double-sided foam tape (the grey stuff with the red backing) 7. made a few registration marks while dry-fitting the faceplate to the visor, and the dome to the rest of the helmet 8. stuck a few bits of tape all over the contact areas 9. crossed my fingers 10. stuck everything together, paying attention to the geometry of the helmet (the flat edge of the snout should be perpendicular to the top of the helmet, lined up the groove on the visor and helmet 11. attached the bolts (1/2" hole for the visor, 1/4" hole for the helmet and pop those plastic bolts in) 12. put the stickers on (you can do this at any stage - might be easier to do the ones on the forehead before fitting the visor) ... and that's it. I looked at a lot of photos and kept second-guessing myself, but I got it all done. I'd suggest staying away from glue and use the tape instead (easier and less mess to pull apart). Hope that helped you out! Good luck!
-
You can see the pattern here: http://forum.bikersc...indpost&p=89693 Print it out as is, and then scale it bigger or smaller, as needed. Take a look at the gallery at the high-rez photos and you'll see how it's supposed to look.
-
Ah, yes. So this is what it looks like... The helmet's definitely the biggest challenge there. If you've got the time, you should post up some photos (front, back, left, right) just so we can help you spot the issues. Good luck, Kath!
-
Elastic Widths For Non-Lancers
Dart replied to scout.trooper's topic in ROTJ Biker Scout Armor/Helmet
Sure, but since all the strapping has to match, you'd have to have pink and blue zebra print straps all over. -
Yes. Some people like to have the pouches sewn to the cummerbund, some like the pouches attached to the inside of the chest plate. I prefer mine on the chest plate. As for the soft bits, technically, they should be 2 pieces, but there's nothing saying you can't make a velcro strip on the inside front of the 'bund to attach to the outside front of the flak vest. Some folks sew suspenders to the 'bund.
-
Seeing as this is coming up again, the only change that I'd like to see to the Lancer specs is the bottom chest strap. Every screenshot that I've seen seems to indicate that it's 1.5", not the 2" that's currently in the spec. In fact, it stands to reason that it's not elastic, but the same cotton webbing that was used for the hip boxes. Put yourself in the costume designer's shoes: Would it make sense to just buy 1 big roll of 1.5" webbing and use it as much as possible? How easy would it have been to find the same texture webbing, just in two slightly different sizes? To be honest, it's really the only bit of the Lancer spec that I disagree with. Hopefully, that can be changed and we can all move on.
-
Elastic Widths For Non-Lancers
Dart replied to scout.trooper's topic in ROTJ Biker Scout Armor/Helmet
And just to clarify, on the knees, the wider strap (1") goes on the bottom, and the smaller strap gets riveted to the top. -
Also, if you're looking for a nice compact mic, I've used this one for the past 2 years: http://www.ebay.com/itm/181125639883?ssPageName=STRK:MEWAX:IT&_trksid=p3984.m1423.l2649 Much more comfortable than the mic included with the Aker amp.
-
Here's a question: I'm going to be upgrading my patch and flap - what type of suede is best? I'm just concerned that I get the wrong one and it shrinks...
-
It can be tricky, but sewing the patch is usually the best way to go. The mudflap can be attached with velcro, or sewn on, your choice.
-
Welcome aboard! A good site to visit is http://jedijennie.com/bikerscout/ There's some great info on how to down-size a scout, so hopefully you'll find some of it useful. Enjoy your stay and be sure to read up as much as possible. Lots of great info here.
-
With respect, I wouldn't even try. You risk warping and melting the plastic on your helmet. If the above warning wasn't enough, do a test with some plastic and see what happens. I, for one, would hate to see you damage your helmet past the point of it being approvable.
-
3. If you want to have useful pouches AND want them to look sharp, get some .25" craft foam, some duct tape and a good sharp xacto knife and build yourself a box that slides in. I've done that and it works great (and it's easy to do). I'll see if I can't take some good photos of mine when I get home.
-
What make of helmet do you own? Asking, because if the plastic of the helmet matches your armour, you might want to reconsider getting the entire helmet painted.
-
If you use a fine grit sandpaper (anything above 600 will do) you'll be ok. Just be careful where you sand and then if it's still rough, get some higher grit stuff than you used and keep gently sanding until it's smooth. Don't forget, it's really just the front edge and the inside curve of the snout that are prominent. Everything else is covered up by the plate and snout.
-
It's hard to tell without seeing clearer photos. Ideally, the bottom of the boxes shouldn't hang below your crotch. That said, they look ok but if you brought them up an inch or so, you'd be fine.
-
Biker Scout shoulder bells and a lip around them
Dart replied to lonewolf's topic in ROTJ Biker Scout Armor/Helmet
To be honest, all the reference shots are of the MoM exhibit, which we know isn't all screen-used stuff (hence the unfinished bicep bit in the photo). I'd have to say that it's more of a curl from the edge being cut than an intentional detail (as Marcel has suggested). If we could find a screen grab where we could see this detail, I'd imagine that'd be the decisive source. -
Nicely done! Looking forward to the day where I can get my head into one of those fine buckets!
