

StudioCreations
-
Posts
203 -
Joined
-
Last visited
-
Days Won
11
Everything posted by StudioCreations
-

Shoulder bell trimming question
StudioCreations replied to jwnikita's topic in ROTJ Biker Scout Armor/Helmet
Trim for the smaller sized bell. We added the smaller line in after size testing the shoulder on an assembled costume and noticed the first (larger) cut was too tall for a wearers height of 5 foot 9 inches. Sent from my iPhone using Tapatalk -
Help! Shoulder bell has buckled!
StudioCreations replied to AJay Irish's topic in ROTJ Biker Scout Armor/Helmet
AJay, send me your shipping address via email or PM here on BSN. I have a spare shoulder Bell I can send you for free. -Jeff Studiocreations.com Sent from my iPhone using Tapatalk -
SC Helmet Build- dome glueing
StudioCreations replied to TB_sweets's topic in ROTJ Biker Scout Armor/Helmet
I recommend clamping the temple area of the helmet as you glue the back center point. That ensures the dome stays in place as the glue dries. Metal spring clamps work best. Sent from my iPhone using Tapatalk -
Studio Creations typical wait times?
StudioCreations replied to TB-1599's topic in ROTJ Biker Scout Armor/Helmet
I pop in to the BSN boards occasionally, when free time permits. I am most accessible through email. Sent from my iPhone using Tapatalk -
Studio Creations typical wait times?
StudioCreations replied to TB-1599's topic in ROTJ Biker Scout Armor/Helmet
The chances for color match are nil. Every batch of white ABS plastic is hand colored from the raw material which is tan in color. That means every single run is different from each other because of the human factor. Also, your 10 year old plastic will have absorbed UV rays and pollution from the air, tinting it over time. If you are lucky the new parts will not have to be sitting next to the old ones and no one will tell the difference. Shoulders and biceps next to chest are the worst culprits in this situation. Let's hope I packed the box correct. Last week was a madhouse here in prep for Celebration, so mistakes could have been made. I already have an extra RFT parts sitting on my work bench, and not sure why. Sent from my iPhone using Tapatalk -
Studio Creations typical wait times?
StudioCreations replied to TB-1599's topic in ROTJ Biker Scout Armor/Helmet
Bubonos, you must have been caught in that 'Plastic Fiasco' in February. Ughhh. that threw the production off by 6 weeks. Not a good thing to happen so close to Celebration. FYI -I recommend never order a custom costume from Studio Creations. I am very very slow at doing custom work. One client had to wait 9 months to get his Dengar costume. It's not something I do regularly so I do not have an efficient process in place. -
Studio Creations typical wait times?
StudioCreations replied to TB-1599's topic in ROTJ Biker Scout Armor/Helmet
Sometimes I can get things out quicker, but the 30 day default is set in place to manage buyers expectations and make them budget their time for worst case scenarios (a snowstorm locked down Atlanta for 5 days once). Currently your parts are in the production queue. I might be able to get them done this weekend, or end of next week, depends how productive I can be. Do you need these parts for an upcoming event? If so, let me know ASAP so I can push other things around and get you the parts intime for your event. -Jeff -
SC Armor - Anyone Got It?
StudioCreations replied to PeaceForEndor's topic in ROTJ Biker Scout Armor/Helmet
It's tough juggling the job, armor demand, and the updates to armor parts, but we try. Chest and Back armor need updates too, but that one-piece belt became top priority in the last 2 years. I've been away from BSN too long. So many posts to catch up on. A Lot has happened here.... and that's Awesome!!!!!!!! -
SC Armor - Anyone Got It?
StudioCreations replied to PeaceForEndor's topic in ROTJ Biker Scout Armor/Helmet
Sorry for my lack of attention to the forums here. Yeah, we here at SC got backlogged in orders when the plastic came in all matte in color. If you need your armor for an upcoming event, send me an email off the SC website and let me know your event deadline. I can usually swap your place in the queue with someone who is not as deadline oriented. We just got backed up and the kits are going out as fast as we can make them. You need to be proactive and contact me though. On a plus note, we have swapped to a ONE PIECE 5-box Belt. The first few kits in this 2017 batch we had to ship out as the old three piece belt, but now all the kits are shipping with a one piece belt. Sent from my iPhone using Tapatalk -
Tristancraig... can you circle the area you are referring to in a photo and upload it to this thread? I am curious about this half cylinder you are seeing.
-
Sometimes SC can get behind and not ship your kit for a couple weeks. if you have a deadline coming up and absolutely need that kit shipped in the time frame quoted, then email SC and let us know. We do get distracted from time-to-time , but alerting us to your deadline helps us prioritize. I will admit that our printed instructions are a bit simple. I need to address that in the coming year. All hail PAndatrooper for his contribution to the community with that thread he posted. Pandatroopers Build Thread can be used for any scout kit, not just an SC kit. Tons of good assembly information there.
-
Mon Cal wait time
StudioCreations replied to Oberkisstillalive's topic in ROTJ Biker Scout Armor/Helmet
I'll assume you are talking about vacummforming,trimming, and boxing the armor. We'll assume the vacuumbucks are already made. Currently SC uses a 2x2 vactable, which is actually 21x21 inches for the vacuum platen. This allows for a scout kit with helmet to be made from 7 squares of plastic. Each square takes me about 5 minutes to turn around. 3 minutes of heating, 20 seconds of vacuum pressure, 15 seconds cooling, then removing the plastic and reloading the frame. Add an extra 3 minutes for the helmet back piece, that is a special part that takes 2 people to make. That means it takes about 38 minutes for vacforming an entire Scout. And that's just vacuumforming. Trimming takes 45 minutes on the bandsaw, deburring takes 50 minutes (whodathunkthat?) , bubble wrapping takes 25 , decal organizing 15, boot holster assembly 15 , Belt clip drilling/folding 10, instructions 10, Postal label/boxing/customs-forms 25 minutes. Now multiple by 10, because, if you are going to make 1 armor, you might as well make 10 (or maybe just 5). I can fully see how Moncal can get behind. He offers a slew of costumes for the fans. That takes mold management, materials management and a ton of time organization. Not to mention to factor in when a high-dollar client walks in and drops $10K on his desk to stop fan-costuming and work on their industrial-sized project. That gets you behind faster than anything... because hey... why not go for the bigger money, right? NOTE: I would like to address the "Yellowing" issue of the plastic. These new fangled eco-friendly house lights are throwing UV rays. The incandescent bulbs did not. I've had a number of fans come to me about yellowing, and all I can say is get a spray can of Krylon Fusion Gloss White and schedule a day of painting. That's how the movie suits are done, that how we might have to keep our armor from yellowing. ABS plastic is not naturally UV resistant, and most of the yellowing occurs from UV exposure (some yellowing can occur from air pollution). You can buy UV resistant ABS plastic, sure, but you will spend double the money to get it. Generally , propmakers use what is known as utility-grade plastic. That means it's a mixture of recycled ABS plastics. If you spend a little more (25-30%) you can get 'virgin' ABS, which is fresh manufactured plastic with no recycled material added... but it's still not UV resistant. "Acrylic capped" ABS plastic is UV resistant, I've purchased that in the past, but the acrylic material is very rough on the band saw and does not vacuumform down as smooth as the straight ABS stuff. It's more rigid and doesn't conform to the small details as nice. I only used that one year, 2012, and never ordered it again. -
Moncal at farawaycreations.com has a great kit too.
-
The larger scale models are all this high priced. My KAwasaki 1100 was $175.00 usd and this Ferarri was $145.00 usd. Dart, I have seen only one other 1/12 312T4 model out there, a 'Protar" model I believe, but I went with the current Tamiya version. I couldn't afford both models at the time. Is there a big difference? I am thinking the fins on the left edge of the part are slightly different, but it could be jsut wear and tear on the parts themselves that make the heights different, and not the actual fresh-from-the-kit part.
-
Thanks, guys! If you see any issues with the part, speak up now. I am in scratch building mode this week and can adjust the part rather quickly if the eagle eyes of this group see something out of place. The more eyes on the issue, the better. ... to encourage people, FREE GREEBLIES for all who contribute positively to the conversation of the accuracy of the Greeblie in question!!!!! FREE GREEBLIES (both the rectangular and circle bits)!!!
-
I bought the Ferrari 312T4 Tamiya Model about 5 months ago, but one thing after another kept creeping into my schedule hindering me from revamping my TD Greeblies. Just this past week I finally found time to work on the blueprints and the hand modelling of the rectangular TD Greeblie.... The cylinder might need to be 1 mm longer, but maybe not. What do you guys think?
-
Below is a diagram of the lens tabs and screw placement. The Left and Right tabs can be placed higher if you prefer them to be more centered. I recommend clamping the tabs down with metal spring clamps as the ABS-plastic glue dries.
-
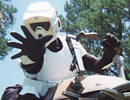
Biker Scout shoulder bells and a lip around them
StudioCreations replied to lonewolf's topic in ROTJ Biker Scout Armor/Helmet
I've added the lip to a couple special builds i've done for clients. Next year we move to .060 ABS plastic for certain parts, and then we'll add this to our molds. Right now we use .080 ABS and it's a bit too thick to reproduce the proper look. -
SO EXCITED (SC Build Thread)
StudioCreations replied to Rainfly's topic in ROTJ Biker Scout Armor/Helmet
Always line up the visor and the faceplate by the hinge bolt holes. Trim and modify the rest of the parts where need be. The hinge holes are crucial. This is a kit, so some tweaking for fit-and-finish should be expected. We literally make this stuff in our garage, so the accuracy of us cutting these parts from the flashing with a bandsaw can get tricky. Anyone that feels they got a 'wacked' out part, like rainfly did with his center belt buckle... let me know. Sometimes we are in a rush and Quality Control doesn't catch something and a poor part gets shipped out. -
SC's new Elbow armor ....
StudioCreations replied to StudioCreations's topic in ROTJ Biker Scout Armor/Helmet
We tweaked the mold this weekend and added the return edge to the back of the elbow... -
SC's new Elbow armor ....
StudioCreations replied to StudioCreations's topic in ROTJ Biker Scout Armor/Helmet
-
SC's new Elbow armor ....
StudioCreations replied to StudioCreations's topic in ROTJ Biker Scout Armor/Helmet
Thanks guys! Here's some image for you guys to use for comparison picts. Majic of the Myth Exhibit and some dvd screen caps... -
SC's new Elbow armor ....
StudioCreations replied to StudioCreations's topic in ROTJ Biker Scout Armor/Helmet
If I can get more feedback from more fans, that would be great. I want these to be as good as possible and the more people that chime in about issues or concerns just help raise the level of accuracy. Save the images and send them to someone else if you know they have that "eye for detail". -
Thermal detonator greeblie, new pics
StudioCreations replied to lonewolf's topic in ROTJ Biker Scout Armor/Helmet
Screencap directly off the Behind the Scenes bluray... click to enlarge/dowload -
SC's new Elbow armor ....
StudioCreations replied to StudioCreations's topic in ROTJ Biker Scout Armor/Helmet
Chef, Yeah, currently the elbow does not have that return edge on that back wall, but we are adding a 'shim' to the mold this week to give them the return edge. Thanks for pointing it out and linking that image up. We were sitting on the fence about doing the shim, but now it's a definite necessity. Darth Vorhees, Here's the 'straight' shot , both from the front and the back. Taken with my 3mp iphone camera...

