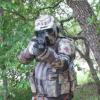
comm tech Posted March 10, 2012 Share Posted March 10, 2012 Well, after having my new shell for about 3 weeks, I finally found so time to work on it. Obviously it is a really rough start, but little by little, I will get there. I am not really good with building things or cutting to fit, but I think this will be fun. Tomorrow I will be cutting the ears and smoothing out the eye lens area. Even though there is not armor anywhere, I am getting some other parts together as well. attachment=1122:kts helmet.jpg] Quote Link to comment Share on other sites More sharing options...
Chex Posted March 10, 2012 Share Posted March 10, 2012 Looking good so far! Quote Link to comment Share on other sites More sharing options...
darren1970 Posted March 11, 2012 Share Posted March 11, 2012 So far so good mate. Quote Link to comment Share on other sites More sharing options...
Heatshock Posted March 11, 2012 Share Posted March 11, 2012 looking good mate - that the biker chick/pghfett lid? Quote Link to comment Share on other sites More sharing options...
comm tech Posted March 12, 2012 Author Share Posted March 12, 2012 Yes it is the PGHFett, from BikerChick. Here is some new pics of todays work. I have a little nick that I have to repair with some bondo in the left eye indent. Other than that I am ready to smooth it out with bondo and start feathering in the mold imperfections. Feed back would be greatly appreciated, so I can get this done at one time, not going back time and time again to fix little things. Thanks guys Quote Link to comment Share on other sites More sharing options...
comm tech Posted March 25, 2012 Author Share Posted March 25, 2012 Getting a little closer. If my personal life would stop getting in the way I would be much further ahead than I am now. Since I still do not have (and can not get the armor) I am going to start practicing my painting techniques on my hard hats for work. Tired of plain old white lids anyways. Quote Link to comment Share on other sites More sharing options...
comm tech Posted March 25, 2012 Author Share Posted March 25, 2012 I have also received my British Desert BDUs. I have spent the last week at night, ripping all of the seams to remove all the pockets, patches and Velcro. Question though on the shirt do the two shoulder straps and buttons need to come off as well? The tabs are sewn into the seam and I can take them out, but them I will have to resew the seam. Also on the shirt, my zipper on the front of the shirt goes all the way up and has no buttons, but then there is a flapthat covers the zipper and it is velcroed closed. Since almost none of the front of the shirt is seen, due to the cumberbund, do I have to do anything with that. i know MR bungles shirt and many others had buttons that they had to hide with extra fabric. I am trying to make the thigh pouches for the pants, with the left over material from the removed pockets, this week. Front of Shirt Sleeve Closure Shirt Collar close up Front of Shirt showing zipper concealed Pants Front of pants Back of Pants All the material I removed from the pants and shirt. I could probably make a set of shorts with all the fabric. ;-) Quote Link to comment Share on other sites More sharing options...
Grumpy Posted March 25, 2012 Share Posted March 25, 2012 The front of the shirt with the hidden zipper and the collar flap are just fine. The two shoulder straps with the buttons are not necessary. They can be removed. They could possibly mess with the chest and back armor where it sits on your shoulders. Looks good so far. Keep it up. Quote Link to comment Share on other sites More sharing options...
Heatshock Posted March 26, 2012 Share Posted March 26, 2012 I removed my shoulder straps by just cutting em off mate however, AFTER I removed em, I did think..... hmmmm they would have been good for strapping the bicep? Remove the button obviously - but if you fold down the strap, its will be same colour as the rest of the BDU and can be used to hold up your bicep armour? (fortunately, my bicep armour doesnt need holding up) Nate Quote Link to comment Share on other sites More sharing options...
comm tech Posted March 26, 2012 Author Share Posted March 26, 2012 Thanks Grumpy and Heatshock, will get them corrected tomorrow night. Love this characters look, can't wait to be done!! Quote Link to comment Share on other sites More sharing options...
comm tech Posted April 6, 2012 Author Share Posted April 6, 2012 Here are the newly dyed BDU's The color is almost correct to the actual color in real life. But they are a bit darker than pictured. The BDU's do have a slight purple hue to them. But I think they came out great. I do not have my thigh pouches sewed on yet, as I am waiting to get my armor, so I can see where they need to go, in reference to the hanging pouches and knee pads. Per heatshocks suggestion, I cut off the shoulder button, but left the shoulder straps on. If need be, I can remove them at any time. Also since the Velcro did not color hardly at all, I will be masking it off and hitting it with black paint from the airbrush. Quote Link to comment Share on other sites More sharing options...
darren1970 Posted April 8, 2012 Share Posted April 8, 2012 Mine has a slight purple 'tinge' to them too. I wouldn't worry. Quote Link to comment Share on other sites More sharing options...
Guest Rain Posted April 8, 2012 Share Posted April 8, 2012 Looking good! Nice dye job! Quote Link to comment Share on other sites More sharing options...
comm tech Posted April 21, 2013 Author Share Posted April 21, 2013 So after 3 months of having the armor I finally got some time this weekend to work on it. All of these pieces, along with the helmet, are ready for painting The bicep pieces will need to be heated a little and pushed into shape and then I will be ready to adhere the two clam shells together. Here they are just to make sure they fit with the shirt (and a set of Grumpy gloves). Quote Link to comment Share on other sites More sharing options...
Death Recon Posted April 22, 2013 Share Posted April 22, 2013 Looks like things are coming together well for you, when I get home in 3 weeks I'll be where you are. Hope everything runs smoothly, good luck with your build. Quote Link to comment Share on other sites More sharing options...
miqt Posted April 22, 2013 Share Posted April 22, 2013 Good progress! keep at it! Quote Link to comment Share on other sites More sharing options...
LENOX61 Posted April 22, 2013 Share Posted April 22, 2013 Looking good so far bro. Don't worry about the purple tint, it fades away in time (I had the same when I dyed mine). You might want to take a black Sharpie to the stitching, but the color looks great. Your bucket is also looking good. Keep it up. Quote Link to comment Share on other sites More sharing options...
comm tech Posted May 12, 2013 Author Share Posted May 12, 2013 The armor party I attended yesterday got me inspired to get back to work on my KT (that and the fact that it was my first weekend off in over three months) So I think I did pretty good. I trimmed the calf and biceps pieces so they are ready for splicing. Then I took a lot of the return material to smooth out the pieces. Cut the greeb hole in the tank, and cut the tank to mount on the back piece. Still a little bit of fitting work to do on that. Got the Hole cut for the Tank Greeb Tank and Greeb Before install Tank with greeb laid in. At least it is snug enough that it is not falling out. Bottom of Tank test fitted onto back plate Side view Top View of tank and back plate, again just test fitting Quote Link to comment Share on other sites More sharing options...
comm tech Posted May 12, 2013 Author Share Posted May 12, 2013 I know I have some final finish sanding to do on the tank to get it to fit just a little better, before Bondo comes into play. But if any one has any critiques I would like to hear them. Is the tank a good height on the back piece? is the angle the tank is sitting at, acceptable? Quote Link to comment Share on other sites More sharing options...
bselphfsu282 Posted May 13, 2013 Share Posted May 13, 2013 Dude that's awesome! Great job! Thank god I just looked at your build, cause I almost cut out the entire greeblie for the tank topper, not realizing there was an extra lip there that does not actually stick out!! I would have ruined that for sure! Quote Link to comment Share on other sites More sharing options...
comm tech Posted May 13, 2013 Author Share Posted May 13, 2013 Crisis averted Quote Link to comment Share on other sites More sharing options...
miqt Posted May 14, 2013 Share Posted May 14, 2013 I'm wondering about the angle of the tank to the backplate....ill check mine... How many inches from the top edge to the bottom? Quote Link to comment Share on other sites More sharing options...
Death Recon Posted May 14, 2013 Share Posted May 14, 2013 I'm back on Thursday to start more on my build but your looking great man. The tank looks like it's placed really nice, I wouldn't move it... Take a look at the screen shots though just to give yourself piece of mine Quote Link to comment Share on other sites More sharing options...
comm tech Posted May 14, 2013 Author Share Posted May 14, 2013 I'm wondering about the angle of the tank to the backplate....ill check mine... How many inches from the top edge to the bottom? I used your measurements as a good starting point (thanks so much by the way) I ended up with 6 1/8" from top center of tank to the back plate and 15 1/4" from top of tan around to the bottom where it meets the underside of the tank. After looking at the Screen Grabs and where my tank greeb placement sits, I thought the smaller top end got the tank greeb closer to the backplate, on mine. When the back piece is on my body the tank top has the slightly downward slope away from the body, that I see in the screen grabs. This is the fist thing I have every built as far as costuming so I am trying to be careful, but input is greatly appreciated. Quote Link to comment Share on other sites More sharing options...
comm tech Posted May 14, 2013 Author Share Posted May 14, 2013 I'm back on Thursday to start more on my build but your looking great man. The tank looks like it's placed really nice, I wouldn't move it... Take a look at the screen shots though just to give yourself piece of mine Thanks Allan. Glad you made it back safe and sound. now back to work on your trooper. Looks like there will be quite a few of us boosting the 41st elite ranks in a couple of months or so. Lots of builds going on. Great that everyone is trading input and ides...and measurements (thanks again Mike) Quote Link to comment Share on other sites More sharing options...

Recommended Posts
Join the conversation
You can post now and register later. If you have an account, sign in now to post with your account.