Drewid Posted November 5, 2012 Author Share Posted November 5, 2012 After a little bit of hiatus, I have some progress to report. I took my armor out on a test run at LBCC this past Saturday. I was missing a few greeblies but overall it worked out nicely. I also figured out what adjustments I need make. Things to do: -Build a belt buckle. My 3D printer threw a belt at the last minute otherwise I would have had it -The rubber greebs at the should straps won't sit properly. I'm going to make some out of ABS off the printer. -Attach all shin greebs -Move the cummerbund straps to sit under the armor -Tighten the elastic strap I attached to the belt -Paint my donor boots white -Replace elastic straps on forearm armor with rubber straps. The elastic ones look okay and work out great but the rubber ones would look better. -Try and fade the pouches. I have multicam fabric but Grumpy did an awesome job on these and they look fantastic. Quote Link to comment Share on other sites More sharing options...
Grumpy Posted November 6, 2012 Share Posted November 6, 2012 That looks freakin' awesome!! ...must...add...**weathering**... (even the pouches... could stand a little bit of weathering, too.) Yeah, you might have to do some adjusting. (Everybody does) But, overall, it looks great! ...In my opinion. But, what do I know??? I'm old. Quote Link to comment Share on other sites More sharing options...
Drewid Posted November 6, 2012 Author Share Posted November 6, 2012 Thanks Matt! I figure most of the weathering will come with time. I have several coats of silver under the base coat. I might rub a little graphite into the armor here and there to give it some "carbon scoring". Oh, to follow up on the bicep greebs and rubber knee straps. I found that I need to seriously scuff the rubber before it would adhere well. Cleaning it of any trace surface oils was essential. Common sense, maybe, but nobody ever accused me of having any of that . To fill in gaps I used silicone caulking. It's paintable and helps with the adhesion process. One of the knee straps held fine with e6000 but the other one refused. After 3 attempts with the e6000 I moved on to gorilla glue. I recommend to start with that stuff. One note though: e6000 is semi-permanent, gorilla glue is final. Had I more time I would have created some clips on my printer. Oh well. I think I need to replace my shoulder bell straps with a brown elastic. The black straps stand out too much. I will probably do the same on the cummerbund straps when I move them in closer. Quote Link to comment Share on other sites More sharing options...
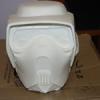
Drewid Posted January 24, 2013 Author Share Posted January 24, 2013 Long time no update. After practically giving up on the Crow boots I've been moving forward on the last odd-and-ends on the build. I decided against using the boot strap greebs that came with my kit and printed my own. 40 minutes in CAD and a couple hours later yielded some nice parts: I don't have a picture of it but I created a belt buckle with the same method. My kit didn't come with one so until recently I was without. All I have to do is paint it gray now. I tried bleaching the pouches that I wore in the pics above. No dice. Looks like the material is 100% synthetic so I didn't get even the slightest fade. If it becomes an issue I'll remake them with the multicam fabric I have. I've also begun adding fabric paint to dye my secondary boots white. It's not perfect but they are starting to take on a faded white hue. All in all, I should be ready for submission before the end of the weekend. Quote Link to comment Share on other sites More sharing options...
Heatshock Posted January 24, 2013 Share Posted January 24, 2013 good way to get fade on the pouches - using rattle cans mist white - really tones down the new paint look mist grey - tones down the glaring white mist black - adds nice weather optional - mist brown; tbh I am not convinced it makes a huge difference, but in my mind it does Quote Link to comment Share on other sites More sharing options...
Death Recon Posted January 24, 2013 Share Posted January 24, 2013 Nice build man, looks great. Can't wait to start mine next month Quote Link to comment Share on other sites More sharing options...
LENOX61 Posted January 25, 2013 Share Posted January 25, 2013 Looking Awseome Drew! Keep it up. Quote Link to comment Share on other sites More sharing options...
Drewid Posted April 23, 2013 Author Share Posted April 23, 2013 And finally approved! I've got a few upgrades planned but as of today I am official. CB4237 reporting for duty! And here it is from Wondercon2013 Quote Link to comment Share on other sites More sharing options...
miqt Posted April 23, 2013 Share Posted April 23, 2013 Awesome! Quote Link to comment Share on other sites More sharing options...
Grumpy Posted April 23, 2013 Share Posted April 23, 2013 Love the pic with Commander Gree. Those are always good! **get that gear...dirty...** Welcome to the Swamp! Quote Link to comment Share on other sites More sharing options...
Drewid Posted April 23, 2013 Author Share Posted April 23, 2013 Weathering is part of the upgrade process. I'm planning to at least streak some graphite across parts of the armor for carbon scoring and rub some rusty metal across the straps to stain them a bit. Quote Link to comment Share on other sites More sharing options...
LENOX61 Posted April 25, 2013 Share Posted April 25, 2013 Congratz Drew and welcome to the 41st Elite..........THE SWAMP. B) Quote Link to comment Share on other sites More sharing options...
Drewid Posted April 26, 2013 Author Share Posted April 26, 2013 Thanks brother! Quote Link to comment Share on other sites More sharing options...
Drewid Posted July 22, 2013 Author Share Posted July 22, 2013 And my armor is back in action! After somehow misplacing some small items (chest plate *cough* and back plate/tank *cough cough*) things have been fixed and made troopable again. I'll post up some pics of the repairs once I get them off the phone. But here it is at San Diego Comic-Con! Quote Link to comment Share on other sites More sharing options...
Grumpy Posted July 22, 2013 Share Posted July 22, 2013 Lookin' good Drew! Quote Link to comment Share on other sites More sharing options...
Drewid Posted July 25, 2013 Author Share Posted July 25, 2013 Thanks! It's good to be able to suit up again Now to finish the repairs on the new DC15 long. Quote Link to comment Share on other sites More sharing options...

Recommended Posts
Join the conversation
You can post now and register later. If you have an account, sign in now to post with your account.