Drewid Posted June 24, 2012 Author Share Posted June 24, 2012 Thanks! I was hoping I picked the right color. I'm hosting an armor party today so hopefully I'll have a lot more progress to report tonight. I do have some more pieces painted and the tank topper nearly complete. What is a good paint to use on the rubber belt piece? Will normal spray paint work or will that crack when the piece is flexed? Quote Link to comment Share on other sites More sharing options...
PunkRocketScience Posted June 24, 2012 Share Posted June 24, 2012 Is that the Rustoleum "Fossil" color? Quote Link to comment Share on other sites More sharing options...
Drewid Posted June 25, 2012 Author Share Posted June 25, 2012 It is. I still need to pick up the green and the brown paints for the camo pattern. Quote Link to comment Share on other sites More sharing options...
Grumpy Posted June 25, 2012 Share Posted June 25, 2012 For the "squarish-rectangle" parts of the rubber belt, I used a permanent black marker. I know someone else had found a paint that worked, but I can't remember who it was. I also can't remember what MrBungle had used. (My memory is shot.) On my belt, on the first try, I used a paint that cracked and chipped, and I had to scrape it all off and start over. (Waaaay back in 2009.) People use different things. I found that the marker works best for me. As for the belt, I just left it that grayish-green rubber color. Once some of the pouches are attached, they cover parts of the belt anyway. Quote Link to comment Share on other sites More sharing options...
Drewid Posted June 25, 2012 Author Share Posted June 25, 2012 Thanks Matt! I was thinking of trying plasti-dip on the inside squares. Since that's rubber it should bend, flex, and bond nicely. I hope anyways. I'll definitely keep your suggestion in mind. That would save me a bunch of time. Quote Link to comment Share on other sites More sharing options...
Jimah Posted June 26, 2012 Share Posted June 26, 2012 Marker sounds like a win to me. Great Idea Matt! I also left the grey parts of the belt their original colour. Making nice progress, keep it up! Quote Link to comment Share on other sites More sharing options...
Drewid Posted June 29, 2012 Author Share Posted June 29, 2012 And rescued some pictures from the camera. This weekend will be a marathon session on the armor as I run into the last weekends before SDCC. The back tank is nearly ready for paint. I just need to sand some bondo additions down. I had to notch the indent where the topper goes in order for the greeb to fit. I also boiled the greeb to get it to lay completely flat. I've been picking up various greens for the camo scheme. I can't find anything that seems to match right. How is this combination? Also, does anyone have a recommendation as to how to lay the camo scheme down? Spray painting doesn't appear to work too well without a template. Quote Link to comment Share on other sites More sharing options...
Heatshock Posted June 30, 2012 Share Posted June 30, 2012 the brown looks good, the green is too light. even with a template - the edges of the camo are too well defined I would say hand paint or airbrush with sponging of the edges for the most accurate look. Quote Link to comment Share on other sites More sharing options...
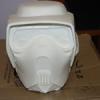
Drewid Posted June 30, 2012 Author Share Posted June 30, 2012 Okay. I'll test out the other greens I bought. They just seemed a little on the dark side. On the helmet, are the notches in the back to be cut out and meshed off as vents or is that optional? Quote Link to comment Share on other sites More sharing options...
Drewid Posted June 30, 2012 Author Share Posted June 30, 2012 I think I found my green: The one on the right seems to match well. Thoughts? Quote Link to comment Share on other sites More sharing options...
Heatshock Posted July 1, 2012 Share Posted July 1, 2012 ooo - to avoid confusion and to confirm this one looks a close match to the washed out look I have a colour more matching Mr B original suggestion, which appears slightly more bold in piccies - both are ok for clearance. Both types of paint schemes are on these troopers standing next to each other was just thinking abt the paint job. you could template the main shape and use rattle cans, as the camo really have quite a spidery look to it rather than rounded. then do a over spray - like you have on the sheet you did your colour tests on! that should give that uneven edge look? Nate Quote Link to comment Share on other sites More sharing options...
Drewid Posted July 2, 2012 Author Share Posted July 2, 2012 Lots of progress to report: The helmet is nearly ready for paint! I just need to work the insides a bit to house the visor lens a little better. I took more pictures of the process I did in case I got around to doing a detailed tutorial (or if anyone wanted one). I had the perfect drill bit for the task to install the visor greebs. I used 3/4" zinc hole covers that will be painted black. The bit is one of those stepper bits. To do the notch at the top of the visor, I found that scotch tape is the perfect width. Cut to to the right lenth, apply, and use that as the template. I think I need to sand it just a little further. The shins have moved to the painting booth: 1.5" painters tape served as my template for the shin straps. Marked the guidelines with a pencil and used a dremel cutting disc to make the initial cuts. I used a small routing bit for tile to widen the gaps a bit to allow enough clearance for the canvas strap. Biceps and tank have received their initial base coast (two layers of silver have already been applied): Quote Link to comment Share on other sites More sharing options...
PunkRocketScience Posted July 2, 2012 Share Posted July 2, 2012 Hey Drew- Looking good! I don't recall seeing the vent holes on the back of the helmet like you have cut them. Do you have a reference photo? Quote Link to comment Share on other sites More sharing options...
Heatshock Posted July 2, 2012 Share Posted July 2, 2012 there are vent holes there - question is - are they REAL holes or just decals like on the TB? see this link in our own gallery - http://forum.bikerscout.net/index.php?app=gallery&image=435 Quote Link to comment Share on other sites More sharing options...
Drewid Posted July 2, 2012 Author Share Posted July 2, 2012 The Mr. B helmet has them as grooved impressions similar to the the front of the snout. I'm going to add mesh to make it black but still allow air through. After going through some other build threads I saw that others had done the same. Worse comes to worse, I have a second helmet kit Quote Link to comment Share on other sites More sharing options...
Drewid Posted July 9, 2012 Author Share Posted July 9, 2012 Coming into the home stretch before Comic-con. I think I'm going to make it. Suit: Check! Belt: Mostly check. It needs some small touch ups and a fastener. Armor: Mostly check. I'm done to the details and fasteners. The back and chest plate get painted as soon as the paint fumes clear in the garage. Helmet: Almost there Remaining ToDo's: Attach bicep greeblies Attach straps and fasteners Apply tint to visor Attach helmet greebs Attach foam supports in helmet, biceps, and shins Finish sewing velcro strips on the cummberbund for the pouches. Anyone have some ideas as to the best way to attach the shoe caps? Quote Link to comment Share on other sites More sharing options...
Jimah Posted July 9, 2012 Share Posted July 9, 2012 Coming along nicely! I used a strap pf velcro and elastic to attach the top of my toe cap to the inside front of my shin armour. The front of the toe is secured to the boot with velcro pads on the boot toe, and velcro strips inside the toe cap. Toe plate and boot, showing velcro strapping: Velcro/elastic strap holding toe plate to shin armour: Quote Link to comment Share on other sites More sharing options...
Drewid Posted July 19, 2012 Author Share Posted July 19, 2012 So I didn't get it finished for SDCC. I had a few crucial bits break at 11pm the day before we left. But I'm almost there. I estimate about 8 to 20 hours total remaining. Biceps: Tank: Knees: Cod piece: Toe caps: Helmet: Pouch vest: What went wrong? Well, I couldn't attach the velcro to the belt or the knee straps. I can't find an adhesive that appears to work with it. The rubber greeblie on the inside of the left bicep also won't attach. Is there a trick to that one? It also doesn't bend enough to form to the contour of the bicep. I may have to fabricate a new part out of ABS. I still have to make the straps for the belt and the back/chest piece. Once I do that those pieces are complete. I made the visor on the helmet just a little too dark so that should be reworked and a new method used to install it. It's riding on my nose and that is fairly uncomfortable. I'm fairly sure that I'll use this helmet as a display piece, though, and build the bikerchick kit I have. I also need to finish the straps for the shins and attach the greebs to that. Then there is the belt buckle. That still needs to be fabbed too. All in all, though, I'm really close. Quote Link to comment Share on other sites More sharing options...
holle Posted July 19, 2012 Share Posted July 19, 2012 No need to hurry man.... don´t take the camo over the greebs they have to be and stay grey as far i can remind that and try to make the ends meet flush....get rid of the glueing excess...It´s worth taking your time in the end result.... measuring! You only have to cut one time and only have to buy one time if you know what i mean..... As Mr. B adviced in his Build Thread first the paintjob on then the Greebs! Keep up your Building Energy mate... Greetings H. Quote Link to comment Share on other sites More sharing options...
Drewid Posted July 22, 2012 Author Share Posted July 22, 2012 The inside view of the left bicep is incomplete. I haven't been able to find a glue that will bond to the rubber greeb that was provided. The only reason the rubber strands adhered is because they got trapped in the epoxy I laid down in the haste to finish before comic-con. Now that its over I can be a little more careful. From the reference images it looks like the outside greeb is supposed to match the color of the rubber strap. That's why I painted it a similar shade of green. This was a mistake made during the pre-con rush. After checking the CRL, it looks like I'll need to paint them all gray. Hopefully I can break the epoxy off and redo them. Quote Link to comment Share on other sites More sharing options...
PunkRocketScience Posted July 26, 2012 Share Posted July 26, 2012 Hey Drew... For the vinyl area on the pants... Did you use the same pattern as for a standard biker scout? Quote Link to comment Share on other sites More sharing options...
Drewid Posted July 26, 2012 Author Share Posted July 26, 2012 No. I eyeballed it from the reference pics. In haste I thought they were two pieces. I just found a screenshot (or at least what I think to be a screen shot) that shows I'm dead wrong. Fortunately I was already planning on redoing it. I was leaning towards goretex although now I'm thinking that 2mm neoprene would look closer. Quote Link to comment Share on other sites More sharing options...
holle Posted July 27, 2012 Share Posted July 27, 2012 Nope Grey textured fake leather... Quote Link to comment Share on other sites More sharing options...
Drewid Posted July 27, 2012 Author Share Posted July 27, 2012 Is that set in stone though? The fake leather patches I currently have look nothing like the screen shot. To me the bunching in that pic looks exactly like what I would get on my wetsuit, right down to the creases. Quote Link to comment Share on other sites More sharing options...
Grumpy Posted July 28, 2012 Share Posted July 28, 2012 The "current" CRL's state that it is a "grey riding patch on the inner thighs." I have seen grey leather, grey pleather, and other materials used. I used grey suede for all of the riding patches that I have made. One was even just plain grey material. I haven't seen anything written in stone about what the material should be made from. Mainly the leather look is a good suggestion. As long as it is as close to the screen character as possible. Remember, we're working with CGI characters. And with the Kashyyyk Trooper, one second it looks tannish-grey and then in the shadows it looks dark grey or some other color. Grey was the agreed upon color for the riding patch. And it is all one piece. (As seen the above "Flying Kashyyyk " screen cap.) Try the neoprene if you like. See how it looks. (Nothing shiny, though. Kashyyyk's don't want to reflect light.) I would say try what you have and post it up. Get an opinion from other people. And the "bunching" in the crotch area happens with any material. It's a real pain in the butt to sew that one-piece riding patch into an area that won't work with you. The material from the pants will want to bunch up underneath the riding patch. Be careful when you sew it on. After you do, move around a bit and do some squats with the Kashyyyk pants on. If the material is bunched too tight, you will pop the seams. It's almost a trial and error. For some people it might work with the first sewing. Just see what happens. And good luck! And Drew, For the bicep greebs, I used grey primer from a spray can. It seems to stay on and flex with the rubber. And I used E-6000 to hold it to the bicep. (Patience comes heavily with the greebs and biceps.) I ended up making my own inner greeb for the left bicep. I made my wife's and my son's out of a couple pieces of craft foam stacked on top of each other to give thickness. And then coat it with the grey primer and it should fill in the seam between the two pieces. Just a suggestion to make things a little easier. Another alternative would be a piece of rubber, say from a sleeve connector for a plumbing project. (Not really sure how to describe that one.) But the rubber greeb that came with the kit really puts up a fight, so I tried something else. Hope this info helps a bit. Quote Link to comment Share on other sites More sharing options...

Recommended Posts
Join the conversation
You can post now and register later. If you have an account, sign in now to post with your account.