Grumpy Posted May 2, 2012 Share Posted May 2, 2012 Does anyone know of a good tutorial for the belt? I did a search for one and couldn't find one. Also, I'm not sure if I'm missing the buckle or not. My kit came with two rectangular silicone pieces that look like they are the size the buckle should be but they are solid. I'll post a pic later today. Right now I've got the bicep armor clamped on one side each. I tried epoxy on Sunday night and that held for all of 2 seconds. I cut a bigger piece of plastic and used Goop last night. I'll test it in a bit to see if it held. For the helmet shroud greeblies, does anyone have a recommendation for alternate parts? The resin ones I have are uneven enough that I'm not sure I can make them symmetrical. Hey Drew, Post some pics of those solid silcone pieces. And the resin helmet shroud greeblies. Maybe with seeing those, I could tell you if you can make them work, or find an alternate piece for them. Plus, post a pic of the belt, and any pieces that might go along with it. Sounds like you might be missing a few pieces. We'll help you get it together. Quote Link to comment Share on other sites More sharing options...
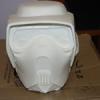
Drewid Posted May 3, 2012 Author Share Posted May 3, 2012 Here we go. I took pictures of all the greebs and some more work in progress. Here are the belt pieces: I'm guessing those are supposed to be made into the buckle. Everything else (minus the knee straps and the left bicep silicone strap. I received two sets of the boot greebs, one in silicone and the other in resin. I began sanding and cleaning up the resin ones. I don't have any plans for the silicone set. The last pic has all of the helmet greebs. The snout greebs are fairly uneven on the back and I'm working on sanding those down. I'm going to take a dremel and try and hollow out the section behind the "grate". The visor greebs aren't bad, but even when cleaned up they won't be crisp like the ones on the TB helmet. And now the progress. Not much since last update. One side each of the bicep armor is done and ready for bondo. I have the other side setting now on one of the biceps. The first pic shows before I removed the clamps from the first round and then moving them to the back side in the second: Quote Link to comment Share on other sites More sharing options...
Heatshock Posted May 3, 2012 Share Posted May 3, 2012 Look up my build for the belt, I think I did some pics of it. Those rectangular grey bits are shoulder tabs. It does look like u are missing the buckle, it should be a smll vac formed piece. You probably could scratch build one? Otherwise, nice progress man. Quote Link to comment Share on other sites More sharing options...
Drewid Posted May 3, 2012 Author Share Posted May 3, 2012 I got a confirmation from Mr B and I do not have the buckle. Does anyone have the dimensions of the buckle? I'm checking to see if he has a spare one to sell but I'm probably going to need to scratch build one. I just found Lonescout's closeup of the belt and that helped a ton. I can fab up a part using ABS and a heatgun without too much difficulty. That also answered my question on how the drop box straps worked. Quote Link to comment Share on other sites More sharing options...
PunkRocketScience Posted May 11, 2012 Share Posted May 11, 2012 Hey Drew- Have you done anything about your pouches? I'm looking to make my own, but the multicam fabric comes minimum 5 yards... WAY more than I will need. Are you interested in taking some of it? Quote Link to comment Share on other sites More sharing options...
Drewid Posted May 14, 2012 Author Share Posted May 14, 2012 I would but I just received my multicam fabric from a surplus store I found online. I bought this: http://shop.vtarmynavy.com/multicam-camouflage-ripstop-cloth-p5226.aspx?utm_medium=cse&utm_source=googlebase Does anyone have a good recommendation for the shin armor straps and the material to make the cummberbund? I went looking at Joann's and I didn't see a match for the fabric. Thanks! Quote Link to comment Share on other sites More sharing options...
Jimah Posted May 14, 2012 Share Posted May 14, 2012 I just used 4cm wide white canvas 'belt' material for the shin straps. For the 'bund I had to shop around quite a bit to get the right texture and colour in the material. Four different material shops, from memory, before I found the best match. I can't remember what the material was called, sorry. But here is a pic: (hope it helps) Hopefully you can see the texture of the material I used and get an idea or two from it. The grey webbing was easy to find, by comparison. I went by the guideline (for the straps on the 'bund) of making sure the webbing straps were 1.5' wide, with 1' between each strap. Hope that helps. Quote Link to comment Share on other sites More sharing options...
Drewid Posted May 14, 2012 Author Share Posted May 14, 2012 Thanks! That's actually a huge help. Quote Link to comment Share on other sites More sharing options...
Guest cypher1 Posted May 22, 2012 Share Posted May 22, 2012 I just cut the lense hole and trimmed the bottom but im actually noticing that the visor is a bit off. The bottom of the visor flares out a bit too much. I will have more progress tomorrow since i have all day to work on it. Quote Link to comment Share on other sites More sharing options...
Drewid Posted May 23, 2012 Author Share Posted May 23, 2012 I have 6 yds of 1.5" natural cotton webbing coming in. I found it at an online store in Seattle. I went to local fabric store and picked up most of the rest of the fabric needed (or at least, what I think I need): For the codpiece: For the cummerbund: The material is upholstery fabric, cotton chenille. I intend to dye it slightly to darken it up but it looks like it should work. I think I need to get slightly larger webbing though. I bought 1" gray webbing. I think I need to bump that up to 1.25". The multicam fabric came in so now I have all the parts I need to finish the suit and pouches (assuming I'm not able to get a set from Grumpy. Those pouches are cool). There is a slight difference in coloration between the pants and shirt but the dye and armor should cover most of that up. The bicep and shin pieces have been put together. When putting the right shin together, I found a huge gap between the front half and the back half. I used a sealing iron and then a heat gun to attempt to reshape it. In the process, I ended up making a mess of it. I'll be doing the bondo work on those this week. I also discovered that the left calf armor is way bigger than the right calf armor. I didn't notice until after getting them all put together and glued. I can get the right piece on even though it can be a tight squeeze. I'll be trimming the return edge a bit just to give me a little more room. I made the expansion pieces as large as I could, too, on the right set without sacrificing the structure. I'm sure it'll be fine. I'll just add more padding to the left set. I also picked up a bolt of gray lambskin for the riding patch. The problem is (and I didn't realize it till after I bought it) that sewing lampskin on might make the pants unwashable. Does anyone has a better idea for what to use for the patch? I was thinking marine vinyl might work but I'm not entirely sure. The next major steps are bondo, bondo, bondo followed by a sanding storm. And then onto fabricating a belt buckle from scratch. I'll also be picking up the Krylon tan to continue painting the chromed pieces. Quote Link to comment Share on other sites More sharing options...
LENOX61 Posted May 25, 2012 Share Posted May 25, 2012 I used grey marine vinyl for my riding patch. It was a pain to sew and you must take your time placing it on the pants. BUT......it is well worth it in my opinion. It shows a leather appearance and it is durable. Here is a picture of my original pants (I have since made a second pair identical to what you see) - Quote Link to comment Share on other sites More sharing options...
Drewid Posted May 28, 2012 Author Share Posted May 28, 2012 I picked up some gray marine vinyl from Jo-Ann's. I think this will work out better, especially since it's machine washable. I should have enough material for 2 sets of patches. Also, I bought some similar, yet different, fabric for the cummerbund. This fabric looks very similar to goretex but is cotton. I'm going to dye it tomorrow to get it to be a nice darkish gray. Unfortunately, I bought the wrong size of webbing for the vertical straps so I'm back on the hunt for that. My cotton webbing for the boots came in and it's perfect! I probably bought way too much but that's okay since I can make the straps for the chest and tank with it. I just got finished resizing and reshaping the biceps. During a test fit they looked way too big so I took about 2" out of them. I had to reshape one with the heat gun. One is gluing right now and the other will be done in the morning (I'm out of clamps). I'm also tearing the left shin apart tomorrow to resize that one. And then... bondo! Quote Link to comment Share on other sites More sharing options...
PunkRocketScience Posted June 13, 2012 Share Posted June 13, 2012 How's the build coming Drew? You gonna make it before SDCC? Quote Link to comment Share on other sites More sharing options...
Drewid Posted June 13, 2012 Author Share Posted June 13, 2012 I've been making progress and taking pictures. Problem is those pictures are still trapped on the camera. Hmmm, quick summary: -Both biceps and one shin piece have been bondo'd and require sanding. -The other shin piece still needs to be reshaped. -I started taking the pockets off the BDUs -I have a complete set of pouches now (many thanks to Grumpy!) -I'll be putting the silver coat of paint onto the chest plate today. -I'm having a small armor party at my house on Sunday. I expect many things to get finished then Major items remaining: -Boots. I'm worried the Crow boots aren't going to be done in time so I'm going to need to buy some temp boots until he's finished. -Camo painting the armor. I'll be picking up the base paint this weekend. -Straps and fasteners. -Cummerbund. I have all the material for it. Dyeing it tonight. Sewing next week. -Helmet visor. I'm going to hit an auto store in the next couple of days to find some green window tint. Otherwise I'll order some online. Minor issues: -The gloves. I have a pair of Grumpy's but it's going to be a very tight squeeze over the sleeve. I can barely get them on over my skin. I'll probably need to redo them at some point. ETA: Still should be good to go for SDCC! Quote Link to comment Share on other sites More sharing options...
comm tech Posted June 13, 2012 Share Posted June 13, 2012 I've been making progress and taking pictures. Problem is those pictures are still trapped on the camera. Hmmm, quick summary: Minor issues: -The gloves. I have a pair of Grumpy's but it's going to be a very tight squeeze over the sleeve. I can barely get them on over my skin. I'll probably need to redo them at some point. ETA: Still should be good to go for SDCC! I had the same issue, but I have a friend that works with leather , and he stretched it out by almost 1/2" for me and no damage to the leather. It now fits pretty good, still a little snug, but not like a second layer of skin, like it was before. Quote Link to comment Share on other sites More sharing options...
Drewid Posted June 14, 2012 Author Share Posted June 14, 2012 I got the gloves to fit tonight. After I finished removing all of the pockets on the arms and the velcro straps at the wrists of the shirt, the gloves fit fine. So, that's a plus. I think the insulation might become a bit too much over time though. I ordered what I hope will be the final set of straps required to finish the cummerbund. I also ordered a set of backup boots. Those items should be coming in next week. Quote Link to comment Share on other sites More sharing options...
Heatshock Posted June 16, 2012 Share Posted June 16, 2012 another trooper well on the way the other thing you could do - the gloves are gautnlet style and come up quite high, you could cut off the sleeve mid way up your fore arm! pics!! Nate Quote Link to comment Share on other sites More sharing options...
Drewid Posted June 17, 2012 Author Share Posted June 17, 2012 I picked up the rubber bungee straps for the forearms today and same spray paint for the camo colors. Two of the three paints I got are off. One is questionable. That being the base coat. It's a great khaki but I don't think it's quite right for this. I think I'm going to track down the Rustoleum Fossil that Darren recommended as a comparison. But here's a test shot of it: Yay! Pouches! Quote Link to comment Share on other sites More sharing options...
Drewid Posted June 22, 2012 Author Share Posted June 22, 2012 My backup boots arrived yesterday. I'll use these until my CROW boots come in. The test fit worked out okay. I've got the rubber bungee straps for the forearm armor: The cotton strap for the boots: And two types of straps for the cummberbund. I wasn't able to determine what would look best from the website so I ordered both. I also have two types of fabric for it. I just need to decide which one I like best once I add some black dye to them to darken them up. Quote Link to comment Share on other sites More sharing options...
PunkRocketScience Posted June 22, 2012 Share Posted June 22, 2012 What are you doing for the toe caps? Are those included with the Mr. B armor? Quote Link to comment Share on other sites More sharing options...
Drewid Posted June 22, 2012 Author Share Posted June 22, 2012 Yes, the toe caps were included. Mine are currently painted silver and just waiting for the can of base coat to arrive. Quote Link to comment Share on other sites More sharing options...
Drewid Posted June 22, 2012 Author Share Posted June 22, 2012 Here's a test shot of the biceps, shins, boots, and caps: And another part in progress: 1 Quote Link to comment Share on other sites More sharing options...
Drewid Posted June 23, 2012 Author Share Posted June 23, 2012 The paint came in yesterday. The test square looked close enough so I laid down the base on the smaller pieces. How does this look? Quote Link to comment Share on other sites More sharing options...
LENOX61 Posted June 24, 2012 Share Posted June 24, 2012 Lookin' good Drew. Quote Link to comment Share on other sites More sharing options...
Grumpy Posted June 24, 2012 Share Posted June 24, 2012 Looks good! Quote Link to comment Share on other sites More sharing options...

Recommended Posts
Join the conversation
You can post now and register later. If you have an account, sign in now to post with your account.