mrbungle Posted December 30, 2010 Share Posted December 30, 2010 it looks just a hair darker but i would think it will work. the main thing is to get the UK KT's to use the same colors so when you troop together , you match, same thing i am trying to get done here in the states. Quote Link to comment Share on other sites More sharing options...
Fettski Posted December 30, 2010 Share Posted December 30, 2010 What if UK KT's are with the US KT's? Onlookers will be so confused...... Just kidding Looks pretty good Darren. You might be able to use a Green wash that is just a tad lighter and with the weathering it might end up spot on. You are taking your time and trying plenty of options, I'm sure the end result will be great. Quote Link to comment Share on other sites More sharing options...
darren1970 Posted December 30, 2010 Author Share Posted December 30, 2010 Thanks for the fast replies guys. I believe that Skip and Nathan (heatshock) have gotten paint matched to your origional sample, so mine should be almost identicle after weathering etc. Now the part I'm looking forward to........it's camo time Quote Link to comment Share on other sites More sharing options...
Fettski Posted December 30, 2010 Share Posted December 30, 2010 any work on your pouches or your gloves? You are planning to get a LSFU cummerbund right? Quote Link to comment Share on other sites More sharing options...
TB4952 Posted December 30, 2010 Share Posted December 30, 2010 What if UK KT's are with the US KT's? Onlookers will be so confused...... Just kidding Looks pretty good Darren. You might be able to use a Green wash that is just a tad lighter and with the weathering it might end up spot on. You are taking your time and trying plenty of options, I'm sure the end result will be great. Nahhh you would tell us apart cause we would keep our buckets on !!!!!!!! :lol: Quote Link to comment Share on other sites More sharing options...
darren1970 Posted December 31, 2010 Author Share Posted December 31, 2010 Nahhh you would tell us apart cause we would keep our buckets on !!!!!!!! :lol: LOL, you naughtly boy Dan Update: Started on the camo ( boy it's fun ). This is my first green layer. I ended up using a flat, stiff bristled brush and 'dabbing it around the shape of the camo pattern to get a 'feathered' edge. I'm leaving it to dry for a few hours, then gonna start putting some brown on it. Darren Quote Link to comment Share on other sites More sharing options...
mrbungle Posted December 31, 2010 Share Posted December 31, 2010 looking good. you have the idea on the camo, i used brushes and sponges. Quote Link to comment Share on other sites More sharing options...
darren1970 Posted December 31, 2010 Author Share Posted December 31, 2010 looking good. you have the idea on the camo, i used brushes and sponges. Phew....that's a relief. Cheers Tom Update. I've added a brown layer. What do you guys think? More green or brown? Can I also wish you all a Very Happy 2011 and thank you guys for the warm welcome, the motivation and the superb advice. Darren Quote Link to comment Share on other sites More sharing options...
mrbungle Posted December 31, 2010 Share Posted December 31, 2010 very cool. yeah your camo looks good, because you are doing in the style of the movie. the camo colors look like they kinda of spider out instead of blobs. happy new years to you too, man. you did a great job on the helmet. Quote Link to comment Share on other sites More sharing options...
LENOX61 Posted January 1, 2011 Share Posted January 1, 2011 Darren, that is lookng totally Awesome. Keep it up bro............KEEP IT UP!!!! Quote Link to comment Share on other sites More sharing options...
darren1970 Posted January 1, 2011 Author Share Posted January 1, 2011 Update 1st Jan. Enjoyed the camo stage soooo much I decided to do some dry brush weathering, add the hinge and aerator greeblies and the decals. I think it's almost finished. Can't decide if I need more weathering? Darren Quote Link to comment Share on other sites More sharing options...
mrbungle Posted January 1, 2011 Share Posted January 1, 2011 maybe a hair more, but don't over do it. looks nice. Quote Link to comment Share on other sites More sharing options...
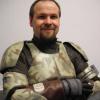
darren1970 Posted January 2, 2011 Author Share Posted January 2, 2011 OK a few changes made. Dan Cooper ( who has a KST cleared in the UKG ) has the inside of his KST visor base + camo, not black like mine, so I've camo'd my visor to match. Added a little more black weathering ( I'd rather do a bit at a time than do too much first time around ). I think it's lookin OK ( note: the camera and lighting have washed it out a little - it's much grubbier than it appears ). Also this is still the test lense material, not the proper stuff. Next I'm gonna tackle the back tank and chest piece. Darren Quote Link to comment Share on other sites More sharing options...
mrbungle Posted January 2, 2011 Share Posted January 2, 2011 very cool!!!!! Quote Link to comment Share on other sites More sharing options...
Fettski Posted January 2, 2011 Share Posted January 2, 2011 Also this is still the test lense material, not the proper stuff. What are you going to use for a proper lens? Camo like great. Quote Link to comment Share on other sites More sharing options...
TB4952 Posted January 2, 2011 Share Posted January 2, 2011 Looking good Daz Looks like the pinstripe below the lense needs to be raised up higher into the reces that is there on both sides and the Black logo only needs to be on the left side of the visor Quote Link to comment Share on other sites More sharing options...
mrbungle Posted January 2, 2011 Share Posted January 2, 2011 4952 is right. bring the stripes up into the littel indention below the viser rim. Quote Link to comment Share on other sites More sharing options...
darren1970 Posted January 3, 2011 Author Share Posted January 3, 2011 Okay, will raise the pin-stripes up a touch ( bugger, I've laquered over them too ) Filled and sanded the back tank, ready for paint and managed to get the chest, filled, smoothed and painted. Darren Quote Link to comment Share on other sites More sharing options...
darren1970 Posted January 3, 2011 Author Share Posted January 3, 2011 Update... Pinstriping corrected and logo removed from the right side of the visor. Darren Quote Link to comment Share on other sites More sharing options...
TB4952 Posted January 3, 2011 Share Posted January 3, 2011 "Much More Better" Quote Link to comment Share on other sites More sharing options...
LENOX61 Posted January 3, 2011 Share Posted January 3, 2011 SWEEET! Quote Link to comment Share on other sites More sharing options...
Grumpy Posted January 5, 2011 Share Posted January 5, 2011 Looking real good, Darren! Quote Link to comment Share on other sites More sharing options...
mrbungle Posted January 7, 2011 Share Posted January 7, 2011 starting to look like a kashyyyk troooper!! Quote Link to comment Share on other sites More sharing options...
Heatshock Posted January 9, 2011 Share Posted January 9, 2011 soz darren back from teh dead now hmmm nice progress, man you are quick!! I have done up to the chrome phase, and just masking for the dark grey (think I am working inside-out and you are working outside-in for the silver bits?) btw - what are you doing to your boxes? I know you got Dmitiris foam boxes; and I am sure Chad did too. There was a another discussion on here (skip started it I am sure?) abt cloth coverage on the boxes (as are Tom's). Was just wondering what are you gonna do with yours? Mine are actually made of cloth, and was gonna paint on em Quote Link to comment Share on other sites More sharing options...
darren1970 Posted January 9, 2011 Author Share Posted January 9, 2011 I may stretch some cloth over the foam boxes to give them some texture before I paint em' Quote Link to comment Share on other sites More sharing options...

Recommended Posts
Join the conversation
You can post now and register later. If you have an account, sign in now to post with your account.