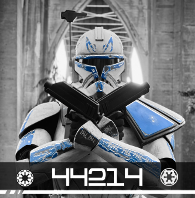
Infern0 Posted April 8, 2022 Share Posted April 8, 2022 Howdy all! CC/TK-44214 aka Garrett here from Cloud City Garrison. Spurred on by how awesome @MikerScoutlooks, I've set my sights on a Remnant Scout as my next build. I'll also be doing a concurrent build of one of Brian Matyas' concept Remnant TKs, since they share chest/back and cummerbunds, so this should be fun! So far here's what I've collected: Helmet: WTF Armor: WTF TIE Flight Suit: MonCal Gloves: Wampawear (the gloves are so good I might buy a second pair for snowboarding) Rucksack (punching bag): p37 bag from www.worldwarsupply.com and Rothco XL belt from Amazon. - Rank bar/greeblie on front will be made by me. Light covers for rank bar from Allied Electronics: https://www.alliedelec.com/product/rs-pro-by-allied/7452584/70827507/ Blaster: 3D printed from @MrPoopie's sweet, sweet files Still to come: Cummerbund: Making myself with a lot of questions to be asked of everyone Boots: Still haven't figured that out yet... Probably uppers made by myself and boot base as of yet undecided. Looking forward to posting pics and shenanigans soon! Cheers, Garrett 1 Quote Link to comment Share on other sites More sharing options...
BikerScout007 Posted April 8, 2022 Share Posted April 8, 2022 Hey Garrett! Welcome to the forum, trooper! I've bumped you up to 501st Access. Just an FYI -- although the series did use WTF armor, the helmet was an EFX. And our CRL model used a Kropserkel. @StephTrooper made the boots for the TV show and she said she used Ozark and Kingshow boots. 2 Quote Link to comment Share on other sites More sharing options...
Infern0 Posted April 9, 2022 Author Share Posted April 9, 2022 On 4/7/2022 at 5:39 PM, BikerScout007 said: Hey Garrett! Welcome to the forum, trooper! I've bumped you up to 501st Access. Just an FYI -- although the series did use WTF armor, the helmet was an EFX. And our CRL model used a Kropserkel. @StephTrooper made the boots for the TV show and she said she used Ozark and Kingshow boots. Thank you!! Stoked to be here. As far as the helmet goes, I’m definitely not in the financial position to seek out an EFX helmet, and the WTF helmet was only $100 more than the armor so I went for it with the thinking that I could always sell it if needed. Will it not be Lancer level approvable? Thanks for the heads up about the boots too! I’m actually tempted to get one of Steph’s boot kits as well… We’ll see how the build goes. I’m putting together my Joann fabrics shopping list. I know the pouches are white duck cloth, what do you recommend for the cummerbund? Just any smooth cotton calico type fabric? Cheers! Quote Link to comment Share on other sites More sharing options...
Aradun Posted April 10, 2022 Share Posted April 10, 2022 Hey Garrett! Welcome! Excited to see your build and if you have Mikerscout in your corner you’ll be in great hands.For the Kingshow boots, I used https://www.amazon.com/dp/B017THAWAO/?coliid=IICGVXFJ7GZ90&colid=17ZNF8WW4QACN&psc=1&ref_=lv_ov_lig_dp_itFor the cummerbund is usedhttps://www.joann.com/sateen-solids/5970074.htmlI picked up 2 yards, and was able to make 3 bunds. One for practice, one for my ROTJ and one for my JFO. I used the following for batting in the cummerbund and cod:https://www.joann.com/fairfield-poly-fil-project-fleece-81inx96in-full-size-batting/15954084.html#q=poly-fil%2Bproject%2Bfleece&start=1For the pouches:https://www.joann.com/jo-ann-stores-duck-canvas-fabric/2136323.htmlOthers may chime in with alternative options, but as you’re going to Joann’s, I thought this might be helpful. 1 Quote Link to comment Share on other sites More sharing options...
Infern0 Posted April 10, 2022 Author Share Posted April 10, 2022 @AradunFF That’s all super helpful!! Thank you! Quote Link to comment Share on other sites More sharing options...
Infern0 Posted April 15, 2022 Author Share Posted April 15, 2022 Fabric ordered and trimming has started! I’ve been staring at @TKZombie’s fantastic reference stills and watching RS Propmasters videos on building a scout to figure out how much to trim where since the WTF trim lines are a bit hit and miss. Not looking forward to the tank which will be coming up soon. I’ve trimmed all I can by hand, and moving to the cold garage to continue with the ol dremel. Pre trimming pic from the warm couch: Quote Link to comment Share on other sites More sharing options...
MikerScout Posted April 19, 2022 Share Posted April 19, 2022 Nice! You're going to have a lot of fun with this build!! I put together my pouches and bund from patterns I got from these forums then changed them up a bit to work with the mando scout. I used a LOT of ideas and tricks from "Christina's build". I really liked how she set up her torso to come apart and her cod piece. I used her weathering technique too only instead of two paint colors I only used one. If you have not checked out her build I highly recommend it!! http://forum.501stpathfinders.com/index.php?/topic/21567-scout-trooper-the-mandalorian-approved-christinas-build/ I wish I had gone with WTF's armor as that is what was screen used. Kudos to you on that!! For trimming just work your way in a little at a time. Get it all roughed out. As you build it you may find that you need to go more. baby steps, remember you can't put it back on once you cut it off lol. Do you have your marine vinyl yet for your boots? If you need help with anything feel free to reach out. 2 Quote Link to comment Share on other sites More sharing options...
Infern0 Posted April 19, 2022 Author Share Posted April 19, 2022 Thank you @MikerScout! I’m definitely going off of Christina’s Build for a lot of tips. Was debating doing either her cod idea or going fully screen accurate and just sewing it into the bund… I’m still waiting on my fabric to arrive though, so no immediate hurry to decide. I don’t have my marine vinyl yet though. I decided to wait to sus out my boots until everything else was done. Any tips? Quote Link to comment Share on other sites More sharing options...
Infern0 Posted April 19, 2022 Author Share Posted April 19, 2022 …and I’ve definitely been going baby steps with trimming. I’m a little unsure how much to take off of the sides on the chest, as each on screen trooper seems to have something different from what I can tell. Any thoughts? Also, going very slowly on the tank, just trying to figure out the fit before I take any more off: … and the topper is ready for a little bit of filler and then painting: Quote Link to comment Share on other sites More sharing options...
MikerScout Posted April 19, 2022 Share Posted April 19, 2022 I really like having the bund separate for a couple reasons. 1. It adjusts independently of the bund so you're always getting a solid fit. 2. You can take only the cod off if you're crafty which is great for going to the bathroom . I went with the ozark trail boots myself. They are fairly comfortable and are screen accurate. You will need to paint/weather the visible part of the sole to make the CRL "one color" requirement. A little krylon camo sand color and your weathering paint nails it. Making the boots is quite fun, at least I thought so. I wish I had gone a half or full size bigger than what I normally wear though for ease of getting in and out of them. Also, I think as the vinyl shrinks a little it tightens things up. Get your tank attached then start mocking up the sides to your body. I used some 2" painters tape to attach things together. I had my wife mark with a pencil then cut a little bit with the Dremel sanding drum. refit it, re-marked, re-cut... wash, rinse repeat, until I got it good. You really need your soft parts to final fit your armor though as it all works together. If you look at the bottom of page 2 of my build you'll see what I mean. It's a good exchange between fitting and advice from the armorers here. 1 Quote Link to comment Share on other sites More sharing options...
Infern0 Posted April 20, 2022 Author Share Posted April 20, 2022 Good points on the cod… hmm, I’ll have to give it some more thought. I’m definitely looking forward to doing the boots. Steph’s tutorial was fun to watch, and it didn’t look too complicated as long as I get the right dimensions for everything. I’ll grab the Ozark Trail boots too I think. Did you get yours from Walmart? Tank trimming is coming along slowly, but I’m getting closer. What did you use to hold the finished tank on? I was debating doing the ROTJ method, but actually cutting holes in the back piece to thread the strapping through so it’ll be hidden. Quote Link to comment Share on other sites More sharing options...
Infern0 Posted April 20, 2022 Author Share Posted April 20, 2022 Also, obligatory soft goods photos: Wampawear gloves that are so darn comfy MonCal flight suit Rucksack 1 Quote Link to comment Share on other sites More sharing options...
Infern0 Posted April 26, 2022 Author Share Posted April 26, 2022 Ok, I’ve been slowly working away at the fit of the tank... I think I’m getting there? Could make the bottom of the left side lay a little more flat maybe, but once I get it attached to the back plate I think that’ll pull it into position. Any feedback so far? Thanks! 2 Quote Link to comment Share on other sites More sharing options...
Infern0 Posted April 26, 2022 Author Share Posted April 26, 2022 Also, I’m painting the tank topper and other greeblies… -There is definitely no white circle, but just confirming if there is a red stripe or not? It’s kind of hard to tell- EDIT: what I was supposed to be saying here was: “I’m looking through some reference screenshots, and it’s quite hard to tell if the toppers actually had red stripes on set or not.” Painting so far: Quote Link to comment Share on other sites More sharing options...
Aradun Posted April 26, 2022 Share Posted April 26, 2022 The CRL is your best friend Garrett 😉. If you don’t have a copy handy, make sure to print one out. No white dot, but the red line detail is specified for the tank topper. https://databank.501st.com/databank/Costuming:Scout-Trooper-The-Mandalorian Also, I haven’t seen Steph’s video tutorial for the boots, but Cheesewhoopy’s boot tutorial does a great job of showing you how to measure things out. Give it a look. 1 Quote Link to comment Share on other sites More sharing options...
Infern0 Posted April 26, 2022 Author Share Posted April 26, 2022 1 hour ago, AradunFF said: The CRL is your best friend Garrett 😉. If you don’t have a copy handy, make sure to print one out. No white dot, but the red line detail is specified for the tank topper. https://databank.501st.com/databank/Costuming:Scout-Trooper-The-Mandalorian Also, I haven’t seen Steph’s video tutorial for the boots, but Cheesewhoopy’s boot tutorial does a great job of showing you how to measure things out. Give it a look. Ah, awesome thank you! I’ll definitely check out the tutorial. I was super tired when I wrote that though… my question was supposed to be more curiosity if they actually painted red stripes on the tank toppers on set or not. I haven’t slept much this week 😂 Quote Link to comment Share on other sites More sharing options...
Infern0 Posted May 18, 2022 Author Share Posted May 18, 2022 Not a lot of progress here to report so far. It ended up taking nearly two and a half weeks for my order from Joann's to arrive, but I finally got the duck cloth and cotton sateen for the pouches and bund! First, finished tank fitting, got the topper painted up and rivet in place, and did a test fit of the chest and back sans cummerbund, and it just looks a little too big to me. I think I need to take 1/4" off each side of the shoulders to raise it up a little, and maybe 1/2" off of the chest sides. I'll get better pics and another test when I get the bund done though (and take a lint roller to my flight suit!). Any feedback so far? Next, pouches! I hadn't done any sewing in over a year, but I drafted patterns using @BikerScout007's awesome tutorial (link for posterity): The pouches came out pretty well. They're not perfect, but with the weathering you'll never know! https://imgur.com/C4WCfT Three!? Yep, one with a belt attachment for my concept Remnant Stormtrooper as well. Finally, got the bag built, and is just awaiting an Earl Grey bath to weather (apologies for the colored lighting). I found that for the rank bar, the rivets that I had to take out of the belt to make the shoulder strap seemed to be a perfect match for the rivets on the side. Not sure if that's the kosher way to do it, but I think they came out looking pretty well. I used a dremel to cut off a little section of the belt buckle to make the "nail head" in the white square too. Ya know, reduce, reuse, recycle! Removing rivets from my test belt: Quote Link to comment Share on other sites More sharing options...
Chopper Posted May 18, 2022 Share Posted May 18, 2022 Hey Garrett, The WTF armor kit is one of the larger scout kits out there, but it's also the armor they used in the Mando tv show, so it'll work. That said, it doesn't look inordinately oversized on you. I think you should hold off on trimming the shoulder bridges for now, but I do agree that you could take a little off of the sides of the chest armor. Check the screenshot below. I would also look at trimming down the bottom edge of the chest armor a bit as well to match the reference shot. 1 Quote Link to comment Share on other sites More sharing options...
Infern0 Posted May 18, 2022 Author Share Posted May 18, 2022 19 minutes ago, Chopper said: Hey Garrett, The WTF armor kit is one of the larger scout kits out there, but it's also the armor they used in the Mando tv show, so it'll work. That said, it doesn't look inordinately oversized on you. I think you should hold off on trimming the shoulder bridges for now, but I do agree that you could take a little off of the sides of the chest armor. Check the screenshot below. I would also look at trimming down the bottom edge of the chest armor a bit as well to match the reference shot. Sounds good, will do all of the above. Thank you! 1 Quote Link to comment Share on other sites More sharing options...
MikerScout Posted May 19, 2022 Share Posted May 19, 2022 This is coming out great, I love it! 1 Quote Link to comment Share on other sites More sharing options...
Infern0 Posted October 18, 2022 Author Share Posted October 18, 2022 Between Celebration, other Cons, and house renovations over the summer, I ended up taking a rather longer hiatus from working on this than I’d intended, but I’m back on it and starting to make some progress again! I’ve been working towards getting the helmet done before it’s too cold out to spray paint it, but this WTF bucket is proving a little more challenging than I thought it would be. I feel like I’m getting close though - Just trying to figure out how the wide the visor is supposed to be so that it’s wide enough for the helmet back, and narrow enough for the face plate so I can get the two halves joined up. Any tips or tricks for getting everything to line up? I’m getting close, but still have some work to do. Also, any advice on sizing for the Ozark Trail boots? Looks like Walmart doesn’t have my size any more, so I’ll have to buy them off of ebay. Quote Link to comment Share on other sites More sharing options...

Recommended Posts
Join the conversation
You can post now and register later. If you have an account, sign in now to post with your account.