mrbill8128
-
Posts
135 -
Joined
-
Last visited
-
Days Won
7
Everything posted by mrbill8128
-
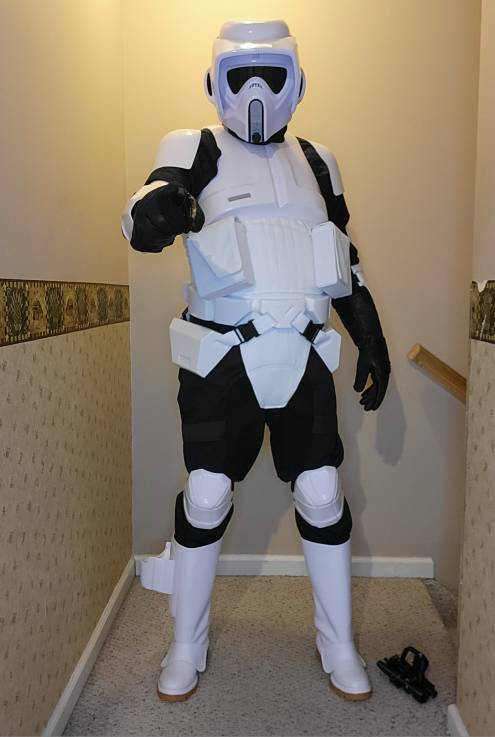
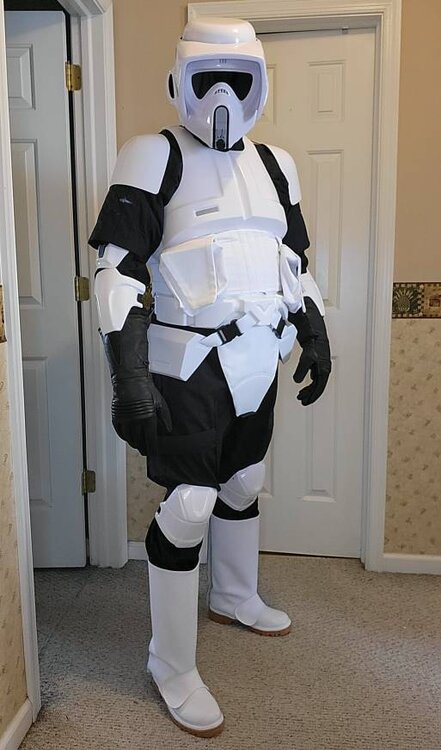
Well, I'm almost ready to send in submission pictures. I attached all of the anchoring velcro, and the boot stretching is underway. I'm sure that I'll have mods to do as I go, but I plan to get this finalized in the next few days [emoji6]. Sent from my SM-G990U2 using Tapatalk
-
Will do. If not, no big deal as it wasn't expensive [emoji6] Sent from my SM-G990U2 using Tapatalk
-
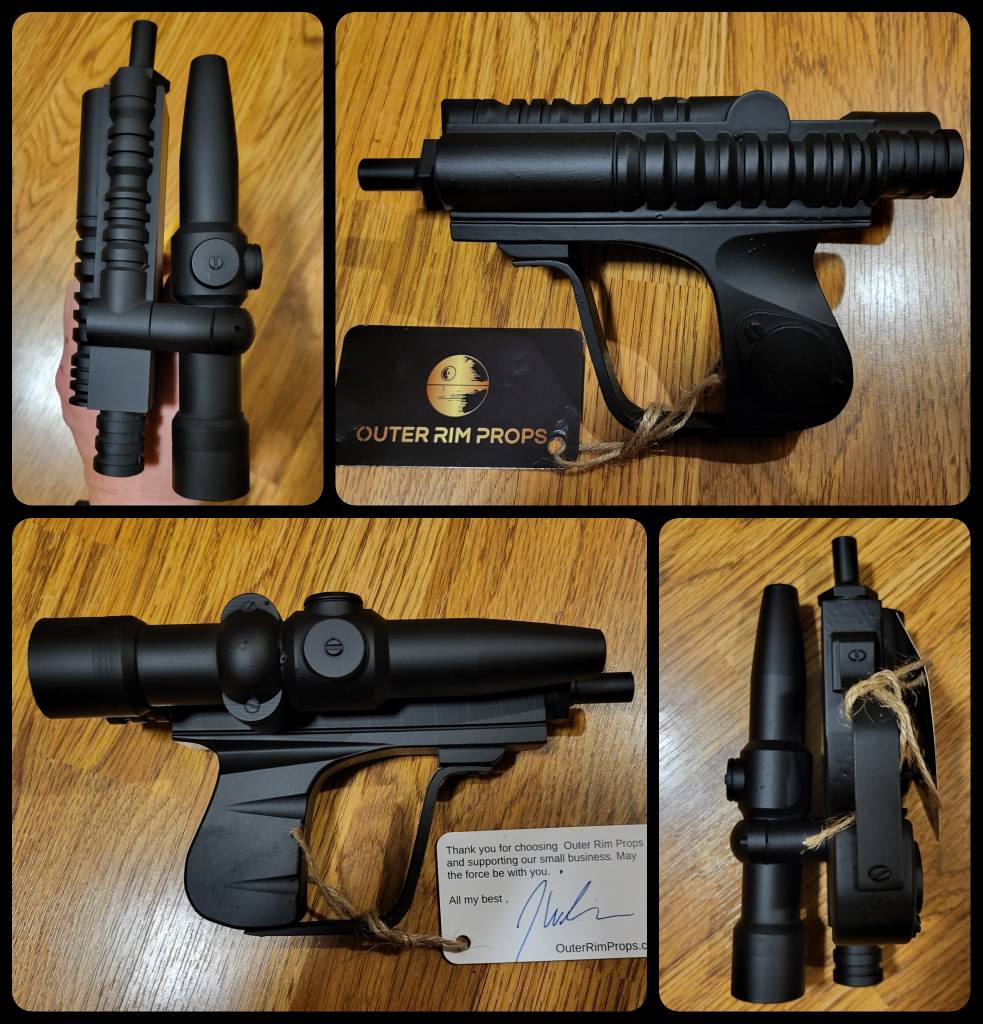
I'm busy adding all of the velcro to secure the armor pieces, but in the meantime, I got a new blaster [emoji6]. Sent from my SM-G990U2 using Tapatalk

-
Bill, now YOU are the one moving in hyperspace! Nice work.
-
Sometimes you just get lucky!
-
I'll eventually post this in the trade forum once I achieve full access here. My hope is to submit for approval in the next couple of weeks. I see that there was a run of ROTJ Scout related merchandise offered last year. Out of curiosity, are there any such items still floating around? Once I'm approved, I'd love to see what was offered!
-
I'm going to attempt to stretch the boots a bit over the coming days. Once that's done, I have plenty of e6000 on hand
-
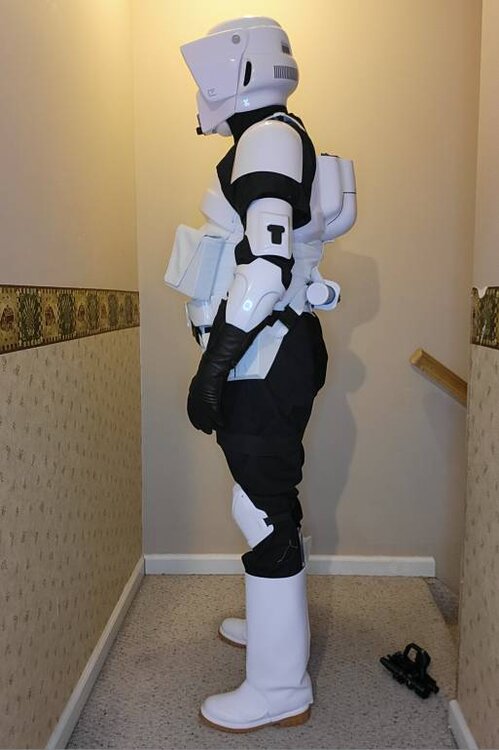
By way of comparison: Sent from my SM-G990U2 using Tapatalk

-
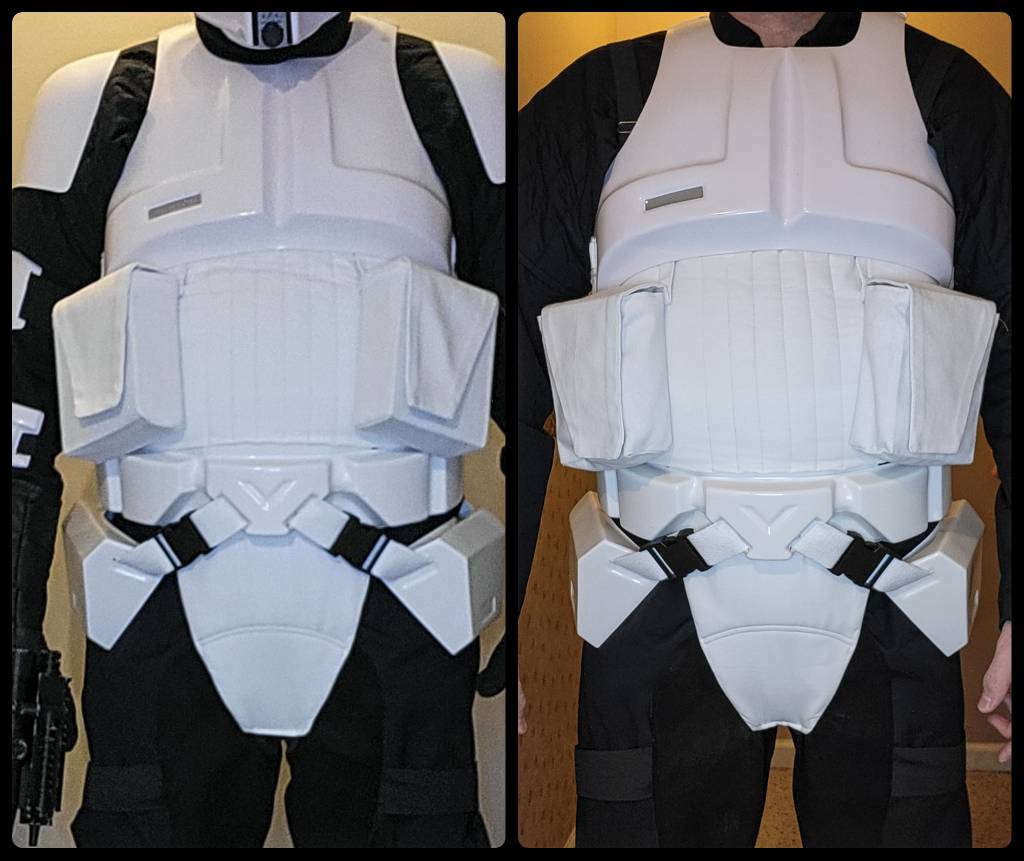
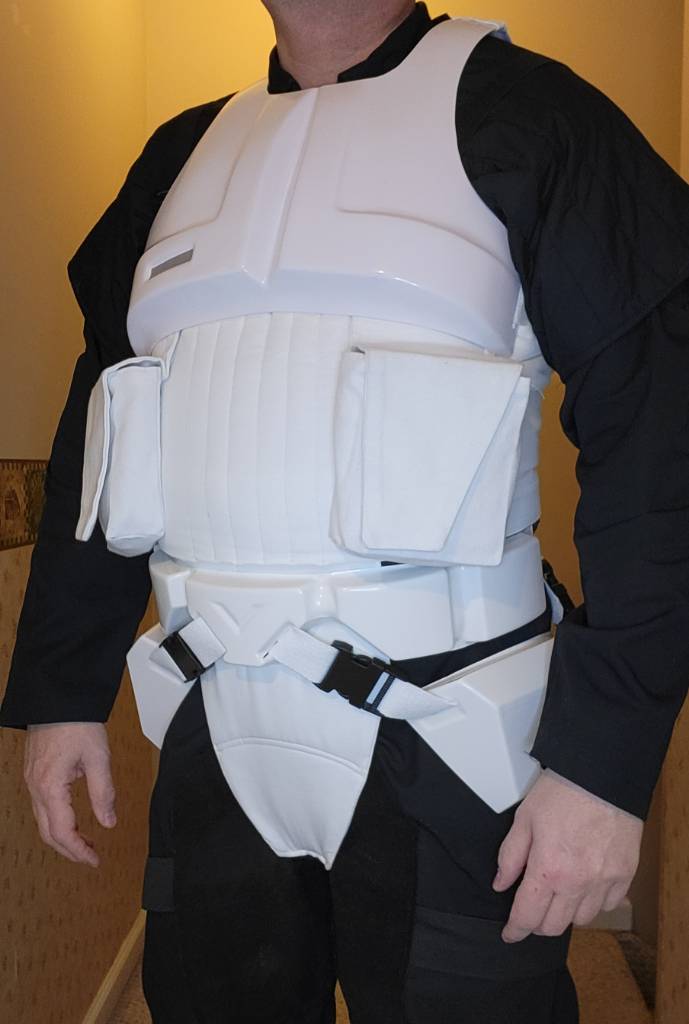
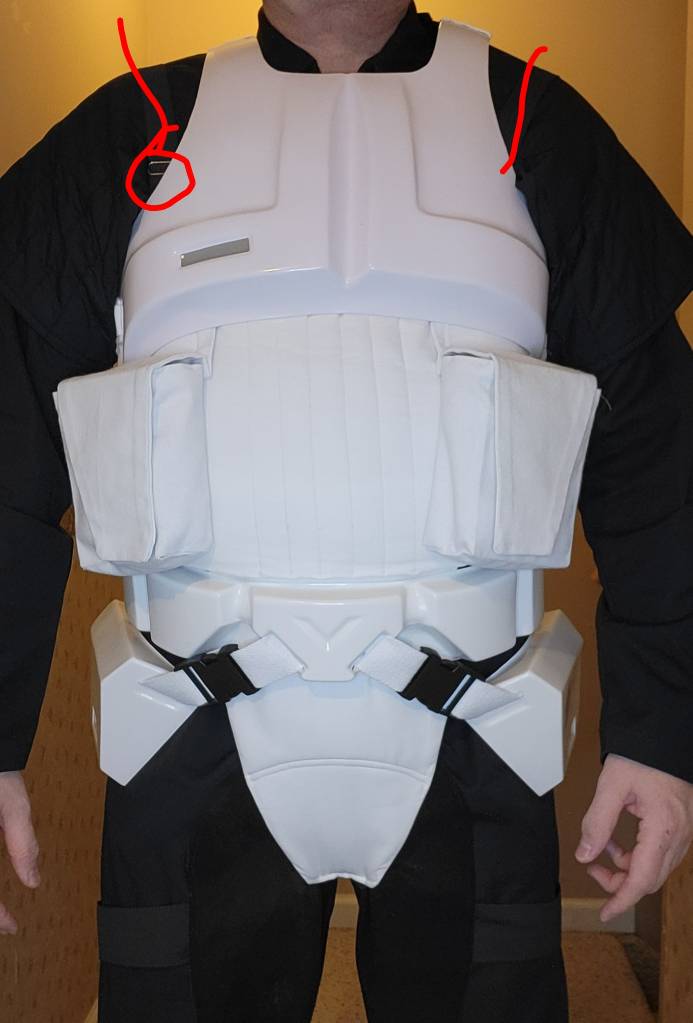
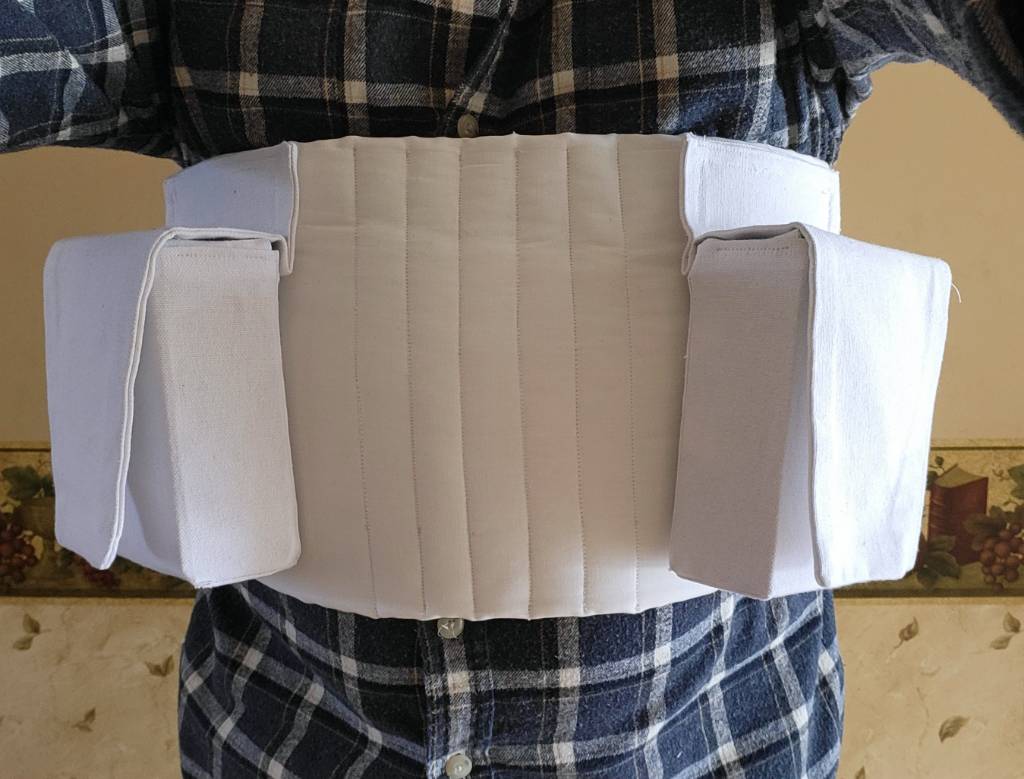
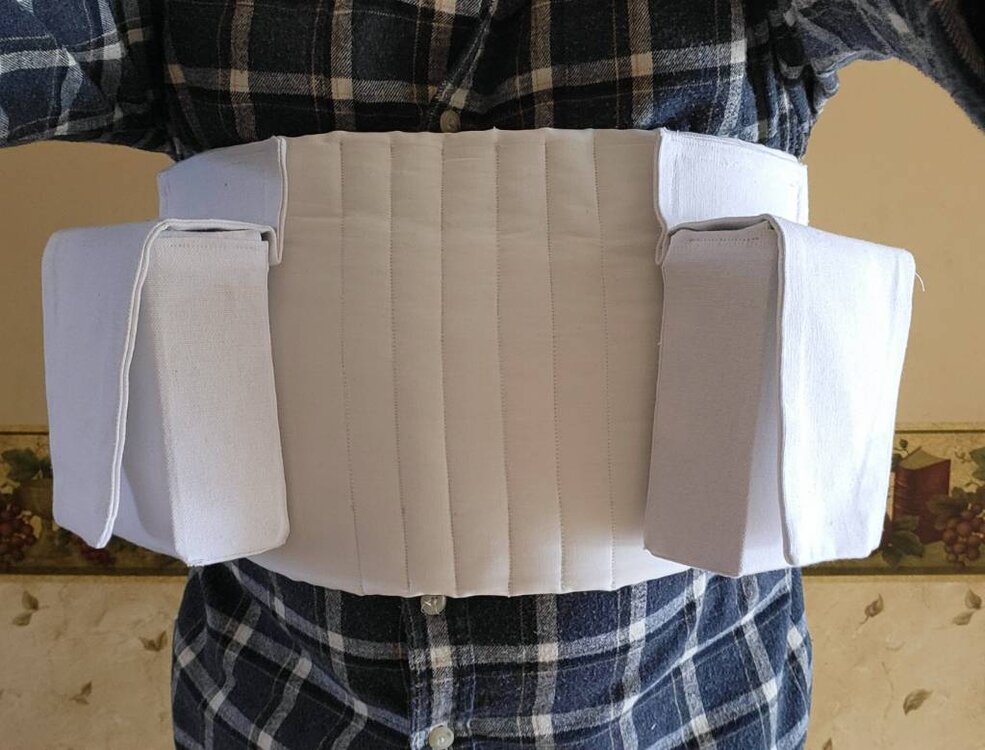
The adjustments never end! I like how things are sitting much better now. Part of the issue is the curvature of the bottom edge of the chest piece. I'll make due with it for now. Do the pouches sit better? Obviously, you can see the suspender straps here. I'll probably reverse them so the adjustment clip is in the back. I'm also moving them closer to the center in the front and back. I might even criss cross them. Sent from my SM-G990U2 using Tapatalk


-
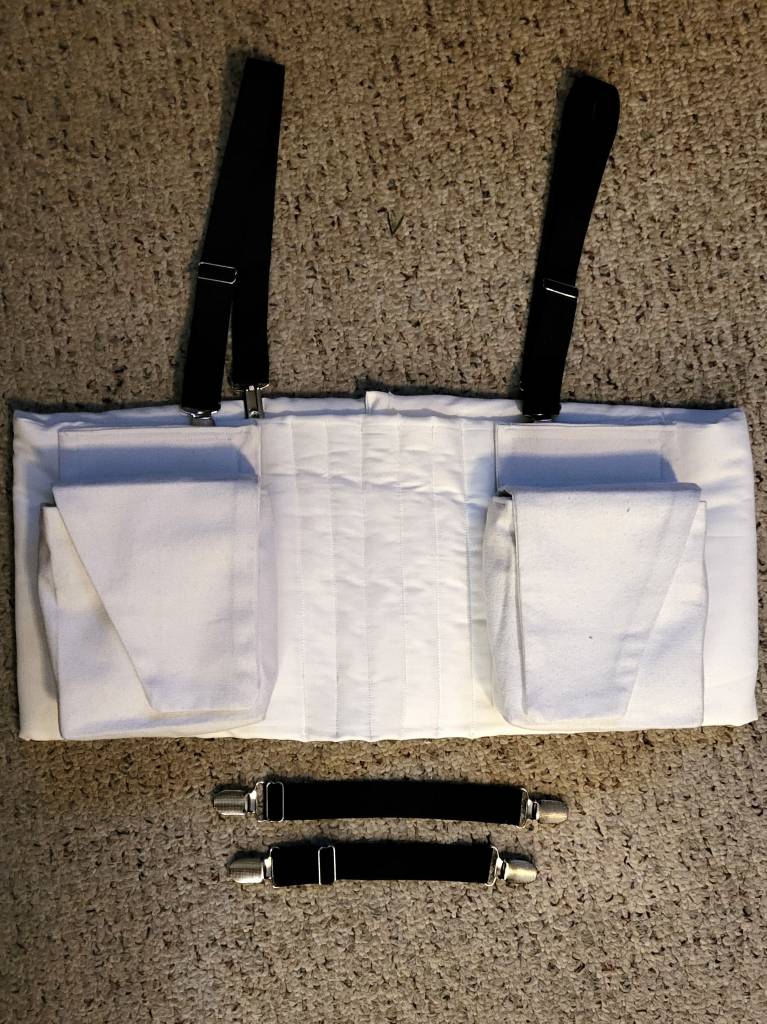
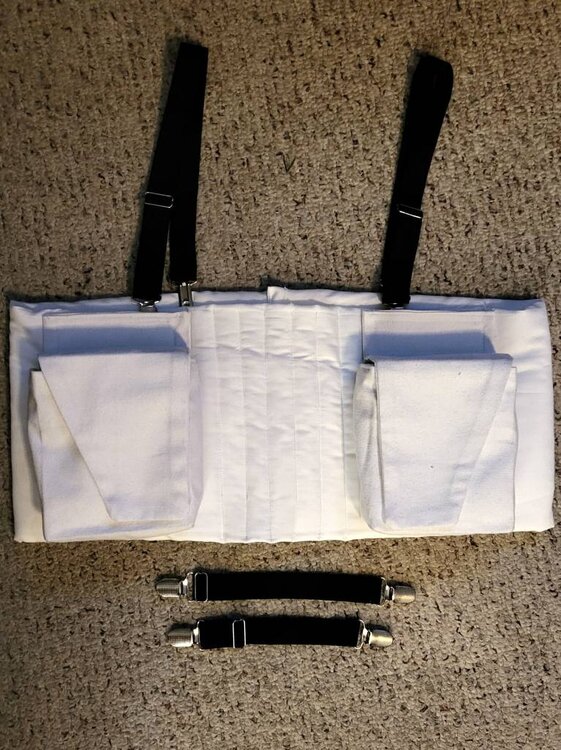
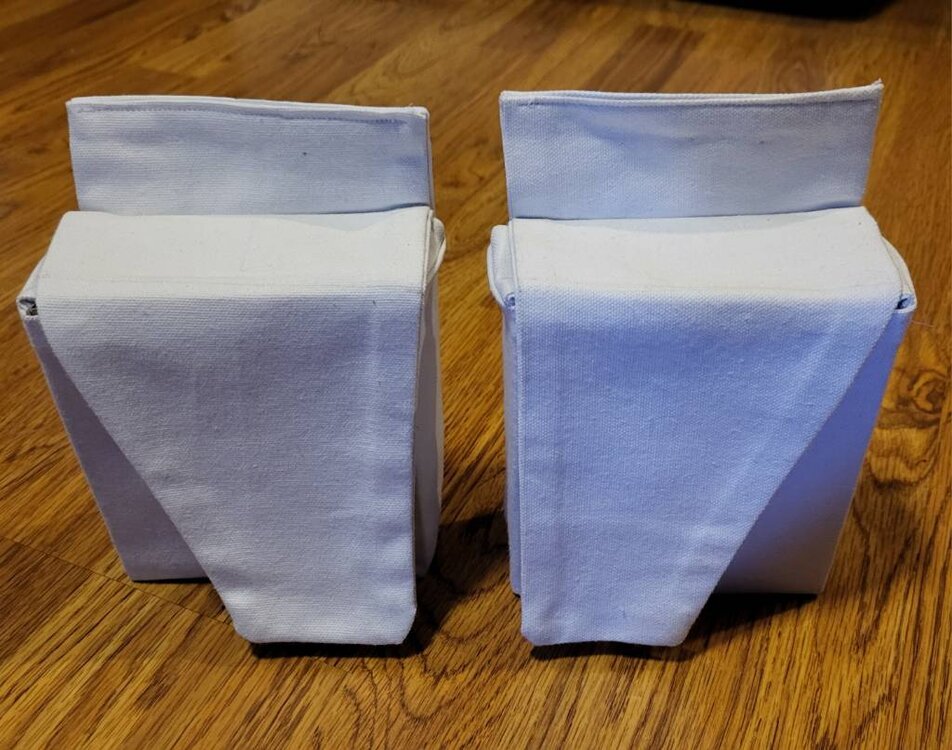
Based on Chopper's comment and the recommendation of my GML, I took out the stiff pouch liners and just added some batting to get that full, yet natural look. Next, I made some suspenders for the cummerbund. Trooping as a TK and lots of other cosplays has taught me the value of suspenders. So I cut up some pant leg fasteners, measured some 1 inch webbing, and made suspenders build for the bund. This way, it's position isn't dependent on the vest. I'll let you know how it works [emoji6]. Sent from my SM-G990U2 using Tapatalk
-
Keep up the great work my friend. We'll be defending Carida against those pesky Ewoks in no time! Sent from my SM-G990U2 using Tapatalk
-
I had the same thought. Sent from my SM-G990U2 using Tapatalk
-
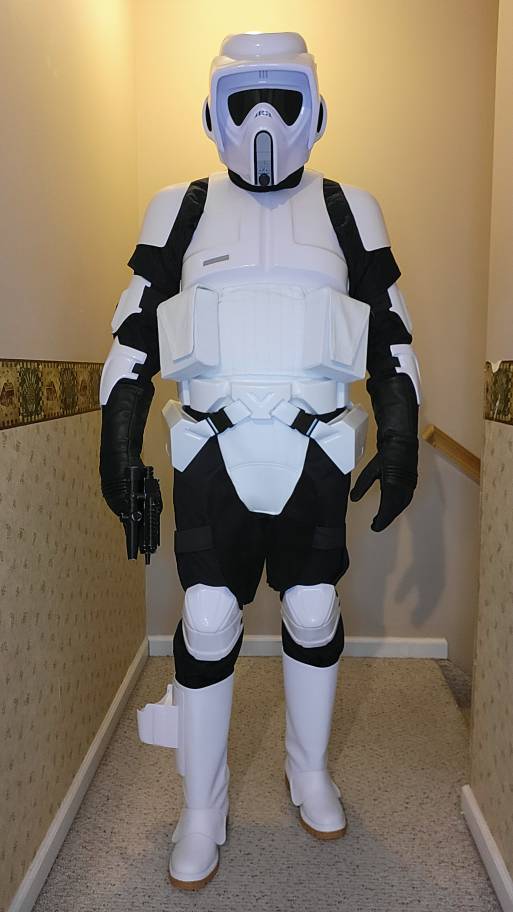
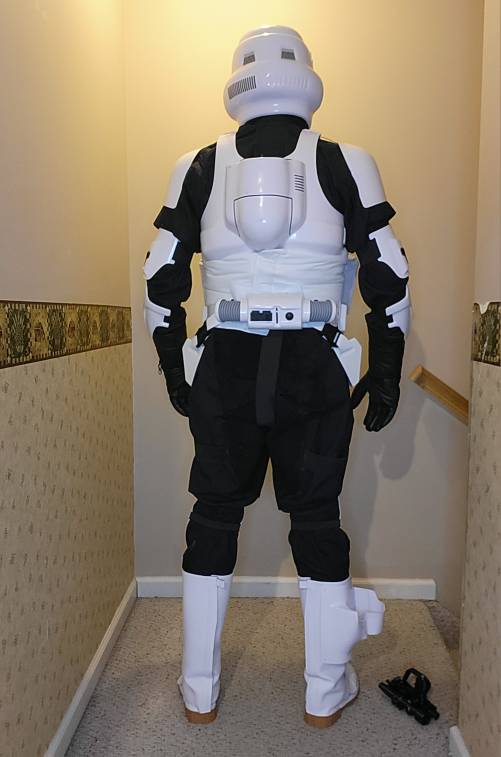
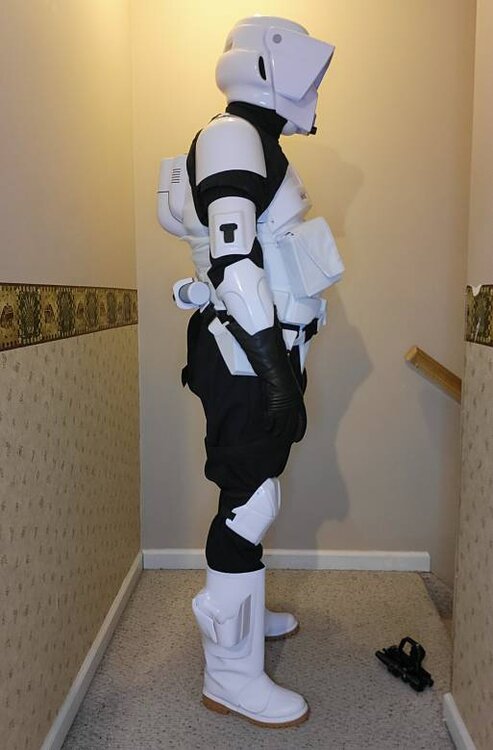
And a few more: Sent from my SM-G990U2 using Tapatalk


-
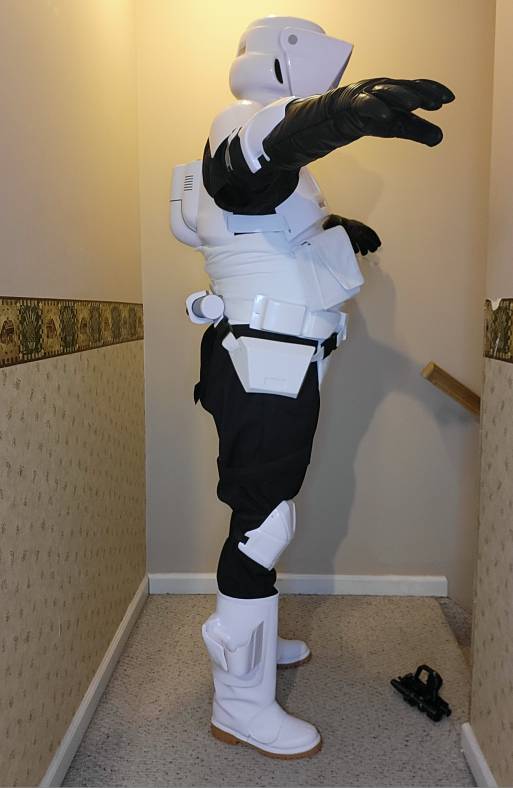
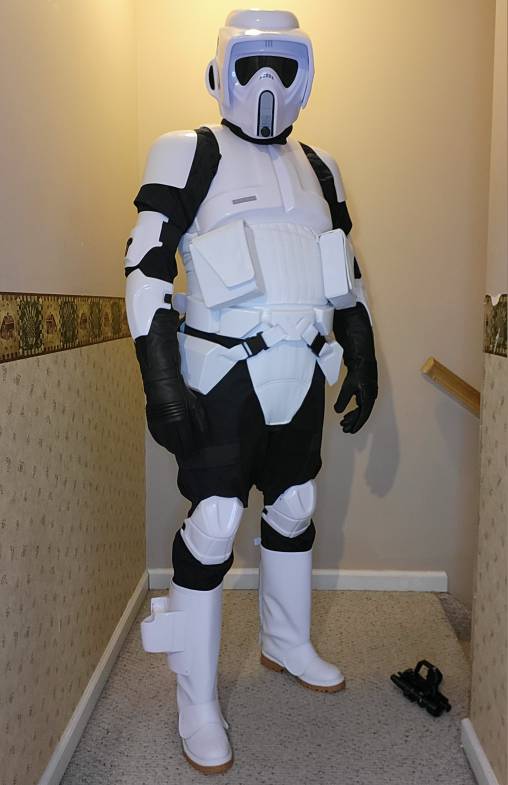
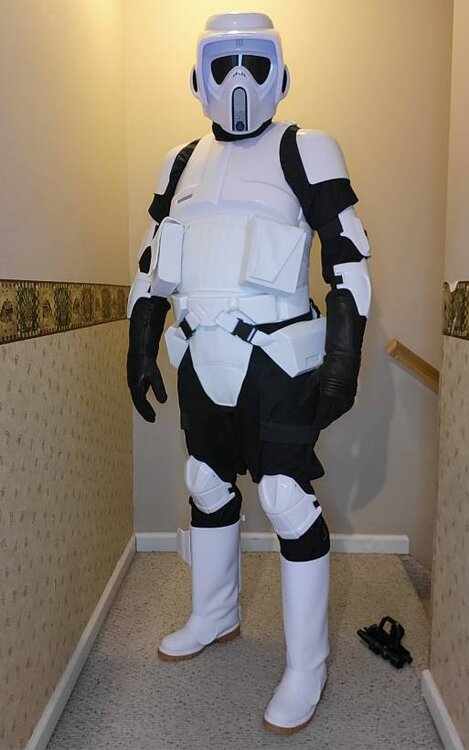
Ok gang, these are NOT submissions photos. I still need to anchor the cummerbund and physically bolt the holster to the boot. I'm waiting to see if I can successfully stretch these, or if I need bigger ones. In the meantime, let me know your thoughts. Sent from my SM-G990U2 using Tapatalk


-
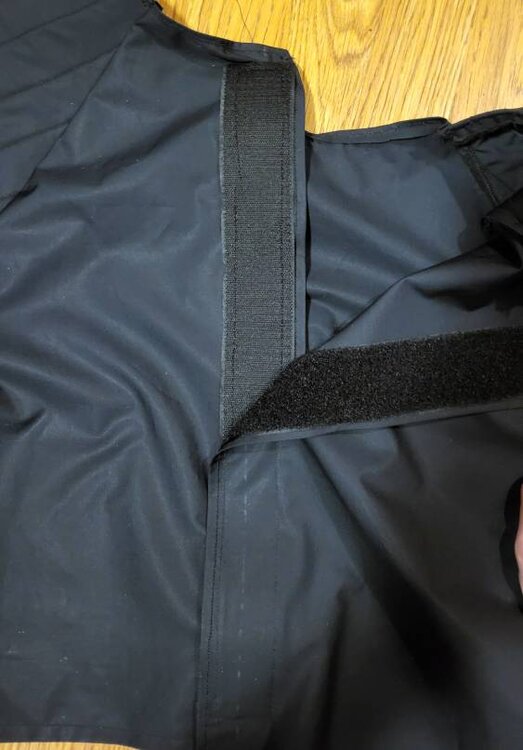
Velcro added to the cummerbund and pouches. Sent from my SM-G990U2 using Tapatalk
-
Vest sleeves are trimmed and hemmed based on yesterday's suit up. Hopefully a little adjustment while suited up does the trick. I also made cardboard inserts for the pouches. They will crush eventually but can be easily replaced. Sent from my SM-G990U2 using Tapatalk
-
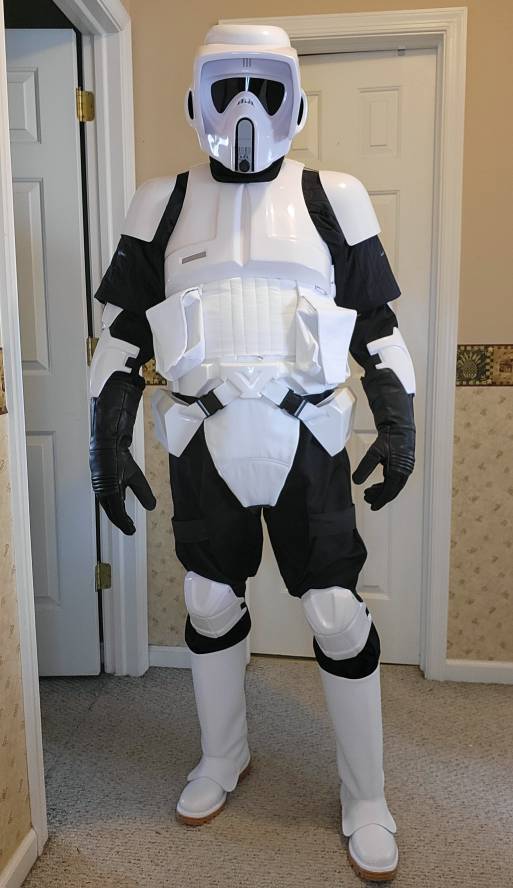
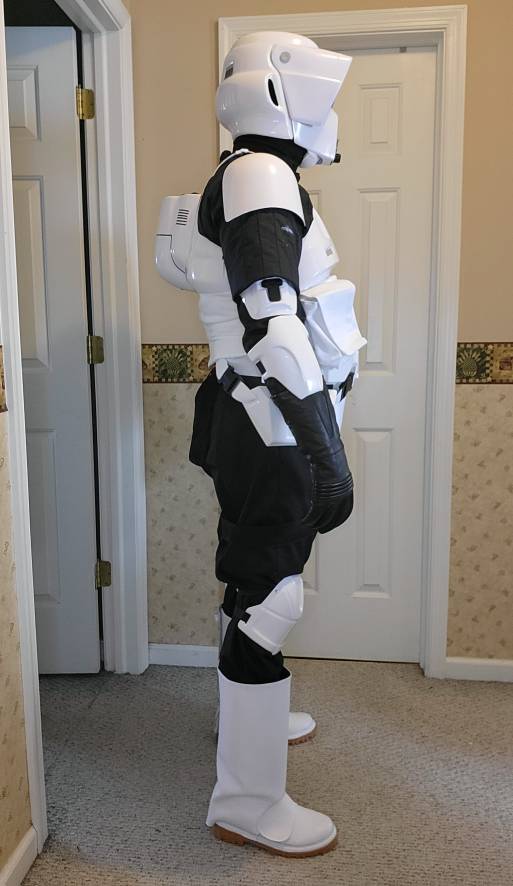
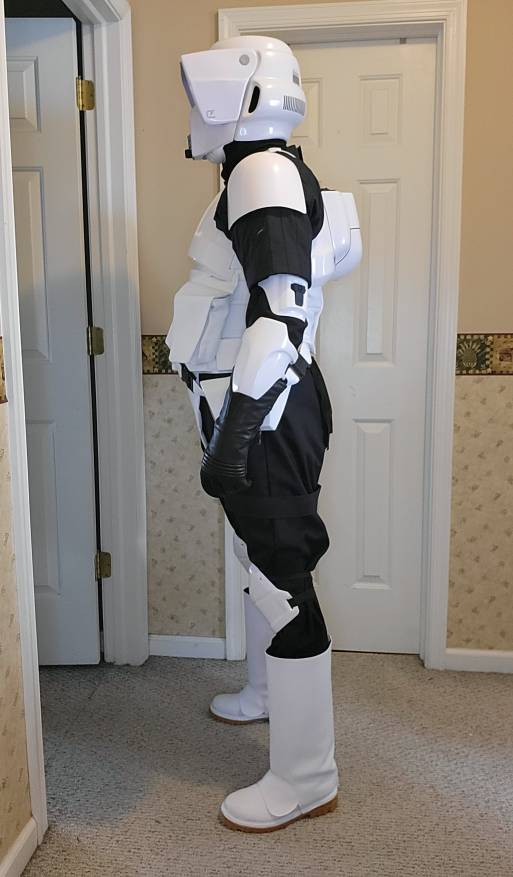
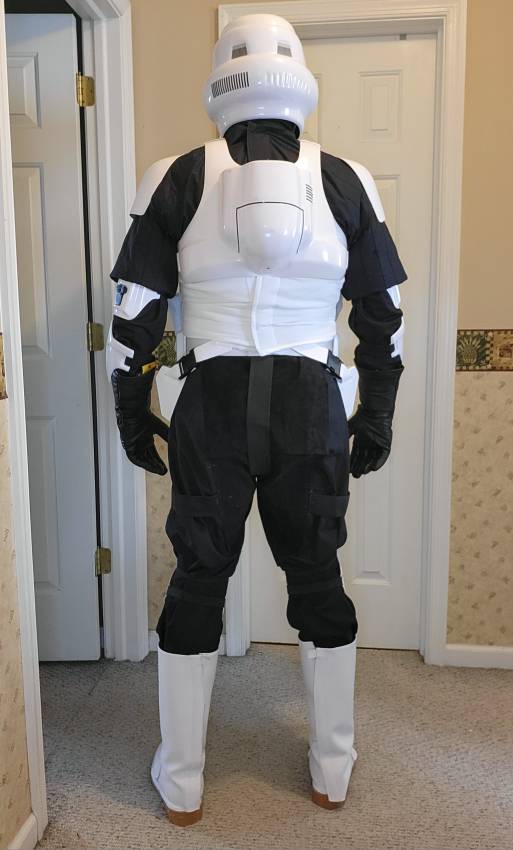
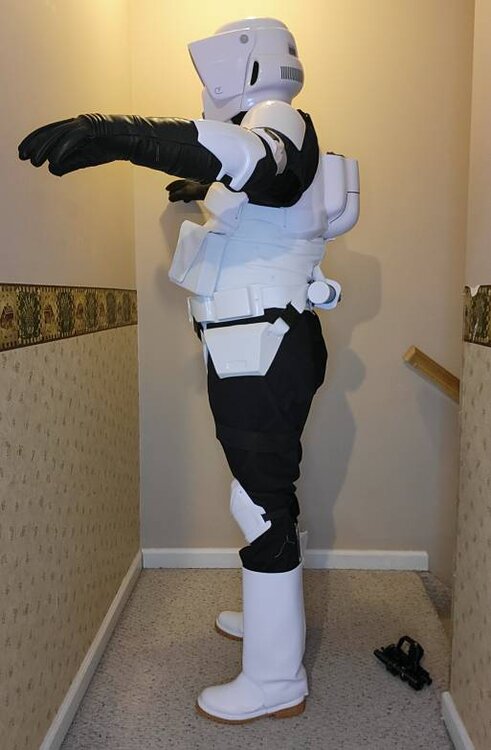
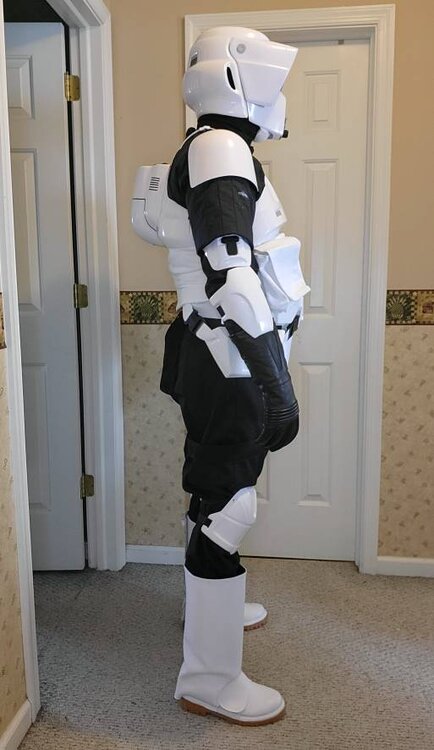
There's still a lot that I need to accomplish here, but I'm down to details at this point. This was a suit up just to get a look. Nothing is in final position. I still need to cut and hem the vest sleeves, anchor the pouches and start adding velcro. But it's coming along nicely. Sent from my SM-G990U2 using Tapatalk


-
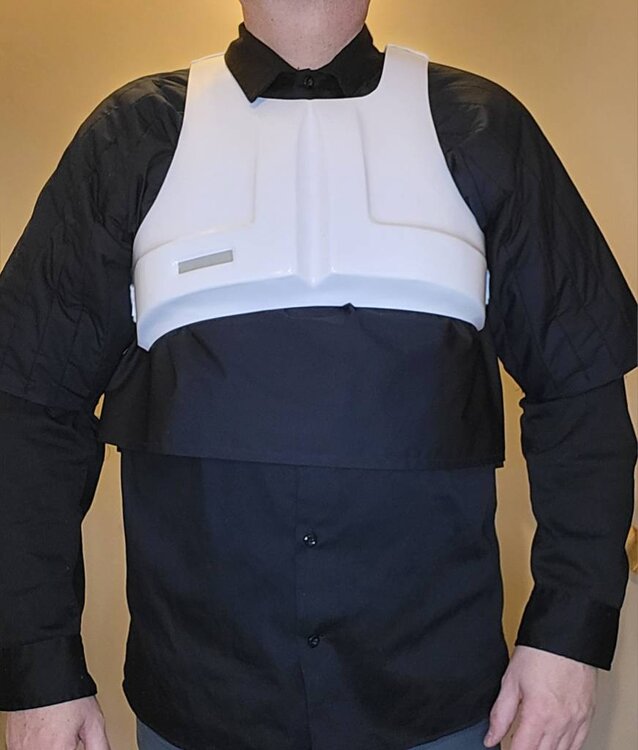
Will do! This is just a black work shirt I had nearby to test the vest [emoji6] Sent from my SM-G990U2 using Tapatalk
-
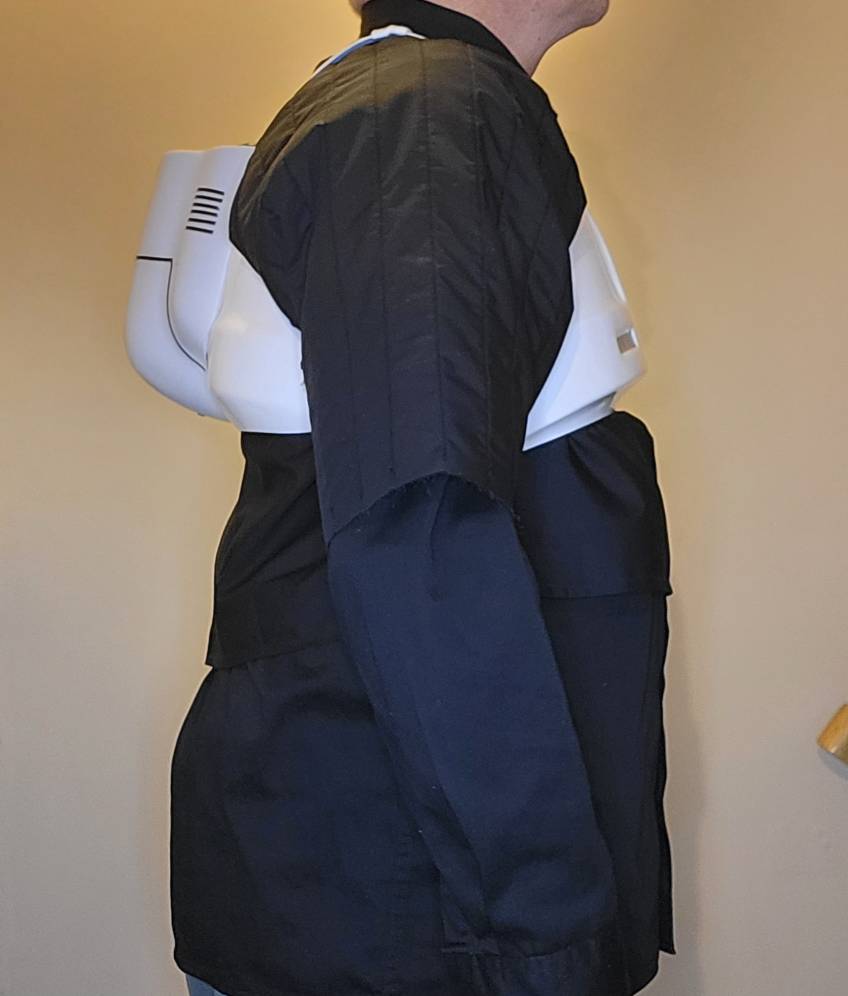
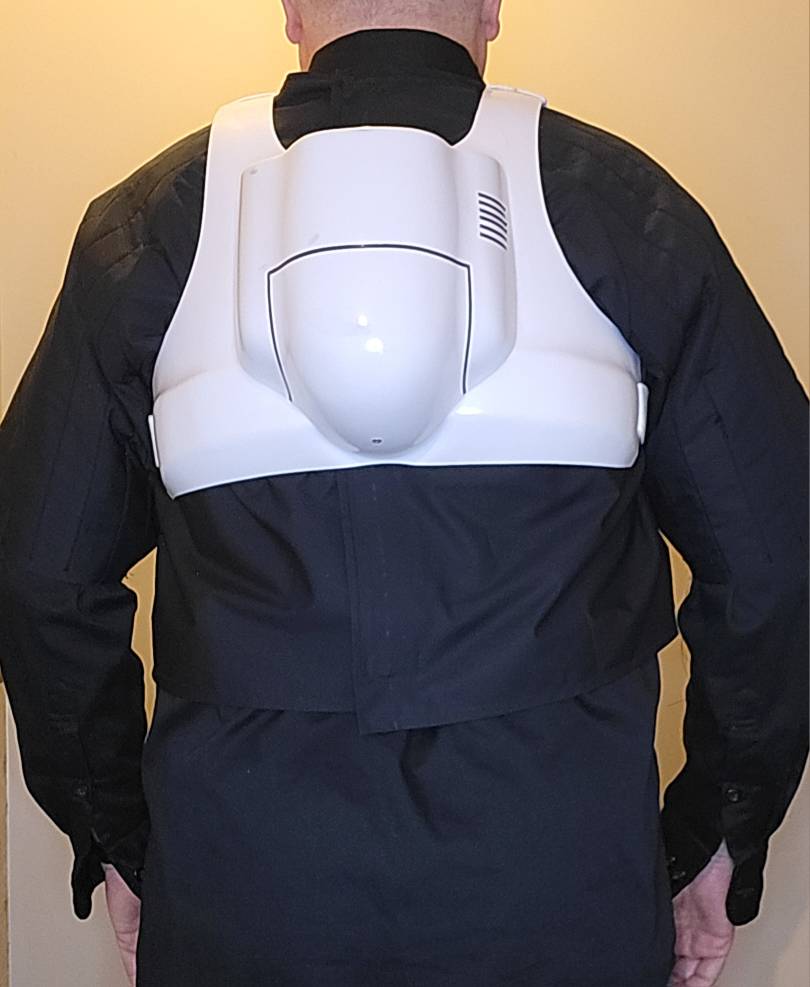
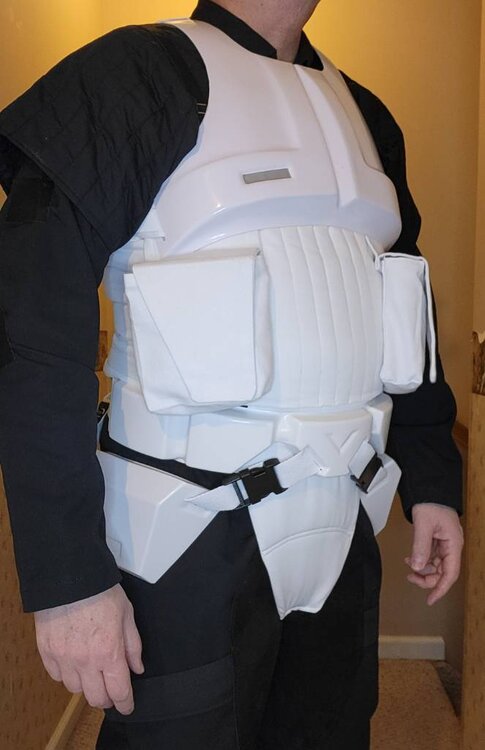
And with the chest/back armor: Sent from my SM-G990U2 using Tapatalk


-
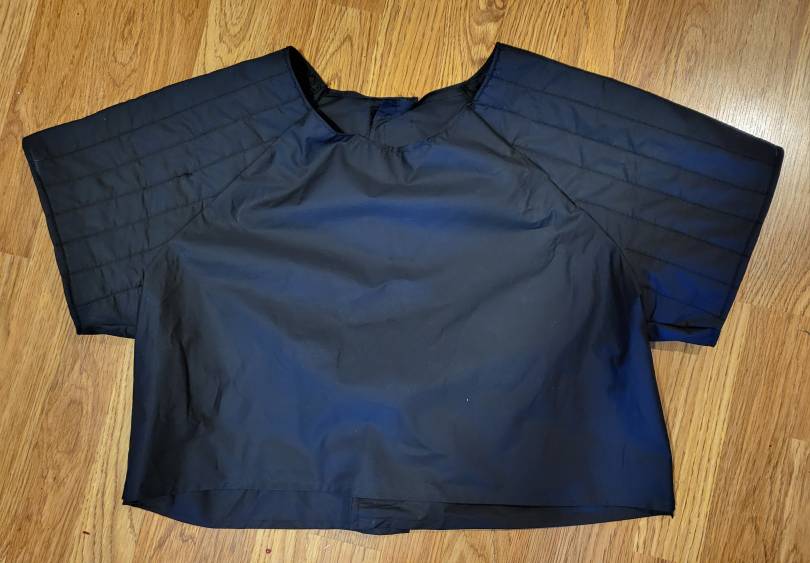
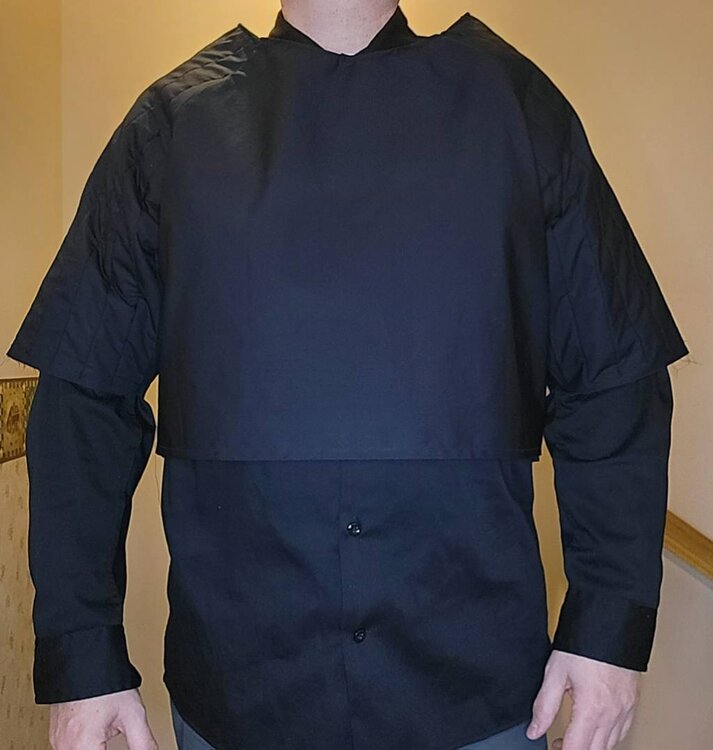
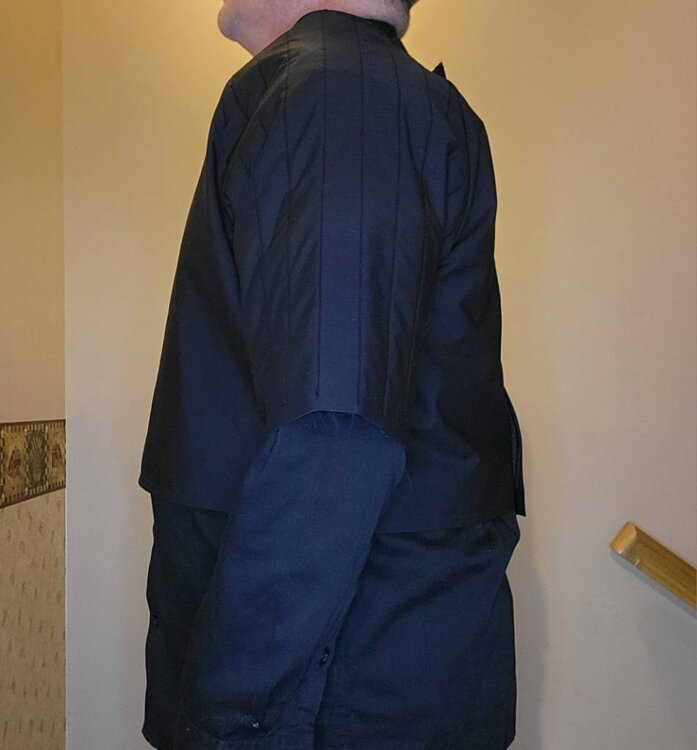
Almost finished with the vest. I have not hemmed the sleeves yet as I was waiting to compare their length to the Lancer requirement. I might tack the top of the shoulder area, but it sits fine with the armor on. Sent from my SM-G990U2 using Tapatalk
-
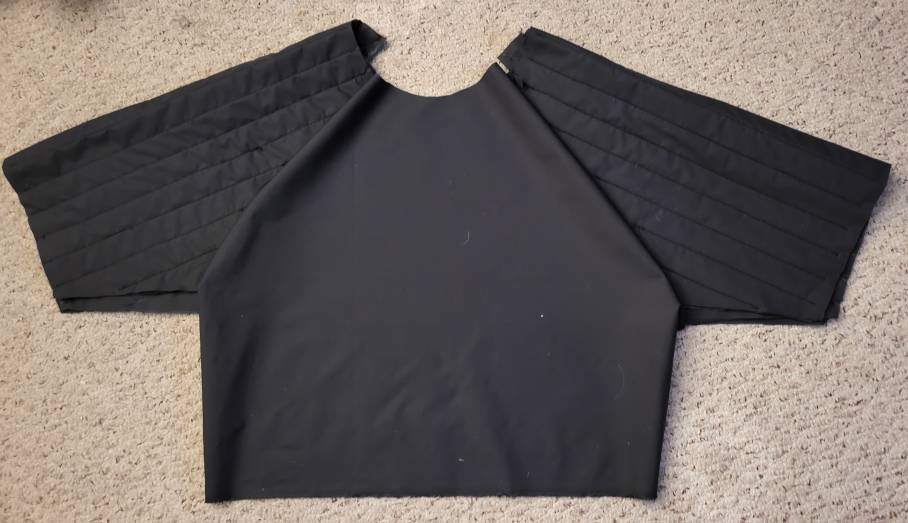
The basic shape: Sent from my SM-G990U2 using Tapatalk
-
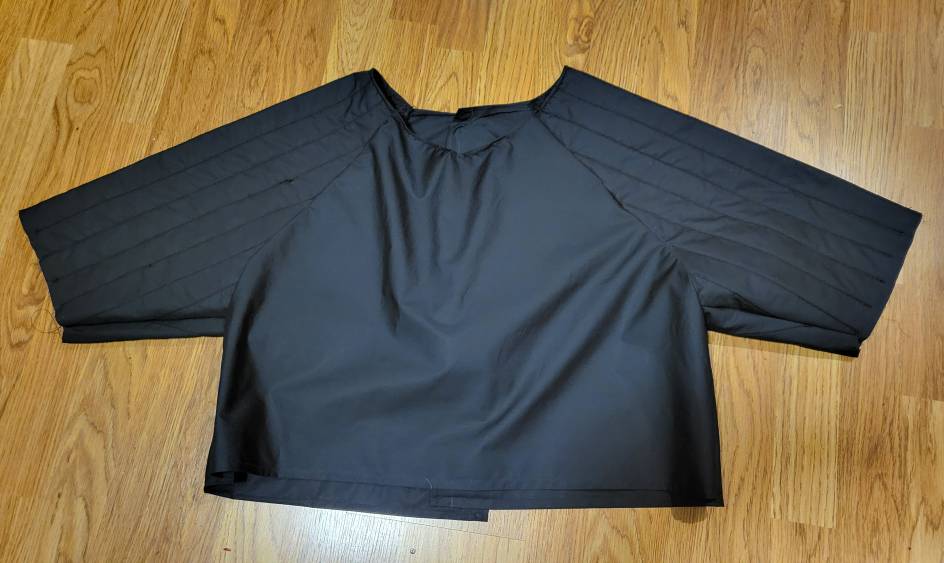
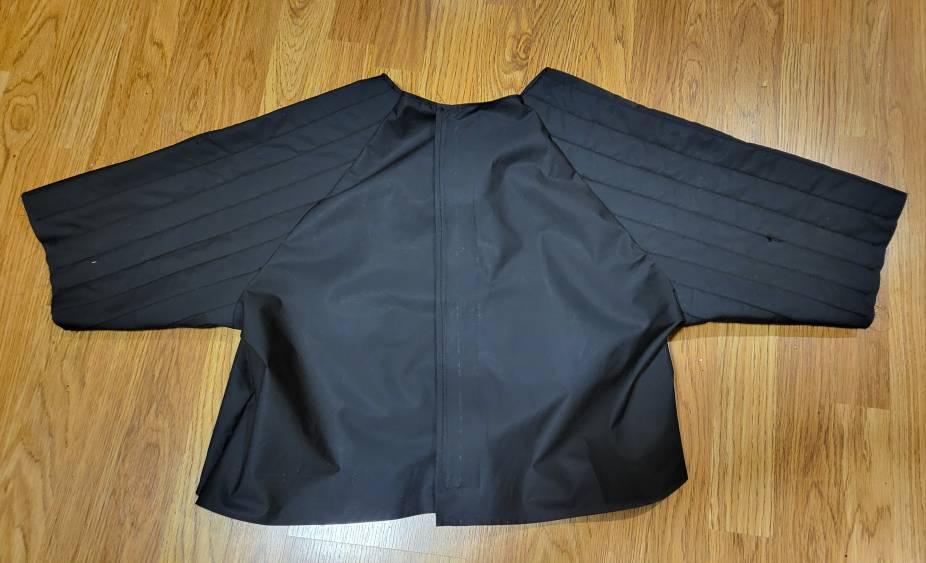
First sleeve padded and ribbed. Sent from my SM-G990U2 using Tapatalk
-
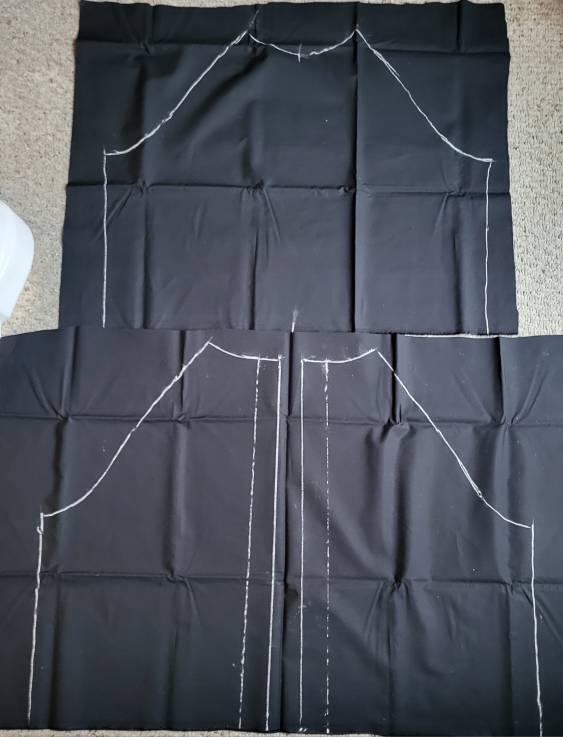
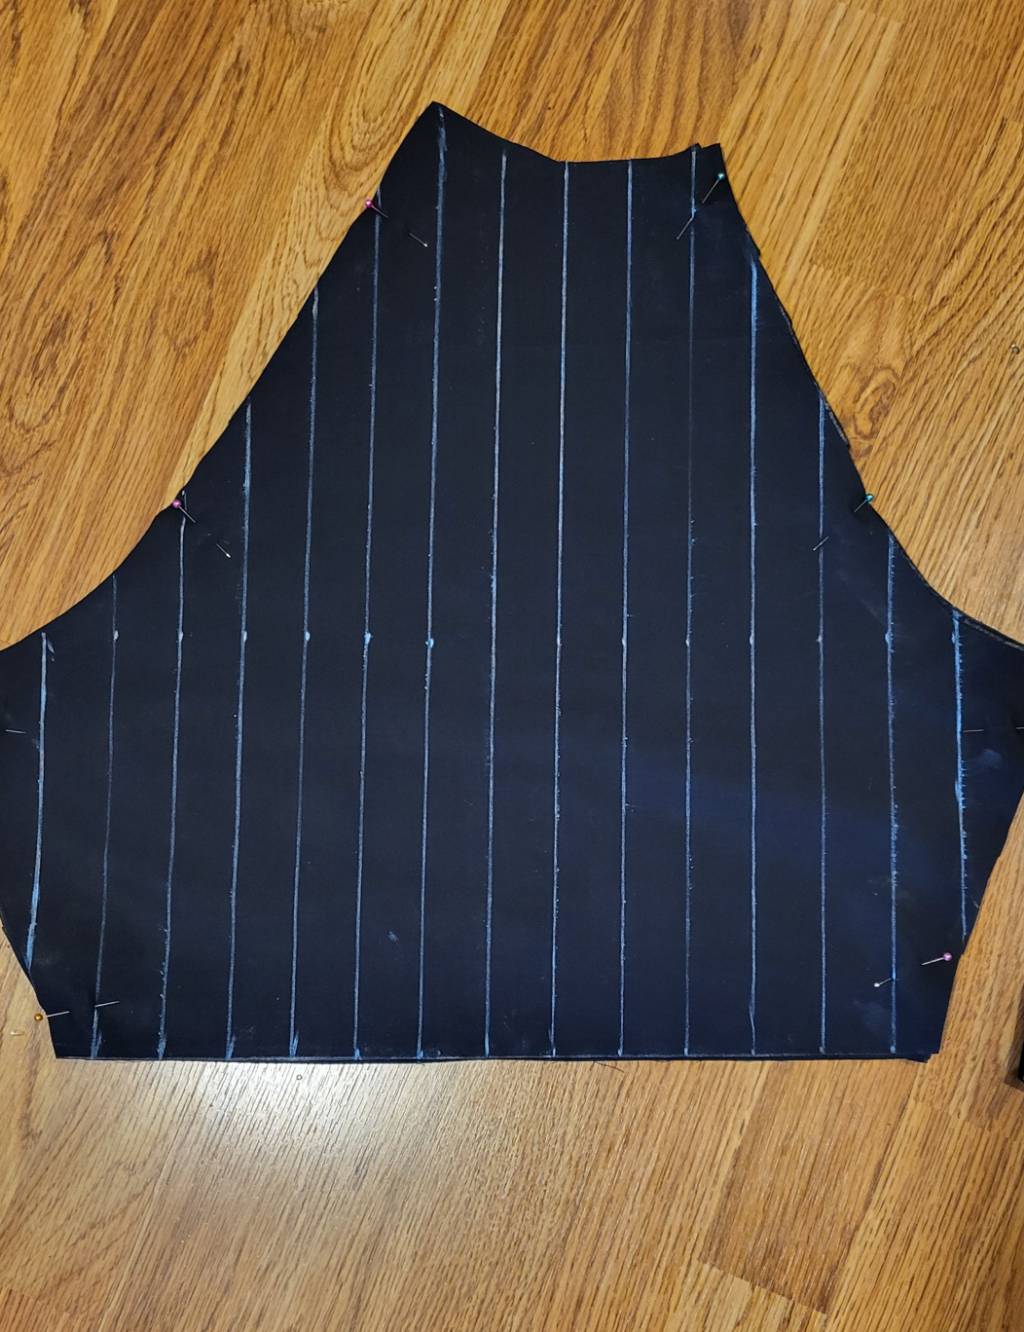
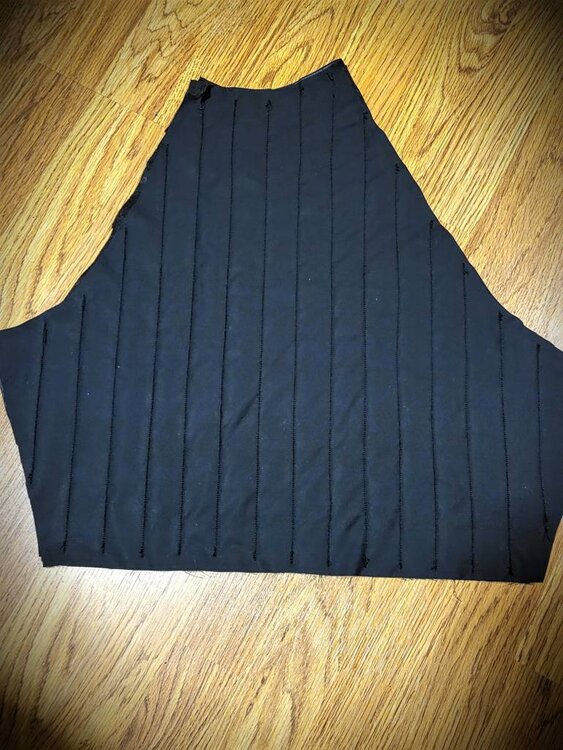
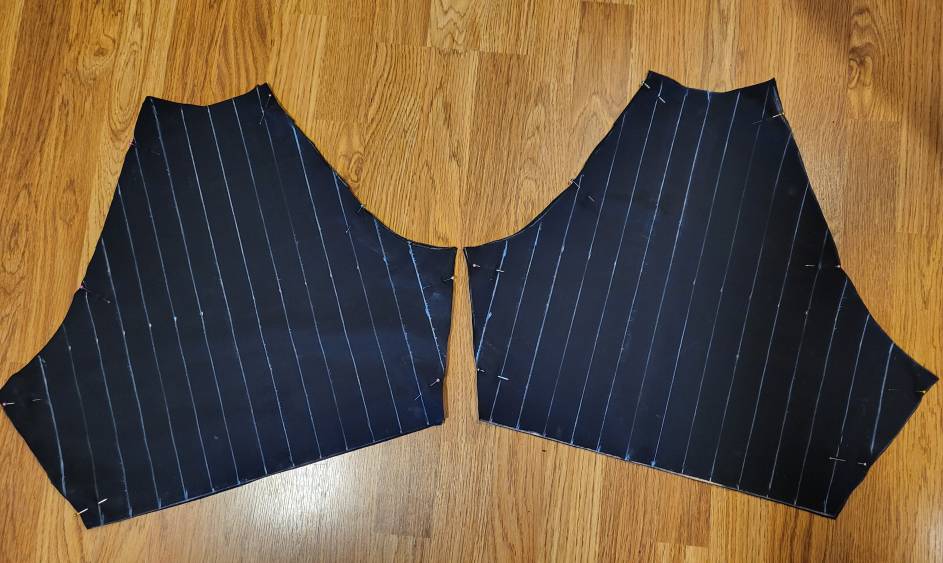
All the parts are cut out and I'm ready to start sewing.... I think. Nothing ever looks quite right until the sewing begins. Anyway, the sleeves are 3 layers, with an cotton facing on each side and felt in between. That will give it the proper look without being as thick as having batting inside. I chalked the rib lines and I'm ready to stitch them in. Sent from my SM-G990U2 using Tapatalk

-
I really appreciate that! I do a lot of cosplay stuff, but I considered just sourcing all of the parts for this. But it's been a rewarding challenge...so far! [emoji6] Sent from my SM-G990U2 using Tapatalk
-
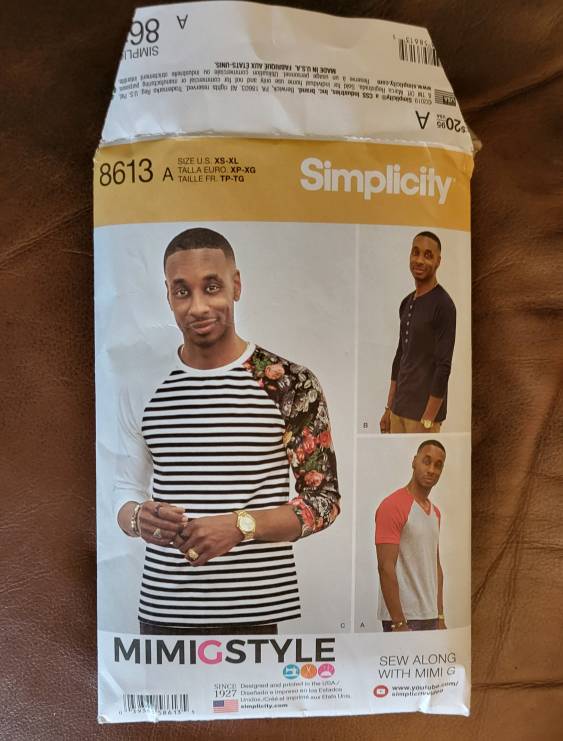
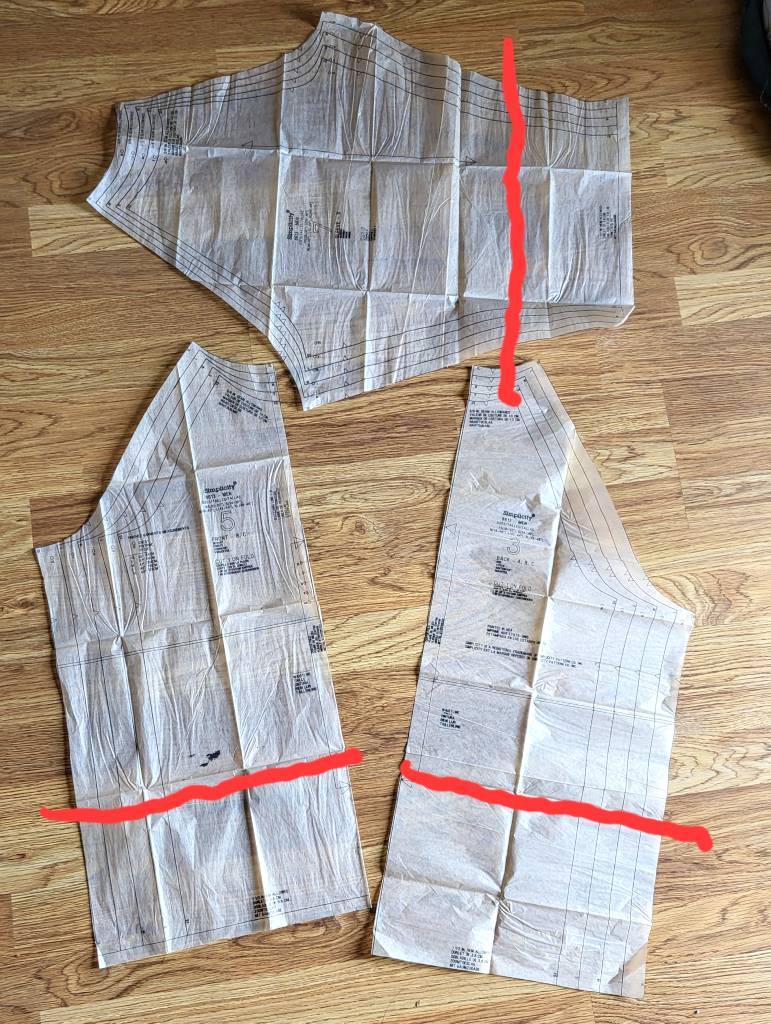
I appreciate you guys regularly answering all of my questions. Funnily enough, I've read and re-read all of those posts. I'm just making sure that I'm not missing anything! I'm starting on the best as my final piece, and I'm going to try something different. I've studied the tutorial, as well as posts from you guys. I'm going to incorporate those ideas into my approach. So, I'm using a Simplicity pattern for a raglan style shirt. After measuring with a t-shirt over my coveralls, XL is the way to go. I'm also cutting down the body length and sleeves, but leaving room for mistakes. I will double up each sleeve and I have felt to use for the padding. This also gives the advantage of cutting the back into separate pieces instead of one. I added 1 1/2 inch to the center of both sides to account for a holdover seam and 2" velcro. Let's see how this goes! Sent from my SM-G990U2 using Tapatalk