Aradun
-
Posts
2,624 -
Joined
-
Last visited
-
Days Won
90
Everything posted by Aradun
-
There is no pattern due to varying sizes from one scout to another. However, checkout the link Chopper posted above on the Undersuit Mods. BikerScout007 has some measurements in that thread that will allow you to get started. I would use chalk to outline the patches front and back on the flight suit and then post pictures for feedback. The armorers here are top notch and know their stuff. They’ll be able to recommend any adjustments needed. Then you can create your own pattern once the adjustments have been made. If you’re interested, I have links to fabrics and materials in my build thread. It’ll will give you an idea of what to look for when sourcing your own materials. Sent from my iPhone using Tapatalk
-

mickeymark34's Studio Creations Build Thread
Aradun replied to mickeymark34's topic in ROTJ Biker Scout WIP
Nice job Mark! That was one productive armor party. The finish line awaits! Sent from my iPhone using Tapatalk -
Nice work! Sent from my iPhone using Tapatalk
-
Harbinger’s TB WIP (501st/Lancer Approved - but never done!)
Aradun replied to Harbinger's topic in ROTJ Biker Scout WIP
Off to a great start. Excellent choice in armor. I hope to receive my RS bucket and armor sometime in April so I can complete my build. I’ll be following your build to help me prep! Keep those posts coming! Sent from my iPhone using Tapatalk -
Can you post an image or link to it Mark? Sent from my iPhone using Tapatalk
-
Building a screen used helmet replica
Aradun replied to Strider's topic in ROTJ Biker Scout Armor/Helmet
No problem Constantin. Glad the mystery is solved. I for one am really looking forward to seeing your finished product. Your work is always phenomenal. Sent from my iPhone using Tapatalk -
Building a screen used helmet replica
Aradun replied to Strider's topic in ROTJ Biker Scout Armor/Helmet
I agree with Stroker about the stunt helmet, but the helmet in the second photo appears to be superimposed over the stunt helmet in the first photo. Does anyone know where the bottom photo originated? Sent from my iPhone using Tapatalk -
Building a screen used helmet replica
Aradun replied to Strider's topic in ROTJ Biker Scout Armor/Helmet
On further review Constantin, I do believe the photo is faked. Look at the two photos below. If you look at your photo, the red arrow points to where the edge of the original helmet from the original photo is protruding. The other circled areas show markers in the foliage indicating the same background. The dark spot in the foliage just behind the exposed neck of the jumpsuit is a perfect match. Sent from my iPhone using Tapatalk -
Building a screen used helmet replica
Aradun replied to Strider's topic in ROTJ Biker Scout Armor/Helmet
Constantin, Here’s the photo. It takes place at the 58:07 mark in the movie. It’s when Han steps on the twig and gets hit in the face. Here’s the thing. It’s clearly not the same helmet. But take a good look at the background foliage. It is absolutely identical. For the camera crew to line two shots separate shots up with a different helmet and in a different take to perfection would be a feat of amazement. Even the body armor looks to be in the exact same position which makes me wonder if this infamous photo wasn’t photoshopped. Sent from my iPhone using Tapatalk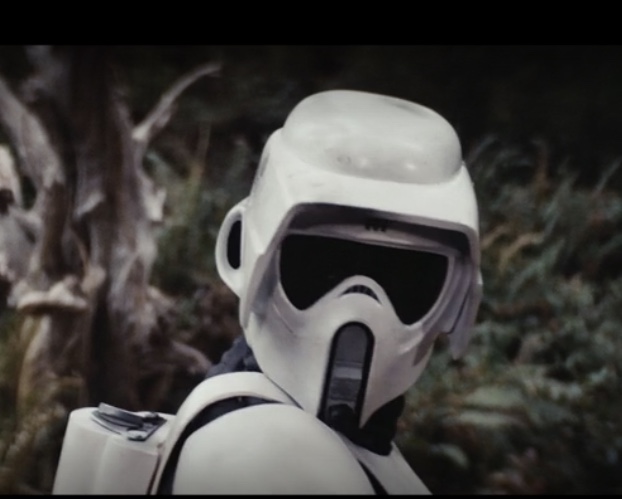
-
BikerScout007's Sierra Sneakers!
Aradun replied to BikerScout007's topic in ROTJ Biker Scout Soft Parts
Found these on eBay today. Price is reasonable. Size unfortunately is too big for me. https://www.ebay.com/itm/Rare-Vintage-Hi-Tec-Sierra-Sneaker-IV-Hiking-Boot-Shoe-Canvas-Scout-Biker-12/313015864366?hash=item48e1330c2e:g:LrUAAOSwaLxeXSHQ Sent from my iPhone using Tapatalk -
Congrats Jenn! Great to have you at the helm helping out with PR. Sent from my iPhone using Tapatalk
-
mickeymark34's Studio Creations Build Thread
Aradun replied to mickeymark34's topic in ROTJ Biker Scout WIP
Mark, when you say “soft goods” are you including the pouches and the bund? The CRL requires the pouches to be white or off-white and the bund to be white. I always thought the tea bath method dated back to a time when the pouches were thought to be more natural in color as opposed to white. Sent from my iPhone using Tapatalk -
Attatching the suede butt flap
Aradun replied to Elephant Knight's topic in ROTJ Biker Scout Soft Parts
Suede won’t fray like fabric that is not seamed. No need to seam the edges. It’ll be fine in its natural state. Sent from my iPhone using Tapatalk -
Joe, I’m not too familiar with the ST CRL, but just wanted to chime in to say that the weathering on your helmet looks fantastic! I really like that chipped paint effect you have in places. Nice job brother! Sent from my iPhone using Tapatalk
-
Dude, I love your work ethic. You knocked that stuff out in 24 hours. Kudos! I think you may need to move your pouches out a bit more. It looks like they’re sitting on the seam of the last rib on either side. They should sit 1” out from that seam. Sent from my iPhone using Tapatalk
-
Chris, looks like your pouches still need to be switched. Sent from my iPhone using Tapatalk
-
Your corners are most likely square. They just needed to be “pushed through” when you fold the pouch from inside out after sowing the pouch and especially the flap before sowing it closed. I used a screwdriver to gently push the corners out. If that makes sense. Sent from my iPhone using Tapatalk
-
Same case with me. Perfect fit.
-
Wampawear has great gloves. Solid quality. Their sizing chart is helpful too when ordering. I found it spot on in my case. Gloves are snug (which I prefer) but not tight or restricting. Some elect to remove the lining to keep their hands cooler while trooping. Sent from my iPhone using Tapatalk
-
Thanks Stroker! I was thinking the same about the butt patch. Just ordered RS armor and their red label bucket today! Can’t wait for it to come in (about 8 weeks)! Once in hand I’ll be able to fine tune the soft parts and tighten up the build. Sent from my iPhone using Tapatalk
-
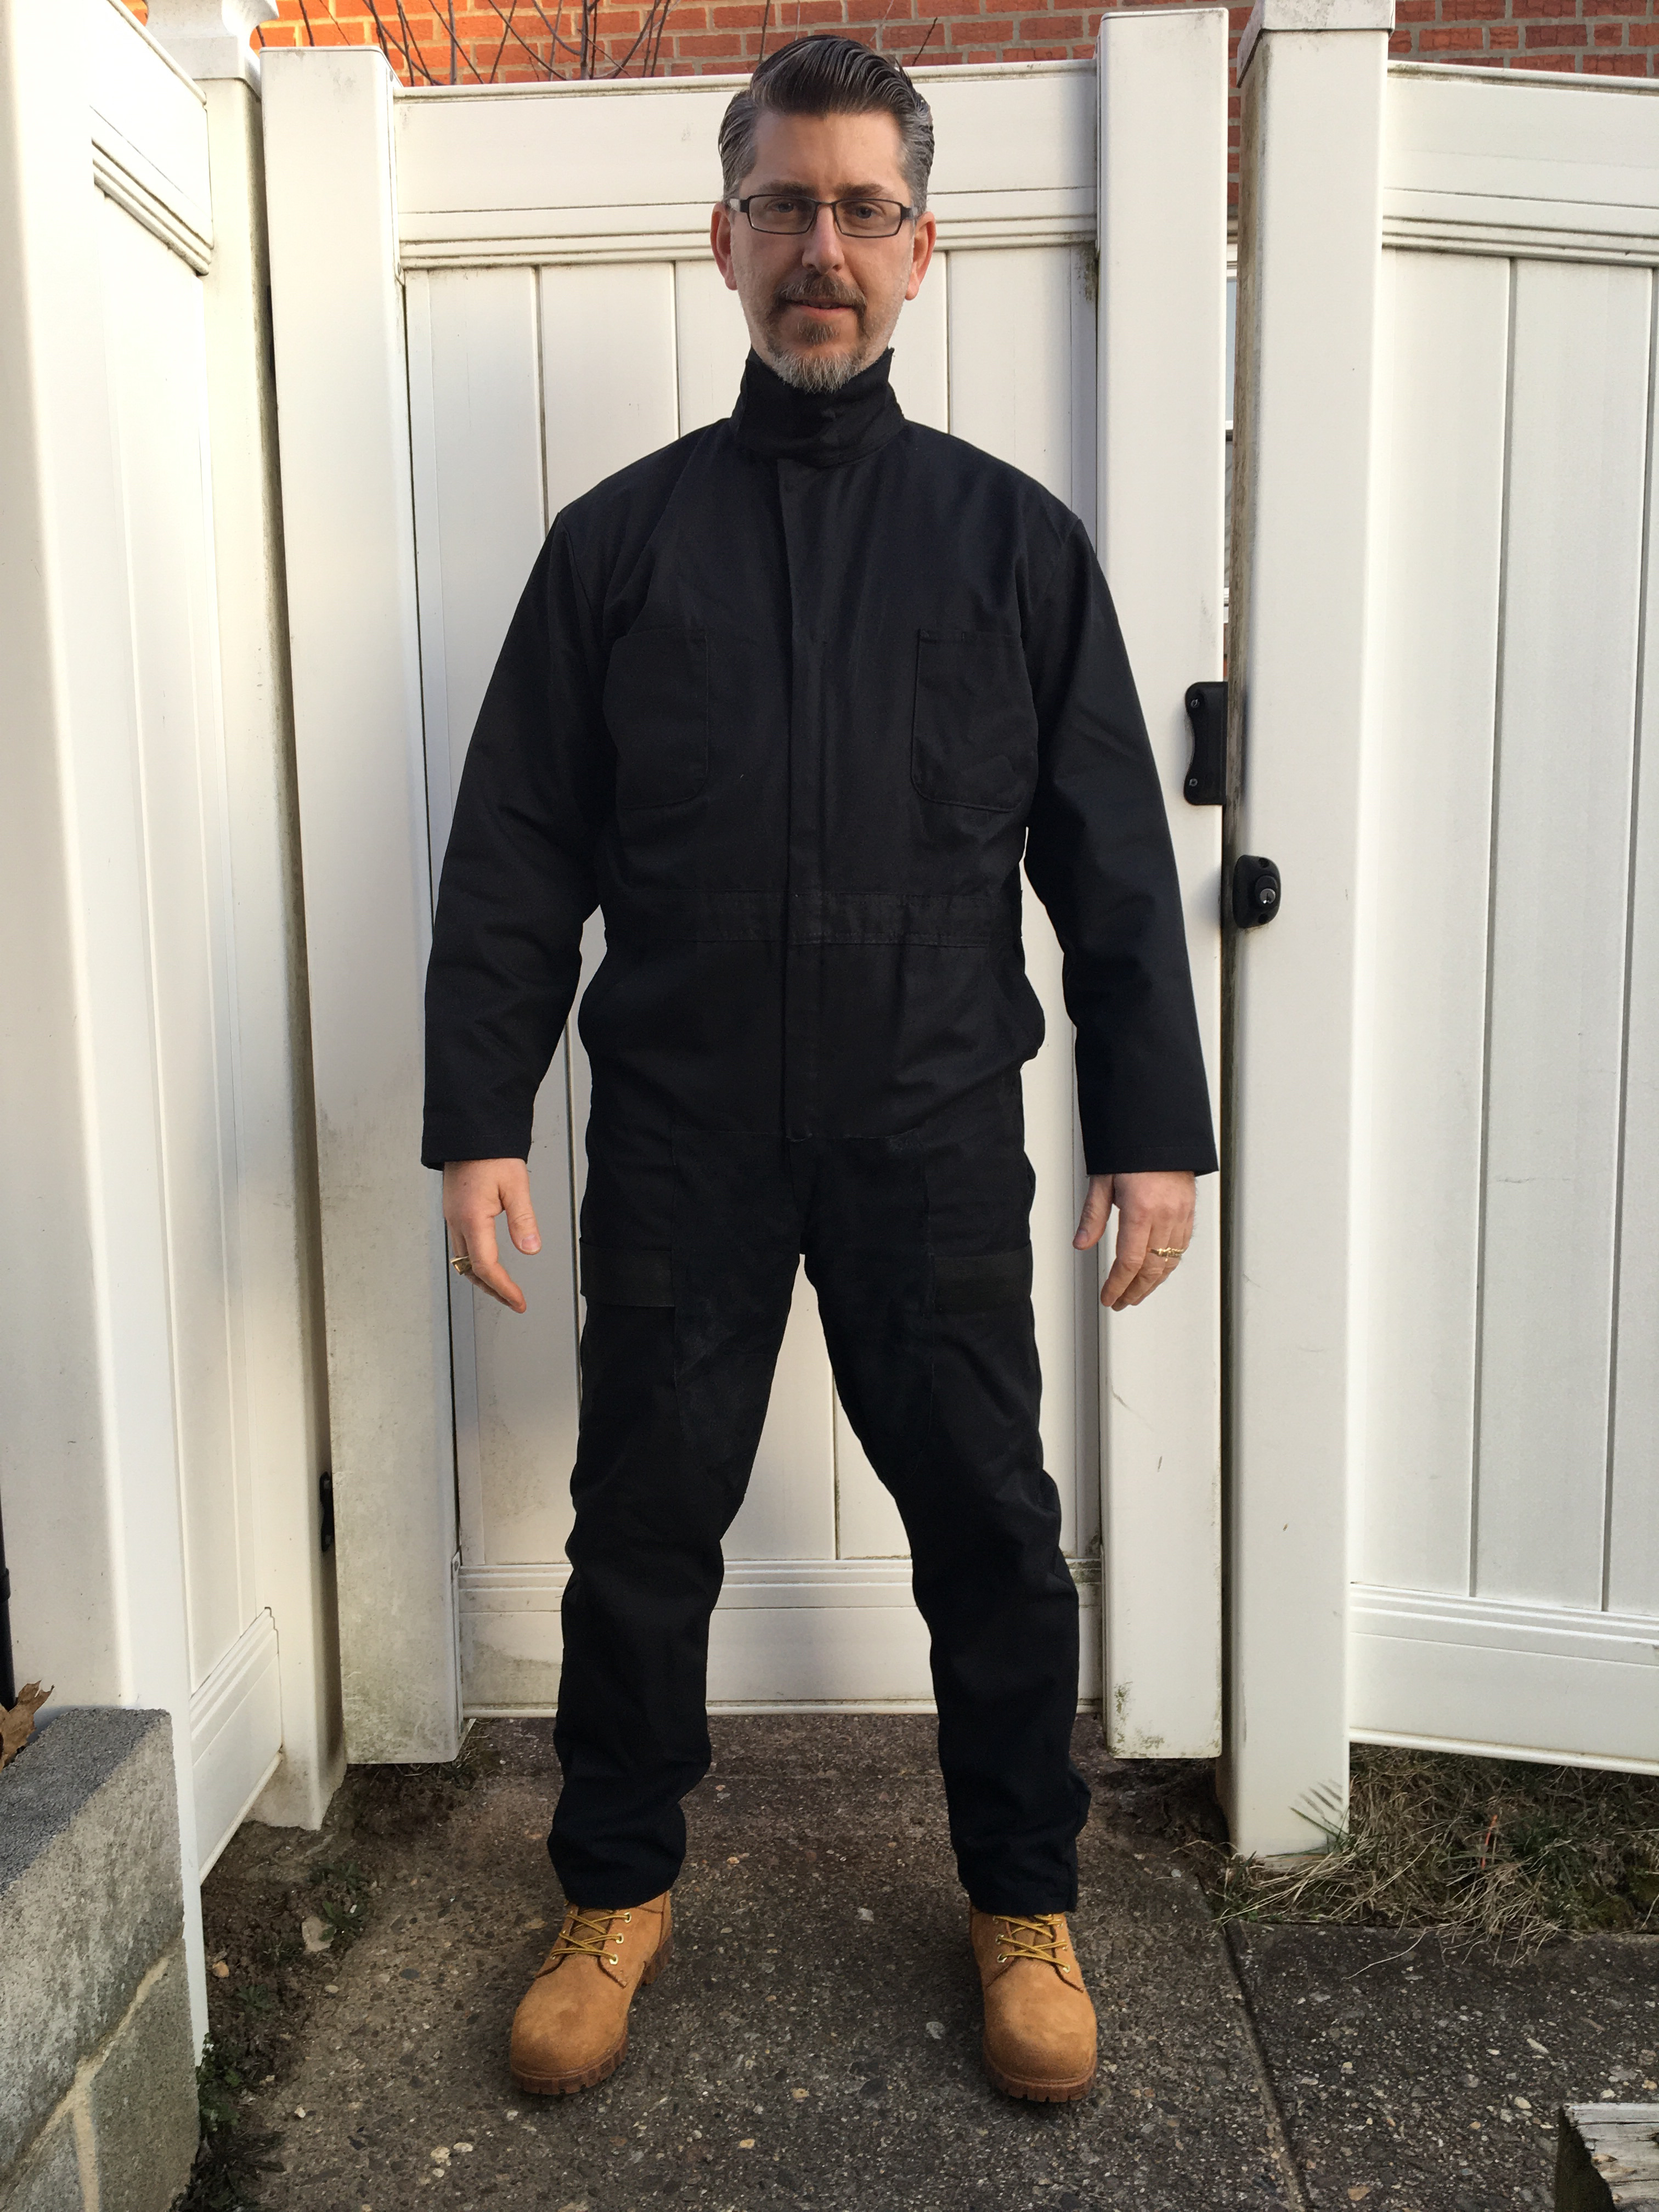
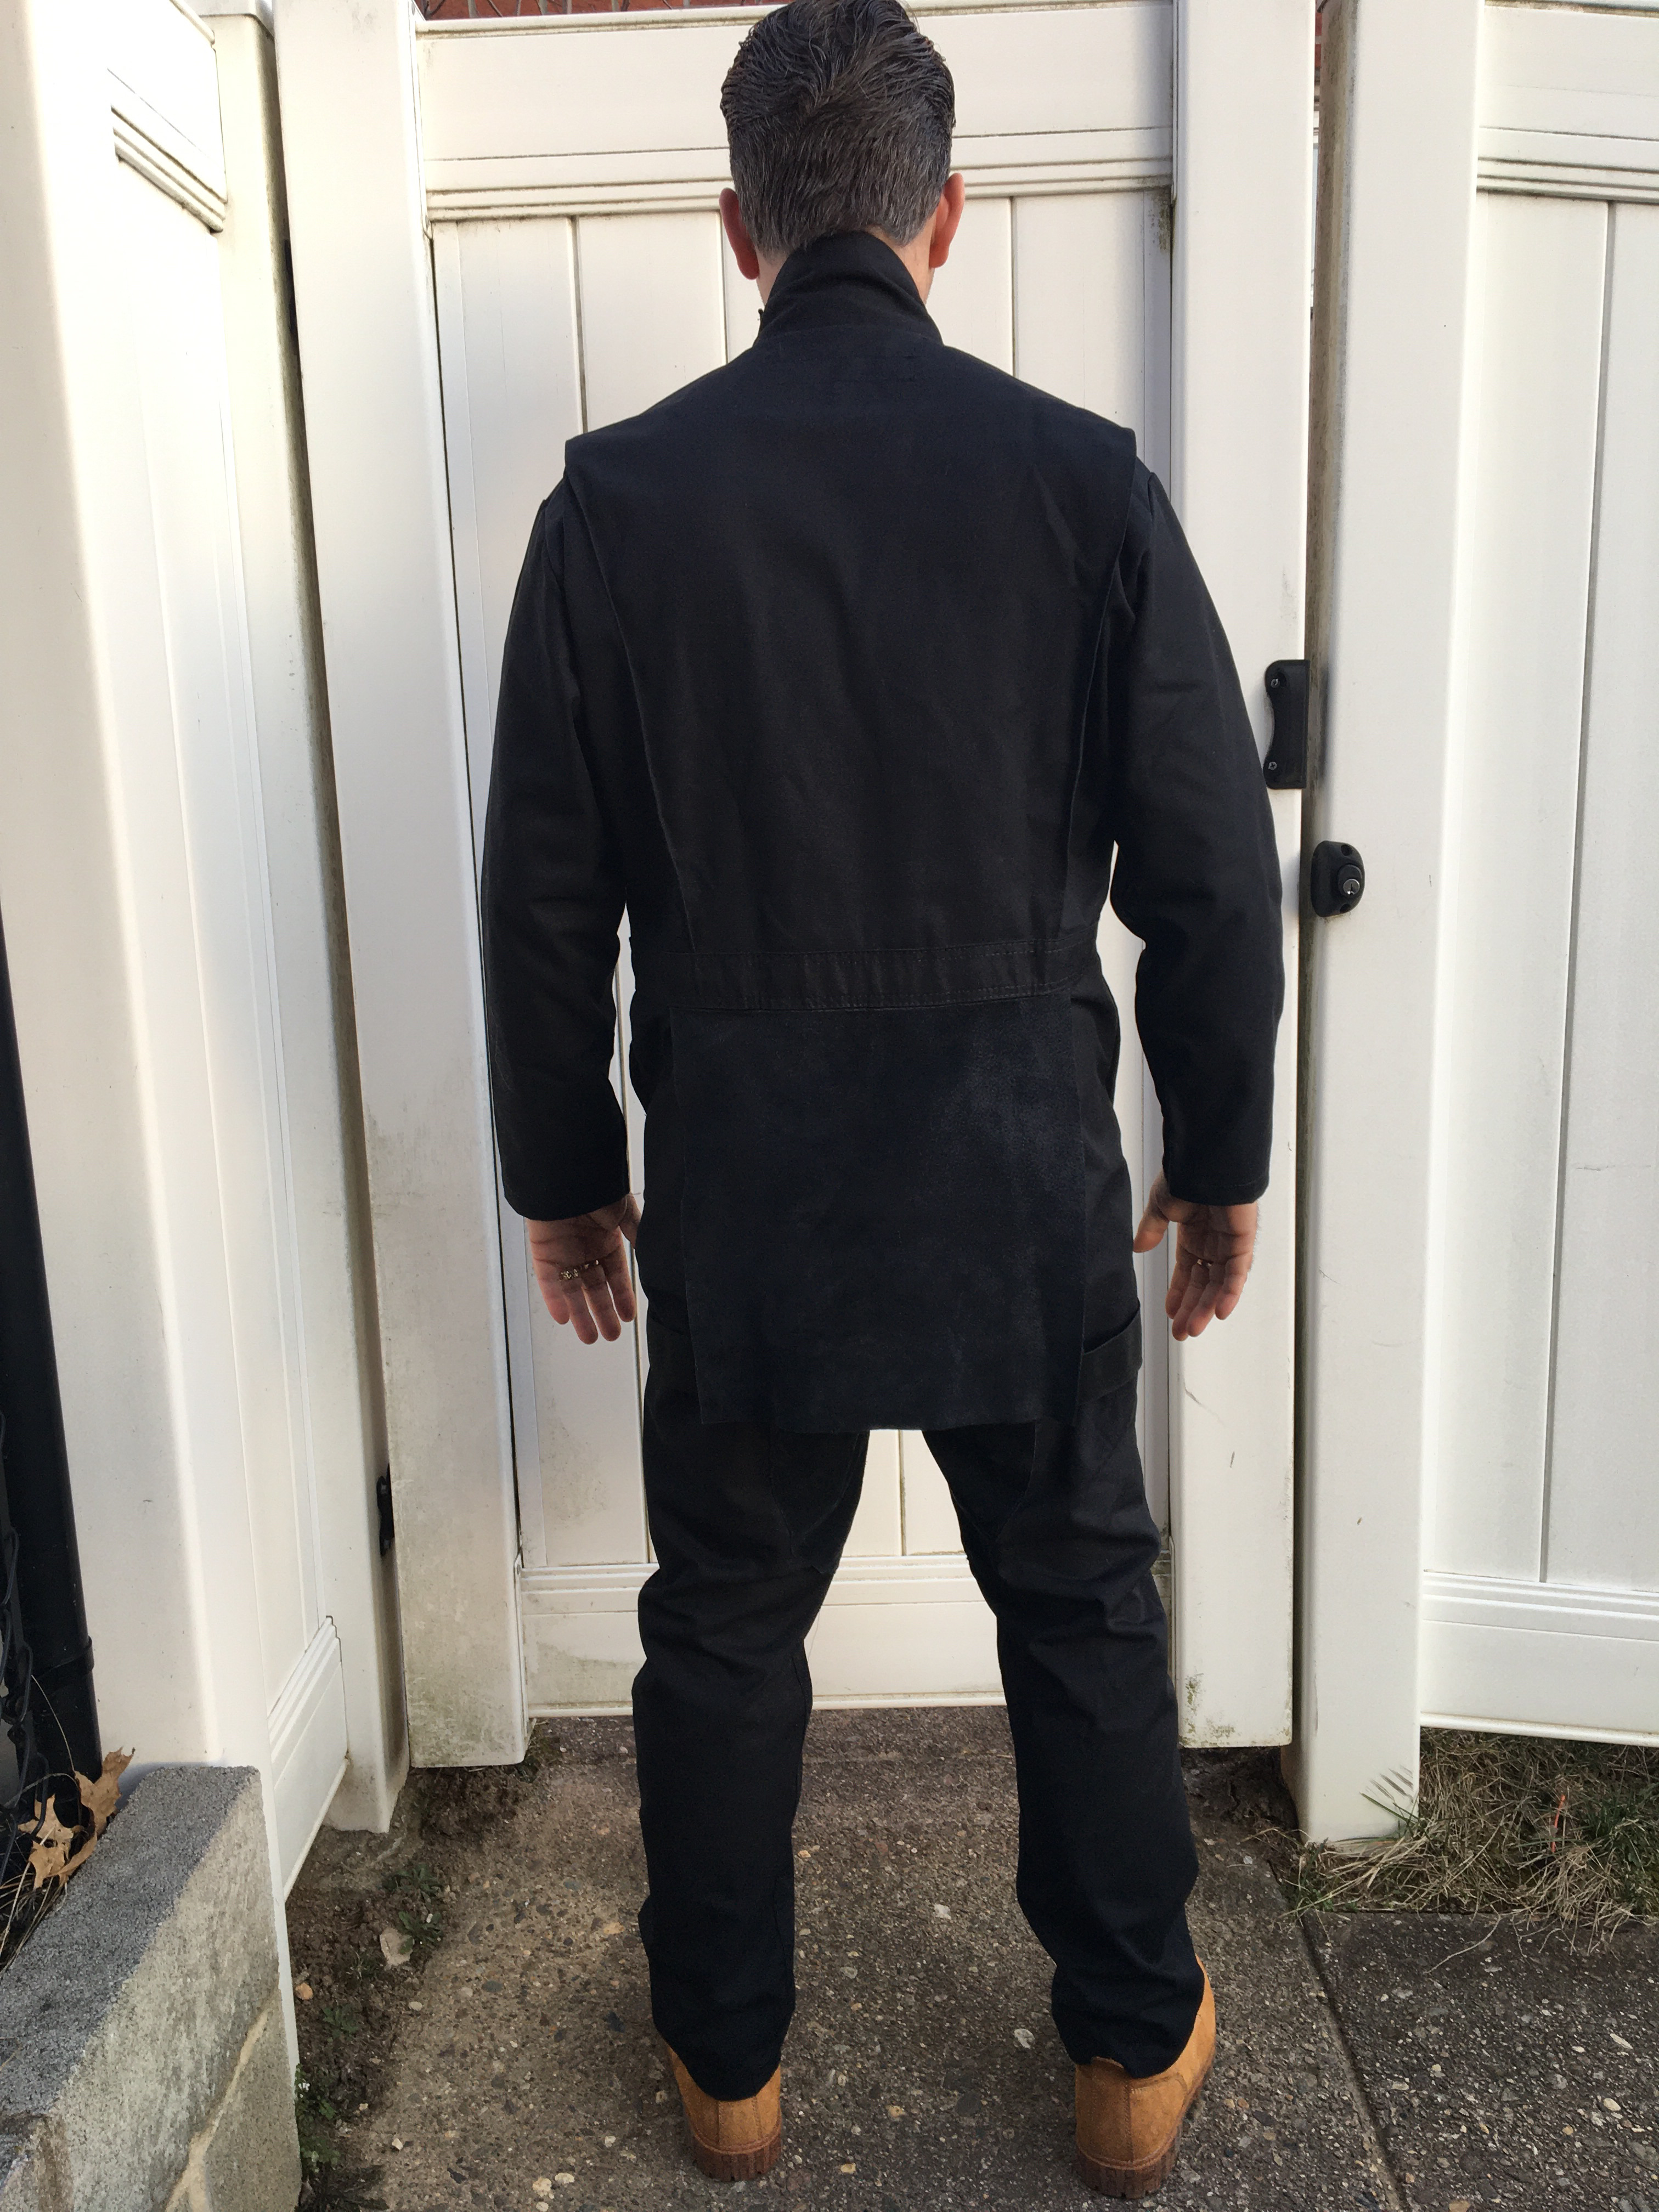
Here is the finished undersuit. Legs tapered, suede riding patches applied, suede butt flap with no visible seams attached, and 2” wide elastic band around thighs. Hopefully you’ll be able to see the patches and thigh straps. If not, I’ll repost pics on a sunnier day. I received my material for the CB and cod piece in the mail yesterday from Joann. It’s heavy enough and the 100% cotton sateen has a light sheen to it. Not an exact match to polished cotton, but I think I’ll work nicely. I hope to get the cod piece and CB done in the next two weeks (busy schedule) so that I can check the front patches and adjust as needed per Chopper’s suggestion. I’m also toying with the idea of taking in the sleeves (maybe an 1” or so) but will wait until I receive my armor so I can see how it looks. That’s an easy adjustment if needed. Sent from my iPhone using Tapatalk


-
Scout Trooper Helmet Padding
Aradun replied to adamantiumcomb's topic in ROTJ Biker Scout Armor/Helmet
Added that to my Amazon Biker Scout wish list! Sent from my iPhone using Tapatalk -
Making a cummerbund, pouches, and cod
Aradun replied to Zugor's topic in ROTJ Biker Scout Soft Parts
Glad it helped, but to be honest I didn’t catch that in your photo until you said something LOL. Glad you caught it now before putting the other pouches together. And technically you just need to take off the flap, turn the box around, and reattach the flap. Sent from my iPhone using Tapatalk -
Hey Scouts, I am taking the plunge and will be placing an order for a set of RS armor and an RS red label bucket by the end of this week. I’m stoked because I didn’t think I’d be able to make this purchase until the end of the summer. I’m making the soft parts myself and having the armor on hand nearly six months ahead of schedule will make my build way easier when assembling my soft parts. I’m going to order it “dirty” as their weathering looks absolutely fantastic in every instance I’ve seen. So, as this is a huge investment, I’m wondering if those of you who own a set of RS armor and/or bucket can chime in on the following: 1) Is there anything I should be aware of or request when placing my order? 2) I’ve read some threads where scouts have painted their RS buckets to better match the color of the RS armor because of a coloration variation between the two. So is there really that big of a difference in coloration between the bucket and armor? No sense in ordering a weathered bucket if I have to repaint it. Thanks in advance for your thoughts. Sent from my iPhone using Tapatalk
-
Attatching the suede butt flap
Aradun replied to Elephant Knight's topic in ROTJ Biker Scout Soft Parts
Correct. You can see how and where to attach it in the best practice guide below. http://forum.501stpathfinders.com/index.php?/topic/19259-undersuit-mods/ Sent from my iPhone using Tapatalk