

HSM76
-
Posts
132 -
Joined
-
Last visited
Everything posted by HSM76
-
If you sew it into the waist seam of the suit, you will see no stitching. It is on the inside of the suit 😄
-
The imperial look is, you won't believe it, intended. The plates on the box, including the discs of 501st and German Garrison, were commissioned from Assassin Graphics in UK.
-
I use the monster Stanley Box, it is a bit overkill for the Scout, but for the TK it is just big enough: Right now I have no picture from the inside. It is lined with a cut blanket, with sewn on pockets in the sides to store smaller stuff (repair things, contact lenses, gloves etc)
-
Thank you very much, brothers.
-
Scout Bag Items Sourced
HSM76 replied to dreadmaster's topic in Scout Trooper: "The Mandalorian" Weapons/Accessories
Yep, same here. Ordered 2 for roughly 20$ with 30$ added for shipping.... Gesendet von meinem ONEPLUS A6013 mit Tapatalk -
Thank you very much, proud to be part of the lancer ranks!
-
TB-24576 Lancer deployment request (APPROVED)
HSM76 replied to HSM76's topic in Lancer Deployment Request
Here are the suited up pictures: I hope that I got got it all covered now 🙂 -
TB-24576 Lancer deployment request (APPROVED)
HSM76 replied to HSM76's topic in Lancer Deployment Request
Okay, next update: I got the webbed cotton for the drop boxes. It is I bit sturdier, I got a yoga belt which is 38mm wide: It is attached in all parts with velcro, so there should be no problem with adjusting it. With the thickness of the belt there should be no problem with the buckles sliding around. I redid the dogbones from scratch: Removed some of the weathering of the right pouch. Was a real pain, ended up using a wire brush: Suited up pictures will follow on Sunday. Then it should be everything that's needed, I think. -
Done with the bipod, it is detachable and held in place with high power magnets. I drilled some of the holes bigger and glued in the magnets. The whole assembly is in movable pieces, and the bipod is functional:
-
TB-24576 Lancer deployment request (APPROVED)
HSM76 replied to HSM76's topic in Lancer Deployment Request
I have checked the boots, I will have to remake the dogbones, as the cutting of the excess will drop the stitching to low to new cut edge :-( Gesendet von meinem ONEPLUS A6013 mit Tapatalk -
TB-24576 Lancer deployment request (APPROVED)
HSM76 replied to HSM76's topic in Lancer Deployment Request
As promised, the boot holster picture: -
TB-24576 Lancer deployment request (APPROVED)
HSM76 replied to HSM76's topic in Lancer Deployment Request
Hi Corey, a happy new year to you too. Thank you for the feedback. >Shoulder Armor >Please bring in your left-side shoulder armor slightly. The >spacing on the right looks good, so you should emulate >where that one is positioned. (See image below) Will do that, I thought I had it at the same length, will check where the problem is. >Chest Armor >Your chest armor is slipping back, please move it forward, >so that the shoulder bridges are approximately on the top >of your shoulders. (See image below) I have added velcro to the 'bund and the chest I hope this will help. >Cummerbund Pouches >The weathering on your right-side pouch is very heavy. >Are you able to reduce the weathering with a toothbrush >or something similar? I will see, if I can get it off. Have to check. >Belt and Detonator >Can you please clarify if your dropbox straps are elastic >or webbing? It is difficult for us to tell from the photos, but >they should be white cotton webbing for Level 2. It is indeed elastic, I will change it to webbing, the bigger problem will be to source 3,8cm webbing in Germany. >Also, please re-center the detonator on your back and >center the rear parachute clips of your dropbox webbing. >(See image below) As written above I saw that already, wiil be done. This is luckily just a dressing issue. >Boot Holster >It's hard for us to tell if the slots are cut into the holster. >Can you please post a photo of the inside of the holster, >so we can verify the cuts? The slots are cut, will post a picture later. >Boots >Please trim the small excess part of the dog bone that >extends onto the sole. The screen used boots did not >have the dogbones glued onto the sides of the soles. Okay, will cut the dog bones a bit. >Forearm Armor >Just a general fitment issue for the future and not a >requirement for this application -- try and rotate your >forearm armor inwards on both arms. They should be >slightly canted inwards, in comparison with your >bicep armor. Will do that. -
Scout Bag Items Sourced
HSM76 replied to dreadmaster's topic in Scout Trooper: "The Mandalorian" Weapons/Accessories
Damn it I can't find this type of belt anywhere in Europe. The shipping from the army surplus on US is over 50$.... Does anyone have a source in Europe? Gesendet von meinem ONEPLUS A6013 mit Tapatalk -
Here a link to the thread about my DLT19(X): http://forum.501stpathfinders.com/index.php?/topic/21065-another-dlt19x-dlt19/
-
Hi, here is a bit of info on my DLT19. It is, or will be modifiable to a DLT19. The scope is attached via two nuts. The bipod is not done yet, but will be attachable via rare earth magnets. The weapon itself is a 3D print by 3D Props NL, it is equipped with a BlastFX system. As usual for 3D prints the first thing was to sand, fill, sand, fill and sand again and maybe fill and sand... After that painting the parts flat black. The inner supports are the big aluminium pipe for the butt stock and grip part which has been cut for grip (trigger and rumble motor) for the display and switches, at the ejection port and on top under the lid. The front support consists of two acrylic support tubes with 28mm outer diameter and a 24mm od tube inside. This is mainly because I could not get one 100cm tube with 28mm. Inside the tubes is a cut tube (roughly one third which holds the barrel LED strip. The muzzle LED is on front of the acrylic tube. Cut openings in the underside of the body of the gun: Cut openings in the upper part of the body: To keep the lid of the main body closed but to have the ability to open and close it I added a short piece of acrylic tube to be able to install magnet there as counterpart of magnets in the lid. The replace the screws intended there. Inside the acrylic tube I installed the cardboard tube with the speaker. The board is in the front of that. I used the ejection port as battery compartment, as I use a removable battery. The lid of the ejection port closes with magnets too: I cut the LED strip and soldered new leads between the parts to make it a better fit for the log barrel of the DLT: This is the end of the whole acrylic tube installation: This is the blaster in DLT19X mode:
-
TB-24576 Lancer deployment request (APPROVED)
HSM76 replied to HSM76's topic in Lancer Deployment Request
Yes thought so 🙂 No problem, I am in no hurry. Thanks for the fast response. -
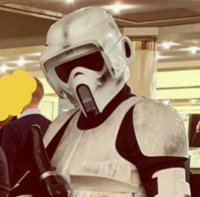
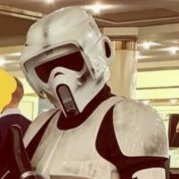
Hi, this is my request for lancer deployment. Bucket: RS kit built by me Armour hard parts: RS Propmasters Flightsuit: RS, modified by me Flackwest: RS, modified by me Cumberbund and pouches: made by me Codpiece: RS Propmasters Gloves: Wampawear Boots: Chrisx909x, sole cuts enhanced by me Holdout blaster: RS Propmasters DLT19X: 3D Props NL built by me Front: Back: I know the thermal detonator is an bit crooked in the picture, but I hope, since it is a dressing issue it will be no problem Right, arms down: Right, arms up: Left, arms down: Left, arms up: Action shot: Detail pictures following: Bucket Real 3M bolts, no mesh in the ears: About greebly and black recess: Gaffers tape behind the ears: Bucket Decals: Flight suit, mandarin collar: Flight suit riding patches front, patches are suede: Flight suit back, back flap and riding patches: Riding patch detail: Shoulder bell detail, rounded corners, zip tie and size of elastic: Bicep armour, greeblies: Bicep armour, size of elastic: Forearm armour, size of elastic: All four arm pieces are affixed to the flightsuit with velcro. Gloves: Flack west, front: Flack west, back: Flack west, velcro size: Shoulder bridge size: Connection chest/back size: Tank topper: Tank separate, connection to back with elastic: Tank, rivet on bottom: Cumberbund: Cumberbund, size of velcro: Pouches, width: Pouches, tab width: Pouches, tab hight: Pouches, hight: Pouches, depth: Pouches, tab size bottom: Cumberbund, ribs size, distance from pouches: Cod piece, size of elastic: codpiece is affixed to flight suit and cumberbund with velcro. Belt, webbing fixed with rivets: Belt, size of webbing: Belt, size of drop box strapping: Belt, buckles non functional: Thermal detonator, endcap concave: Thermal detonator, greeblies: Thermal detonator, clips: Knee amour, upper elastic size: Knee armour, lower elastic size: Knee, rivets silver: Boots, not wrinkled, soles with cuts, silver rivets: Boots, holster holes cut: Holdout blaster: Holdout blaster, lens disc cut Holdout blaster, previously drilled barrel closed: DLT19X: Thanks in advance for looking at this post! With kind regards Sven
-
Great, thanks for the heads up. Than I will get to make the roughly 1000 pictures for Lancer in the next days and get the request up.
-
Any more tips for lancer? Am I missing something? Gesendet von meinem ONEPLUS A6013 mit Tapatalk
-
After a lot of rework (and no interim updates, I know I am terrible in that regard) I reworked the shoulder bridges to a flexible velcro connection. I added a lot of velcro to the softgoods: - for the forearms and biceps - for the cumberbund to the flak west - for the cod piece to the suit - for the cod piece to the cumberbund (And I might add some more velcro... I shortened the sleeves of the flak west and shortened the zip ties on the shoulders. Made the Vs under the pouches in the cumberbund. The best part: I got my basic approval yesterday! Now off to Lancer. Do you guys have anything that would be necessary to do for the lancer submission? One question I have is the boots, I updated the slots to be a bit more accurate. But do I need to add cuts in the toe? The pattern in the original serrias is a bit hard to replicate.
-
Took a while longer than I thought... But I got back on working on the Scout.@Chopper: Yes I used the pics above for the submission. I will do that, take the shoulders in when I make the new connection of the shoulder bridges. Dropping the belt will not help with the bund unfortunately, as the waist and midriff are about the same circumference. @greenyone : thank you. I don't know why I did not come to this solution, it is so obvious! Gesendet von meinem ONEPLUS A6013 mit Tapatalk
- 107 replies
-
- 1
-

-
- lancer deployment
- rs prop masters
- (and 1 more)
-
Long time no update... Had no time to get on with the build, and it is still a bit before I can get at it again. I cut out the glued part, but that's it. After a long time I got a response regarding basic from the garrison. The two things that were noticed are that the shoulder bells should be brought in, which will happen with the updated shoulder bridges. But the added concern that the flack vest sleeves might be to long in that case. Here I noticed that the basic "The sleeves end just below the bottom edge of the shoulder armor." can be interpreted more strictly than the level two "not more than 1,5 inches" The other thing is that the cumberbund "extends over the belt, and should be brought up." which is not the case. It extends to the front. I have a rather slim waist compared to my chest. Right now the hook velcro (inner) on the cumberbund is at a steep angel to bring the bund in at the waist. It is a problem to get it lay flat so there is no protruding to the front. How have you guys solved this?
-
Okay. Thanks for the solvent reminder, I had that in mind, but it is something that can't be said enough. Liquids that dissolve the bonds of Cyanoacrylate dissolve ABS too. That's what I thought and feared, that I have to cut. But from the photo I would say that I have more than 1cm too. So I will go for it when I have time to work on it. That will be in about 1,5 weeks earliest 😖
- 107 replies
-
- 1
-
-
- lancer deployment
- rs prop masters
- (and 1 more)
-
Indeed they did, here you see:
-
Darn it.... The shoulder bridges seem to be superglued together. Does anyone have an idea how to get this to separate without cutting it out? I am a bit reluctant to just cut it of , it is about one cm of overlap.
