cheesewhoopy
-
Posts
420 -
Joined
-
Last visited
-
Days Won
13
Everything posted by cheesewhoopy
-
Tips for sewing straight ribs?
cheesewhoopy replied to Digger's topic in ROTJ Biker Scout Soft Parts
Chalk is a good route as suggested. Or you can use pins to map out your line and just follow the path. If you have a good eye you can do a straight line without putting anything on the fabric. -
Biker Scout Boots Tutorial
cheesewhoopy replied to cheesewhoopy's topic in ROTJ Biker Scout Soft Parts
If you look at the screen used ones, Brown thread was used.

-
Biker Scout Boots Tutorial
cheesewhoopy replied to cheesewhoopy's topic in ROTJ Biker Scout Soft Parts
Step 4: The dog bone I will try to find a way to upload the dog bone I use, but for now a picture will have to do. When making the dog bone be sure it is long enough to reach over the boot and have the edges touch the top of the sole. Trace onto vinyl. Cut out and sew two white curves on each side. *Use white thread, not brown* at the time of this tutorial it was thought brown was correct but white is correct for lancer. Use CA Glue to adhere to the boot. Be sure to center it over the seam line of the tube and toe. And just like that you have a boot! Stay tuned for a cummerbund tutorial in the future! -
Biker Scout Boots Tutorial
cheesewhoopy replied to cheesewhoopy's topic in ROTJ Biker Scout Soft Parts
Part 3: The tube You will first need to take a few measurements: - Circumference of the largest portion of the calf - How tall you want the boot to be (This can be determined by putting your knee armor on and measuring from the bottom of your foot to about an inch under the knee armor. If you don't have knee armor, measure from the bottom of your foot to the back of the knee where it bends and then subtract approx 3".) *Be sure to add an inch on both side of your calf measurement to account for the overlapping velcro* *After that add an extra 3/4" to account for your socks/flightsuit* *Be sure to add an inch to your length for folding the top over* Now that you have those measurements, flip your vinyl over on a flat space and make a square with them. For example in the photo below the measurements are 16"x18.75" after adding the extra needed. Then flip your boot over and measure how wide you need the front opening of the tube to be. You will also need to determine how wide the bottom of the tube should be. This measurement can be found by placing the tape measure roughly an inch before the heal and measuring to the center of the back of the boot. You will then want to add about an half inch to account for the overlap of velcro. In the following picture the actual measurement used is where the arrow is. Now, find the bottom center of the square you made on the vinyl and using the measurement from the bottom of the boot, create an opening that will be cut out to fit over the boot. I recommend adding about a 1/2"-3/4" on each side to that measurement. Your opening should look something like this. The height of the opening depends entirely on the boot you use. Start with the opening really small and make it bigger as needed when you are fitting it over the boot. Next, you will draw out how wide the bottom of the tube should be based on your measurements. For example, 6" is used as seen the photo below. You will want to use a ruler to make an angle from that 6" mark to top corner on each side. Now cut it out. Use this as a pattern to make the tubing for the other boot. Fold the top inch over and sew it down using white thread. *After new research use white thread instead of brown for lancer specs* Sew down velcro on the each side using brown thread on the outside. The outside flap should be facing inside and not visible from a side view, so be sure you plan accordingly on each tube. Velcro the tube shut and check to see it fits. Draw a line on each side,so you know where to glue. Spread E6000 on one side with a Popsicle stick. Use CA Gorilla Glue on the outskirts of your E6000 to ensure a good hold. Place the side of the tubing on the glue and push down firmly for a 10-15 seconds to get it to grip. Then clamp the top corner. *Put a scrap piece of fabric under the clamp or else you will leave an impression of the clamp in the vinyl* Repeat the same process on the other side and your tubing will be glued down. -
Biker Scout Boots Tutorial
cheesewhoopy replied to cheesewhoopy's topic in ROTJ Biker Scout Soft Parts
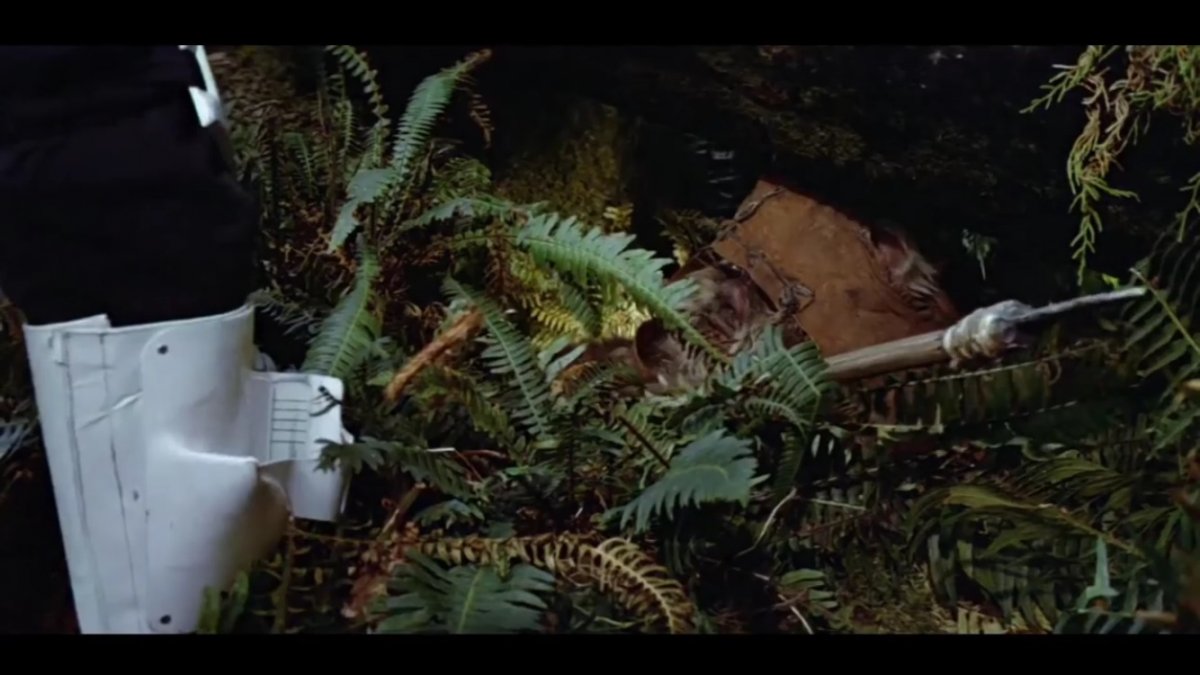
Part 2: The Toe The first thing you will want to do is cut out a piece of vinyl or leather to cover the toe and place a few tacs in the front. Then take your heat gun or hair dryer (preferably a pink one with flowers on it) and begin to heat the vinyl. This will allow you to stretch the vinyl over the boot. As you heat the vinyl, pull it over the boot and tac it down on the soles. Continue this process until the vinyl is perfectly shaped over the toe of the boot. Use a marker to draw a line on the boot where the vinyl ends. This will help you know how far the glue needs to go. Let the boots sit like this, tacked, for a little while so they retain the shape. You can take the hair dryer and heat the vinyl more while tacked and then let it sit and cool off. Leaving it tacked for 10-15 minutes should suffice. Then take all the tacks out except for a few in the front and start putting generous amounts of E6000 on the area where the vinyl will be. Go all the way back to the black lines you drew. Using a Popsicle stick, smear the glue around like jam. This will provide better coverage. Now, reheat the vinyl a little more with the hair dryer, then tack it back over the toe to glue it in place. You may need to play around and do some stretching. Let it sit for a while so the glue can adhere. E6000 take 24 hours to cure and maximum strength is reach at 72 hours. However, you can leave it for 30-60 minutes and it will stay in place enough to move on to the next step. Using an exacto knife, cut the excess vinyl off. Then cut a long 1/2" strip of vinly to wrap around the toe. This strip does not have to be a perfect. When you pull it around the toe it will even out. Using CA gorilla glue,which cures faster glue the strip around the toe. You can use E6000 but again it will take longer to cure. You want to use E6000 on the rest of the boot because it has the ability to flex which CA glue does not. Once you glue the strip around the entire toe, you should be left with a nice clean looking front end of the boot. -
Materials Needed: - High qaulity marine vinyl or leather (one yard should suffice - White thread - E6000 Glue and CA gorilla glue - 1” Velcro Tools Needed: - Sewing machine - Hair dryer/heat gun - Scissors - Exacto knife - Pins/tacs - Magnets/clamps Part 1: Cutting the soles You will want to use a pair of boots that have a softer/gummier sole. I recommend “Kingshow Water Resistant Premium Work Boots” found on Amazon. Pencil out the pattern you want on the soles. Then use an exacto knife to cut out the details. Cut into the pattern very shallowly, then slice through like bread to cut it off. Rinse and repeat on all penciled in patterns until complete.
-
Wow could use a little updating! I’ll be working on boots this weekend, so I’ll take some pics and write some words.
-
I can also put together a complete tutorial for the next pair of boots I make.
-
Great idea! I’ll try scanning my template and posting a photo tonight.
-
I can understand what your saying. The specificity could trip people up. Maybe saying the helmet bolts are to be flat or concave for basic. Then strictly concave for lancer would be better?
-
The GML should read and be aware of the other levels requirements for a costume. I don’t think you having pieces of lancer in your basic approval should have any effect on approval. By that logic, everything would have to be 100% lancer to get approval or 100% basic.
-
Whiskey's semi-finished Scout Trooper
cheesewhoopy replied to Whiskey's topic in ROTJ Biker Scout WIP
Lucky!!! -
Thanks!
-
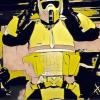
Pretty much done at this point. This was the best pic I could get at the moment. Things left to do: -Add Velcro on sleeves so biceps don’t slip -Add Velcro so knees don’t slip -Might tweak the shoulders some more -Iron the right flap on the pouch because it got all wrinkled from tea staining. What do you guys think? Anything else I could tweak?
-
patterns Seude Patch Pattern?
cheesewhoopy replied to Hikuro1983's topic in ROTJ Biker Scout Soft Parts
I don’t know why I never thought to do 4 pieces. That would’ve saved me a lot of headache. -
Shoulder Bridge Covers question
cheesewhoopy replied to TB-9490's topic in ROTJ Biker Scout Armor/Helmet
Hey, I replied to your pm as well. Sorry it didn’t fit you right 😕 I was just giving it some thought, and I think the best thing would be to put a piece of plastic between that gap. Cut it to the right size and fit it between there, then place the 1” cover in the center. Walmart sells “For sale” and “Keep out” signs that are made of a styrene type plastic and are white on the back. They’re super flexible and only cost $2 I think. Something like that should work. -
patterns Seude Patch Pattern?
cheesewhoopy replied to Hikuro1983's topic in ROTJ Biker Scout Soft Parts
I’m pretty sure I still have the paper pattern I used. I can take some measurements if you’d like. It varies depending on your height, but might help. -
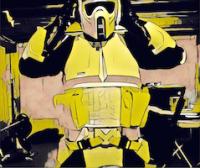
Here is the how the EFX helmet looks with armor on. I need to adjust the placement of my shoulder bells so they come forward a little more. And I think I’ll make my flack vest shorter since you can see a bit of it at the bottom of my bund.
-
patterns Seude Patch Pattern?
cheesewhoopy replied to Hikuro1983's topic in ROTJ Biker Scout Soft Parts
This is the pattern I use if that helps give you an idea. -
Thanks!
-
Moncal helmet review/comparison
cheesewhoopy replied to 3DImpact's topic in ROTJ Biker Scout Armor/Helmet
Wow he did a great job with the resculpt! Looks fantastic. If you ever wanna sell that third kit.... feel free to send a message my way 😉 I like your idea about two separate kits, one clean and one dirty. I was thinking of doing the same thing. -
I’m not sure if they’re available I’m Germany, but I recommend King Show water resistant premium work boots found on amazon.
-
Rather than making a square, try cutting in all the way from the top. It makes it easier to slice into the sole. The same way that you did the bottom. It also depends on the material of the sole. The boots I use are a little bit softer and gunmier so it’s easy to cut into. Something with a hard sole will be more difficult.
-
Yes, I use an exacto knife for everything. It’s hard to explain with words, but I’ll try my best. I trace over the lines I drew with the knife, cutting in a shallow amount. Then I start at the top (or bottom depending on which part your doing) and slice through like bread. I’m going to be working on a pair of boots this weekend and can try to record a video if that would help.
-
When I make boots I use an exacto knife to carve the soles. I draw out the pattern with a pencil then slice through with the knife over the pattern.