


Soundwave
-
Posts
319 -
Joined
-
Last visited
-
Days Won
16
Everything posted by Soundwave
-
mlbukowski's sc armor build
Soundwave replied to BikerScout007's topic in ROTJ Biker Scout Armor/Helmet
True that. But, hey! Look on the bright side! You get this mystery free gift! Could it be a coupon for 10% off a future purchase? A new balaclava? An extra inaccurate snout greeble? A free sticker? .... What could it be? -
Got some feedback yesterday on my gear. I had weathered down the knees and the chest, however, I didn't have much on my boots. I thought I had weathered enough, but they turned out green, so I cleaned them up, and started over. Just make sure your weathering is consistent throughout. I'm now currently working on spraying the grey primer, using a grill brush on the boots, road grime from some tires, as well as burning some paper over the vinyl to add wear in different places. It's a lot of work to get it looking good. So, word to the wise, make sure you know what you're doing BEFORE you start weathering. It takes a lot of work and processing to get it looking right. Shoe polish and spray paint should not just be acceptable forms of weathering. Whatever you do... Make sure it stays and is permanent, But it also needs to look acceptable. Make sure you get good feedback on it before you try to go all out. And, last for now.... Just remember that I'm pretty sure that the 501st will approve your armor BEFORE you start weathering. What you do after you are approved is on you. And what you do may be subject to approval per your 501st peers. So, just be extremely careful when weathering.
-
Trim the shoulders down, and/or round off the bottom edges. Rank strips need to come off the boot holster. And it does look a bit bigger than the body it is on. You may want to adjust for size as suggested above.
-
mlbukowski's sc armor build
Soundwave replied to BikerScout007's topic in ROTJ Biker Scout Armor/Helmet
So, I forgot to mention that the balaclava they sent is not that great. I'd look one up on EBay. Don't plan on using the balaclava that KS sends, if you ordered one. -
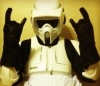
I'm not sure what you mean by dropping the armor on the primer. I'm also not sure how it was read earlier, so I'll just explain again... Lay your armor on the ground, Stand about 2-3 feet away (do a distance spray test before application) and spray the primer/paint at the ground in front of your armor. The wind and gravity will assist in getting it in the areas where you are trying to get it. You do not need to spray directly onto the armor. It will apply too much. What you're doing is getting a natural feel to the armor. You're not looking to make it obvious from a distance. However, if it shows from a distance, you have have done too much. The weathering should be shading. if you look at my user picture, You'll see a few places on the chest. Those are sticker decals. I also used some of the black paint and grey auto primer for shading and weathering. In the picture, you can't see much, But I assure you, it is there. Anyone up close will see it. And from a distance, I just somewhat blend in. Which is good. You don't want to paint a target on yourself. granted, everyone's armor is different, but we are in "uniform". And I'd be willing to bet that no single trooper was placed alone into an area of the galaxy/universe. troopers were a team of specialized recon. So, Your weathering should also match up with what your team's is like. Most of the troopers in my area that are Scouts have a pretty clean look. I chose some weathering, as I wanted to be a sniper. Therefore, it allows me to fit in with my group, and I have my own story as well... Does that help?
-
I highly suggest BSN user CucBlack. He's in South America, but will make to your specifications. Just make sure you add a couple of inches on your shoulder to shoulder for your flight suit. You're going to need it. He can make the flight suit, the flak vest, the cumberbund and pouches, and a balaclava if you're in the need for one of those. It's a one stop shop for all soft goods needed. His turnaround time is about a week or so, and it may take a few weeks for it to clear customs in the shipping process, but as long as you're building while it's shipping, you should be good to survive. Let me know if there's anything else I can assist with.
-
Just don't use the fingernail polish removed on the bed while watching TV... Because I totally did. And I also totally accidentally knocked it over, and you CAN NOT get that smell out of a matress. Just sayin'.
-
I had to end up doing ye ole' hair dryer on the TD routine, and it worked like a charm. I had my doubts... But it worked. Also, I love your idea on the TD and belt... I may look into using my riveter to attach my TD to the back of the belt webbing now...
-
Those $5 clamps are all that I ended up using. Sandpaper was another one of my useful tools. Other than that, it was all tape, and glue, and zip ties, and velcro and elastic and exacto/razor blade... And some rivets of course.
-
Also, If you're going to weather, Make sure you keep it where it makes sense. Don't weather the chest, and forget or neglect everything else. That's why less is more... because for each piece that you do, It adds more overall. One of the things I did was get some automotive primer, spray it at the grass and let gravity and the wind do the rest. If it gets too heavy, get a brillo pad and gently scrape it down. you can also do an extremely light mist of black. Just don't cake it on. it starts to look tacky, and uniform. You want the weathering to be character to your costume. It should tell a story. And that story should not be a Rorschach test.
-
It shouldn't. Just make sure you don't overdo it like that other suit was. Keep it simple. Less is more. Make it your mantra... Less is more.
-
I had a leftover sheet of decal stickers from the big AT-AT playset vehicle thing from the 2000's... I never used. So, I dug them out, and ended up using some of the stickers for battle damage on my armor. I cut and scraped them up pretty harshly, and then ended up going over them with a lighter/open flame to add a little more character to them. You wouldn't believe just how well they turned out for being just leftover stickers for a toy.
-
Dude, my armor is complete. I just have to make a few adjustments now. Got my bucket in on Sat. Waiting on new stickers, the Snoutr Greeble from Rottie, and then the new helmet hardware... Other than that, it's some fine tuning with filling the pouches, finding an easier way to get in and out of the boots, and I should be good to go. I'm done, man. No race needed. Sorry. -- As for the wear, I can't comment on what Enigma does. I'm just his bro. I back him up. I can't answer for him. I like my suit to have some wear and weathering on it. A little goes a long way. So, I'm not that worried about being Death Star white. And don't be sassin' him on the pink. He's a ladies' man. And ladies love a man in uniform.... So I've heard.
-
Looking good, Hawk.
-
Rare earth magnets are used 'round these parts for the faceplate. I can't say about worldwide. So, I can say that those are a good idea. As for the lid opening and closing, I'd imagine that it not being able to be opened would be a problem. I don't think it's a requirement to be able to be opened... I mean, I have not read or seen anything about it being required...
-
... Oh Myyyyyy
-
Don't worry. I set my goal for May 2nd. I doubt I'll make it. But I'm trying come hell or high water... Which... To be honest, I have no idea what either or them have to do with the other. :/ Wouldn't high water extinguish hell? Just sayin'.
-
Those shoulders don't look like they've been trimmed, trooper! Get on it!
-
I definately can not meet up with you in person, but I'm willing to donate some of my time via messaging to help out.
-
I've done some spray can and then doing some scuffing with a brillo pad. It seems to add some character to the residue left on the armor. I'd also do a spray test with each can from 3 feet away, 2 feet away and one foot away and see what works best for you. You can also spray down at the ground, and let it mist up towards your armor and that way it's not a direct spray. Make sure you have your own technique down, Sarah... And go from there. Good luck!
-
I think I was told as a general rule, stay away from Ebay or Amazon when looking for parts of your build. There will be a few exceptions... but not many.
-
Thing, I'm not really quite sure what kind of bolts these devils are. BatNinja installed them before I bought the bucket from him. I just thought it was possible to have it opened if need be... I mean, I'mma assume that somewhere a long time ago in a galaxy far, far away... IF (only IF because I know there is some debate on this topic) .... IF there were Sniper Scouts... I'd assume that they wouldn't be able to have that accurate of a shot looking through the helmet lens. They'd have to either take off the helmet, or raise the visor. I know it's a matter or personal preference, but I'd like mine to have the option to stay open.... Just in case I need a quick drink of water, or meds, etc. For the record here, I am NOT planning to troop with it open....Before that conversation begins.
-
Well, ya know... just in case I run into any willing ladies in the forest distributing swords by the lake... It'll have to be opened at minimum...
-
So, I got most of the ole bucket assembled yesterday, and I'm still having problems with the lid of the helmet not wanting to stay open or up. I threaded the screws to see if that would help, and nothing... It still wants to close back... So, Can someone offer up some advice on keeping it open when I raise it up? Thanks!
-
Jeremy, I've found that if you end up sending them a PM on facebook, it goes to someone else, and they end up getting back to Brenda And she'll message you again. Try that and let them know about the problems you've had. You now make the 4th person here that I've noticed having this same problem with KS including myself. I ended up having to buy a bucket from BatNinja and I'm attempting to get it together myself so that I can try to get it together, assembled and approved before May. (I doubt I'll be approved, but at least I can troop, hopefully.) ---- Anyways... I need a little help with my helmet. I ended up going out and getting decals from TrooperBay, and I got a new Snout piece. I've built an ear piece to darken it up instead of painting it... However, I can't seem to keep the lid closed when it's down, and I can't get it to stay open when it's up. I went and found a face shield from Lowe's, and I'm getting some window tint to build the lens myself. What's the best way to get the thing to stay in the facemask part? Also, When painting the front where the snout greeble will go... Should it painted gloss of flat black? Any advice would be appreciated. Thanks again, Troopers!
