

gmrhodes13
-
Posts
994 -
Joined
-
Last visited
-
Days Won
13
Everything posted by gmrhodes13
-

A Biker Scout, thanks to BFF's
gmrhodes13 replied to gmrhodes13's topic in ROTJ Biker Scout Armor/Helmet
Thanks Mike will do -
A Biker Scout, thanks to BFF's
gmrhodes13 replied to gmrhodes13's topic in ROTJ Biker Scout Armor/Helmet
Thanks Mark I take any advice onboard, we did keep these builds off forum as Liz wanted to be the first armored female in our squad. I agree the pouches do look too big, I could either go to a all night buffet or make some smaller ones, smaller ones work, clips not a problem will get them sorted in the morning -
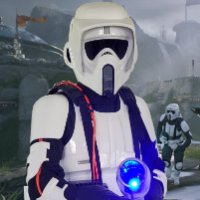
I was asked if I would help a couple of close friends with some sewing with their Biker Scout builds, decided if I was gong to make 2 sets of everything then I may as well make 3 and order my armor later. Anyway on to sewing and a few weeks in they both arrive for a build day, start unpacking their armor and say "oh they made a mistake, there seems to be 3 sets of armor here" could have blown me over with a feather, they had gotten together and bought me a set of armor for all the work I did and as a birthday present, big thanks to you very sneaky buds, Thanks Brett (Synkro) & Liz (Liz). So here we go, photo's done and just waiting on word from my GML, fingers crossed . Waiting on a new set of stickers in the mail, need a bit of trimming on the undersuit, bit baggy in places, after approval I may try to shoot for Lancer with a few more tweaks
-
From junk to presentable - who made this blaster?
gmrhodes13 replied to a topic in ROTJ Biker Scout Weapons
I did as Pandatrooper, I added a metal strip to the base of the blaster then magnets to the boot holster. But after playing with electronics I worked out you could use an actual metal plate resistor (the cap plate on the grip with the two screws) just sand off the resin one, drill a couple of holes then screw on, then add a magnet to the inside side of the boot holster, just another idea -
Most who know me from other forums know that I just can't have a blaster without it having lights and sound, so here goes my blaster build. Started with a printed blaster kit from a fellow squad member, he supplies quite a lot of printed pieces around our squad. Found a cheap toy blaster with a nice sound Started looing at were I could hide everything, decided I would need a smaller speaker to hide in the sight. Recessing a small push switch and also a jack so I can run a cable directly to my Aker, really makes peoples heads turn when they hear a loud blaster Made a few metal base brackets, these are for when I place magnets into the boot holster Making places for the wiring to run through the blaster as to not be seen Adding a small batter holder and cover plate to hold them in Adding a high bright red LED Everything together and in it's place With the light and working Next will be some sanding to get rid of some of the print lines, then onto painting.
-
Looking good, nice work keep it up
-
I am in the middle of a build for a friends SC bucket (practice for mine that should be on the way soon), I found I had to do a little clean up and do some trimming of the underneath of the face plate and also the sides to match the back section. Also the holes that had been pre drilled in some of the pieces did not align properly so I have had to adjust for a better fit. I am used to make TK buckets so a bit of trimming and aligning wasn't scary for me. I have had a good search but unfortunately have not as yet found a really good SC bucket build.
-
Very nice work, well done
-
Looking good. I found the pouches the easiest to make, I stuffed them with foam too. I have the same texture on boots I have made, I don't think it's a problem. Nice build can't wait to see it finished
-
Coming along nicely, well done
-
Awesome, looking good
-
Nice idea
-
from other builds I have seen it is looking good
-
+1, closely watching I will be
-
Looks like fiberglass to me
