

NegativeEleven
-
Posts
630 -
Joined
-
Last visited
-
Days Won
11
Everything posted by NegativeEleven
-
I'd wait on the strip cuz you'll use that to cover some slippage when you do the riveting. Both E6000 and vinyl have a lot of give in them and can move a bit while you're working. The strip covers any imperfections.
-
Think in the planning stages about how the weight of the blaster is gonna affect the right boot. I wish I'd doubled up the vinyl on my first build. I'm hoping this weblon/eisenglass combo will work on my new ones.
-
I'm quite happy with sintra glued into the snout and a single screw thru the lens into the sintra. It's easy to take out if necessary. Of course, I used a lens I got from the army/navy surplus store that already had a convenient hole in it.
-
My GML wanted to see "between 2in and 3in" between belt and box, so I had to send this pic in with my submission. The guy who took the photos for me apologized for not noticing the strap had flipped around with the clip hidden. So, yeah, what Chef said, it's up to your GML, although he's gonna share it with the detachment staff and choose whether or not to accept their opinion. I think closer to the front without touching the cod and not so far back that you'll sit on them is a good rule. I hadn't heard the halfway between thigh strap and belt, but that works too. In my experience (and helping a friend get approved), they should be higher than you think they should be.
-

weblon instead of marine grade vinyl
NegativeEleven replied to NegativeEleven's topic in ROTJ Biker Scout Soft Parts
Yeah, if I could afford it, leather would be the way to go. Almost got the old boots repaired enough for trooping. Still sanding the fixed corners of the holster. I'll probably pick up a new pair of base boots tomorrow to start working on this new build and then I'll share some pictures. -
I'd move the drop boxes down a little, perhaps half an inch (which might require an inch of strap because of the angle). They wouldn't look so big if they were sitting lower on your leg. There are some pictures where they're touching your belt. Don't go too far though. That was one of the first things pointed out that was wrong with my scout. For the pouches, they seem a little big and puffy. If you are capable, maybe turn them inside out and hem them in a little bit. Whatever you've got filling them, use about 75% of that. Stroker, it's hard to trim and round the shoulder bells on a KS kit because there's a deep return edge on almost every piece. You have to take that edge off of the whole shoulder before you can round it without it looking weird.
-
weblon instead of marine grade vinyl
NegativeEleven replied to NegativeEleven's topic in ROTJ Biker Scout Soft Parts
I will probably try the velcro inside the right boot like in the tutorial with my new pair. The snaps I've had don't leave any room for movement. If I crouch or kneel, they're gonna pop loose. Velcro is a little more forgiving. I spent a couple of hours tonight trying to salvage this holster. I've got a new one ordered, but I'm really leaning toward buying a new pair of base boots and salvaging this pair as a backup or to wear until the new ones are done. On the holster, I already had to repair the top two rivet holes where they'd cracked after I tripped on something back in February. Over 4th of July, I wore them and leaned against something, completely breaking off the bottom corners around the rivets. So I cut out a vaguely similar corner from sintra, heated to the same curve and glued behind the missing corner. I have some scrap ABS here. I cut even less accurate corners from that and glued to the sintra. Then I used my acetone/ABS paste to make a mess over the whole thing. Tomorrow,after it's bonded a little more, I'll be applying the paste again to smooth it out. Then after letting that sit for a few hours, I'll be delicately trimming away with the dremel and orbital sander. Hopefully it will be strong enough to put rivets through on Sunday, but I'm cleaning up and re-gluing most of the vinyl on the boots first. -
weblon instead of marine grade vinyl
NegativeEleven replied to NegativeEleven's topic in ROTJ Biker Scout Soft Parts
My current boots are a little wide, but even with snaps on the flightsuit and an elastic strap from the holster support around my leg, it still looks saggy in pictures. -
I don't know what I'm doing differently than other scouts. Perhaps it's riding my motorcycle in armor or just wearing the boots to work, but the vinyl (marine grade from Hancock, same as what they have at Joann's) shifts and changes shape so much. I've got glue exposed, which picks up a lot of dirt. Also, the bottom edge is slowly moving away from the sole of the boot. I've met some older scouts whose boot vinyl seems much thicker than what I've got. I'm mad that my right boot won't stand up on its own with the holster attached while theirs will. After asking over and over where to get that stronger material and getting no real answers, today, I went by a marine cushion maker's shop and slowly went thru his options. He said that there's not a "vinyl" that will do better than what I have. He said my best choice would be Weblon. It's technically vinyl, which is actually PVC. With Weblon, there's a vinyl coating on a strong polyester base. It's just as flexible as the vinyl from a fabric store, so my boot's still not gonna stand up on its own, but given this guy's experience, I believe him when he says it isn't going to change shape as much as vinyl. I believe this is what I brought back: http://www.outdoortextiles.com/2985-62-vanguard-pearl-white.html The inside is ribbed, almost like canvas, but outside has that natural almost leather appearance of vinyl. It's much whiter than the stuff at Hancock and Joann's as well. He then gave me Eisenglass to sew inside the right boot for support. This stuff is another type of vinyl that is clear. It's basically like a thick shower curtain. It should flex enough to be wearable but not so much that the holster makes the boot fold over like it does now. I'm hoping to be building new boots soon (2 weeks til next scheduled troop). I'll probably do a quick repair job on the boots I have now first, just so I won't have to stop trooping. I'll try to take pictures of the process. I think there's a lot that I will do differently this time around. I'm thinking I'll sew the dogbone to the leg vinyl, then rivet to the boot and glue another dogbone over that. I'm sick of the dogbone shifting and having this black outline where the glue's been exposed. I'll be using a strip of plastic inside to secure the top of the holster instead of the sintra piece the size of the whole holster that I've got now. That was a mistake. I thought it would be more secure, but really it just put more stress on the rivets.
-
I don't know about other makers, but the KS belt is made as one piece and SC makes theirs with 3. The one trooper here in town who has KS armor is pretty skinny, so it was hard making the KS belt look right on him because you can only heat and bend it so much. If he was fat, that would be easie, just adding more webbing in the back. With the 3 piece, you'll get a better fitting belt because you can adjust the space between the front and the last set of "boxes" if needed, but you will have that seam and visible rivets (don't think glue alone will hold it for long).
-
I wouldn't use bondo alone. It'll crack when the armor flexes and you'll be refilling it constantly. Take the ABS you cut off when trimming your armor/helmet, put it in a glass jar with some acetone. It turns into a paste. Put that into the seams, but be careful because the acetone will melt the armor itself. Then you can use bondo spot putty to fix some little imperfections. That's what I did for the seam on my helmet. I didn't bother with the belt because I didn't want to paint. Paint picks up dirt much faster than bare ABS. My KS helmet came in 2 different colors of ABS, so I had to paint it anyway. After a year, my helmet looks weathered while the rest of my armor looks pretty new.
-
I used the headband from a Hasbro Darth Vader helmet and a couple of pieces of styrofoam that something else was shipped in. I always save foam if it doesn't make crunchy noises when you squeeze it!
-
What can I start now?
NegativeEleven replied to Musicaljedi's topic in ROTJ Biker Scout Armor/Helmet
Sorry... sent you a PM. Blaster might be next week. I want it to be perfect before I ship! P.S. - I replaced my first set of gloves with ones from http://www.scoutgloves.com/. They're great. -
hi guys got a armor question?
NegativeEleven replied to blholmes's topic in ROTJ Biker Scout Armor/Helmet
Over in the helmet forum, there's a size comparison thread. I have KS helmet and SC armor because of the KS being slightly larger, but I think it would have taken less time and anger to assemble an SC helmet kit. There's some flaws in the KS that made it not want to fit together properly. The KS armor is bigger in most places (bicep, forearm, knee) and has a nice return edge around each armor piece. I think the SC shapes are more accurate though. -
I'm sticking with my decision to build something that was seen onscreen in one of the original trilogy, but I'm gonna stop calling mine a DC-15x and just say it's a Valken-38 (Dengar's rifle). I am working on new barrel sides (squared with 4 long holes and one circle) and top (rounded with alternating holes), but I've got too many other projects to finish before DragonCon! I had to change those links in my post from HeroesCon. The chick who took pictures had a fit because our Garrison XO told her she couldn't share them with her name watermarked. His reason (and I agree) is because as the official photographer for the group it couldn't look like she was trying to profit from it. She deleted the photobucket account so no one could have access to pictures. Which was dumb because they were on the memory card that belonged to our Garrison event coordinator, in his camera... so they're still photos she took, but he had to re-upload them. Kinda childish if you ask me.
-
I decided to pop Battlefront 2 in and play a little last night to get another look at the rifle now that mine's troop-worth. Wow... in motion the rifle looks very different than the screen grabs imply. Put it in 1st person mode and it looks like they intend for the barrel to look rounded, not square. Obviously, the still image of the model out of context is very square, but the way it moves and the angle you're looking at it, I think they mean for it to be round.
-
What can I start now?
NegativeEleven replied to Musicaljedi's topic in ROTJ Biker Scout Armor/Helmet
My hobbytown only has styrene, not ABS. You don't want to try to bend styrene (or plastic ForSale signs). They'll just crack. A metal ForSale sign will work, or a piece of brass or aluminum from Hobbytown or a hardware store. If you hadn't ordered belt clips already, I would have thrown something in with the blaster for ya. I used large cotter pins, bent into a hook and glued in a hole in the TD tube. -
yep, it's part of why I chose the scout! I have a KS helmet, but I've tried on an SC and can still wear glasses. Just be sure when you build your helmet that the face/visor can raise up when you put it on.
-
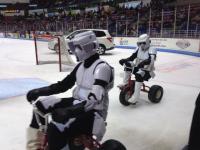
Ok, so after trooping for around 3 hours with it (con was 11am to 6pm on the day I could make it and I did half the day with my Cobra group), I have a couple of issues. It's a little heavier than I expected. I like a gun to have some weight to it. If you buy airsoft guns, a lot of times they will have metal or stone pieces inside to give it a more real feel. This one got a little cumbersome after about 30 minutes. I wasn't real sure that the barrel would stay attached, so I was afraid to put it over my shoulder with the strap I'd attached. Also, the way the strap was attached to the barrel wasn't real secure. I need to play with the piece I rigged up to hold the bipod up. It's kinda clunky and looks weird. I bent aluminum around styrene "I" beams to make it slide along a 3/4" steel track, with a spring to pull it onto 2 hooks on the bipod legs. I know, way over-complicated. It held, but there was some play, so if I wasn't looking and grabbed the barrel, it would slip a little and I kept checking to make sure I didn't break something off of it. I'm also not too happy with how flexible the PVC and styrene are on the barrel. If I leave it sitting on the bipod, it'll sag a little. I've got steel mending plates overlapping where they come together (you can see bare steel underneath the hinge in the pic below). There's the water-tight PVC screw down connector holding the PVC to the wood body and a thumb screw thru the metal hinge and sintra reinforced t-nut inside the barrel. It still can wobble a little. The "door" I built around the metal hinge there is sintra. I'm working on another vac-form buck for that piece that will look more like the one from the MG-42. Might need a longer thumb screw to go thru the whole barrel for strength, or perhaps a long screw thru the barrel and a wingnut on the door. I'm also thinking aout going back to the idea I had before with the aluminum "U" bar along the PVC barrel, but as you can see, I had to lose that when I saw how much it would raise the PVC inside of the outer styrene shell and would make the barrel impossible to line up with the body of the gun. Bonus, I didn't realize I was a "Scout-a-day" last week until our photographer at the con told me how happy she was to see her photo show up unexpectedly on facebook. She wanted to get that rush again, so she's sending in this pic soon: And big props (pun intended) to our former Garrison CO, who stepped down to focus more on execution of events and prop building, for really blowing everyone away with his set pieces at this con! Wish I knew which scout this was in the picture. I was so rushed to make sure I got in costume for as long as possible, I didn't get names from the 4 or 5 troops I hadn't met before.
-
Currently made almost dead on Scout gloves!
NegativeEleven replied to Darth Voorhees's topic in ROTJ Biker Scout Soft Parts
Last summer when Taylor (username rustbucket) and I were building our scouts, and SithArmor wasn't available, he bought some on ebay that looked like these. They weren't made very well. I believe there were 5 ribs on one and 6 on the other. I had found some that were closer for about the same price and we each paid someone to mod the gauntlet part for us. -
still gotta build something cover the opening where the two parts come together (the metallic piece with masking tape on it in the first photo). I want to be able to open and unscrew to take them apart to fit in my costume box. that piece will prob another vac form mold over a hinge. I've also got to finish a more square barrel to be more in line with Marcel's interpretation of the video game version. another reason to keep the first one removable. I also haven't built something to keep the bipod folded up against the barrel. I'm thinking magnets for that, unless anyone else has ideas. I've got 2 more sets of this barrel (one in .06 styrene and one in .09, I believe) already pulled and somewhat trimmed to fit together if anyone else wants em. I've also got more styrene and clear PETG if someone wants one of the top-cover pieces.
-
I've still gotta build the little door I'm using to cover the PVC fitting that tightens on the inner barrel. It corresponds to the hinge on the MG-42 that allows you to swap the barrel on that. I have started carving up a vac-form buck for that piece too. If anyone wants any of these vac-form parts, let me know. I think they'll be under $10 each (2 pieces for the barrel, 1 for the top cover, and there'll be a few other small parts that will prob fit on one sheet of styrene).
-
Almost there. I will be carrying this at HeroesCon in Charlotte, NC on Saturday. I am still working on the more squared barrel vac-form bucks. All of this is easy to take apart and fit in my costume box, so it will be easy to swap the barrel shroud when I get a new one made.
-
Took another pass at vac-forming the barrel bucks today. They pulled a lot sharper. I am gonna assemble one like this (the MG-42) but I have been trying to make new bucks more like Marcel's rifle. It's a little too big for my vac-forming setup, so it might have to wait till I get motivated to build a heater and bigger frame.
-
A little more work today and yesterday. First, the vac-formed top cover fitted, painted and scope mount resized (although that still needs some work). I am not keeping this vac pulled barrel. I'm just sort of test fitting it to see how it's going to work when I get a good pull. I think I'm gonna start over on the bucks and get rid of the tapered barrel, go for more like Marcel's flat one (with the rounded top). So here's an idea of what I'll be doing with a barrel when I've got one. That's an aluminum "U" bar riveted to the bottom. I cut the 2 halves of the barrel out with a wider bottom edge on the left than the right, but the front/back are wider on the left, so they fit together like teeth or cogs. I glued another piece of sign material (I think it's vinyl) along the bottom to give me a surface to glue both sides to and I put a steel mending plate up near the front where the bipod is going to attach, just so I'll have a stronger base to hang that from. And here's how the 3/4" conduit pvc pipe will sit on the "U" bar. I'm afraid the connector I use to attach the pipe to the main body is a little low, so that "U" bar is gonna make the barrel not want to line up with the body when I put them together. I'll have to figure that out some other day. As I have to go to work now. And one last thing. It wasn't visible in the other pictures, but I shaved down the stock to a more accurate shape. This was a mess. I had never used a reciprocating saw before and I couldn't get it to stay clamped. A lot of time last week was spent fixing this. Lots of bondo and wood filler and sanding.
