RZill
-
Posts
163 -
Joined
-
Last visited
Everything posted by RZill
-
The first of a thousand questions about my build...
RZill replied to RZill's topic in ROTJ Biker Scout Armor/Helmet
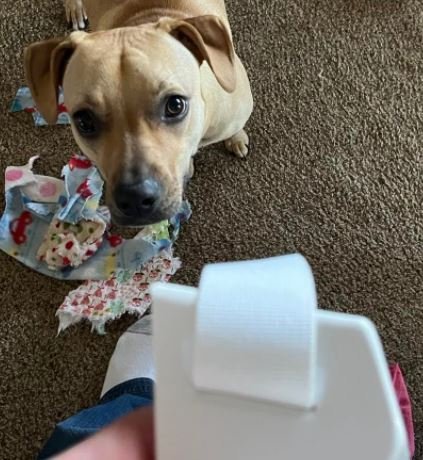
Trying to get the drop boxes placed correctly. Seems like they are mostly on the hips, and slightly forward, as to not be totally on the hips at 3 and 9 o'clock. Is this correct? I have a one inch gap between them and the belt. So, am I ready to secure them?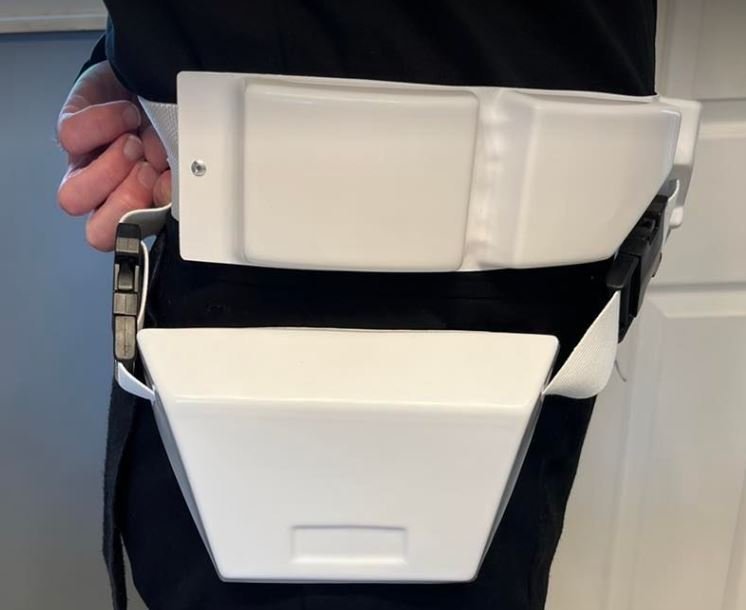
-
The first of a thousand questions about my build...
RZill replied to RZill's topic in ROTJ Biker Scout Armor/Helmet
That's what I was wondering - if there were stitches on that under-arm connecting piece that show between the chest and back armor. Hard to tell in the pictures. -
The first of a thousand questions about my build...
RZill replied to RZill's topic in ROTJ Biker Scout Armor/Helmet
Thanks! That's what I was wondering about. I know it velcros to the inside, but this bridge was what I was curios about. I guess I am still hung up on how anal retentive the TK build was, how precise everything had to be. -
The first of a thousand questions about my build...
RZill replied to RZill's topic in ROTJ Biker Scout Armor/Helmet
Is there velcro holding the two parts of the strap together that make the bridge between the back and chest? Hard to tell in pics and the build threads I've seen. Or, is it just velcro on the inside of the armor after you wrap it through?
-
The first of a thousand questions about my build...
RZill replied to RZill's topic in ROTJ Biker Scout Armor/Helmet
I'm looking at fitting the back-chest underarm straps. Looks like the cumberbund always fits underneath the chest/back armor, correct? I know to leave a lot of velcro to account for adjustments of the strap, but I just want a guide for it. Thanks! -
The first of a thousand questions about my build...
RZill replied to RZill's topic in ROTJ Biker Scout Armor/Helmet
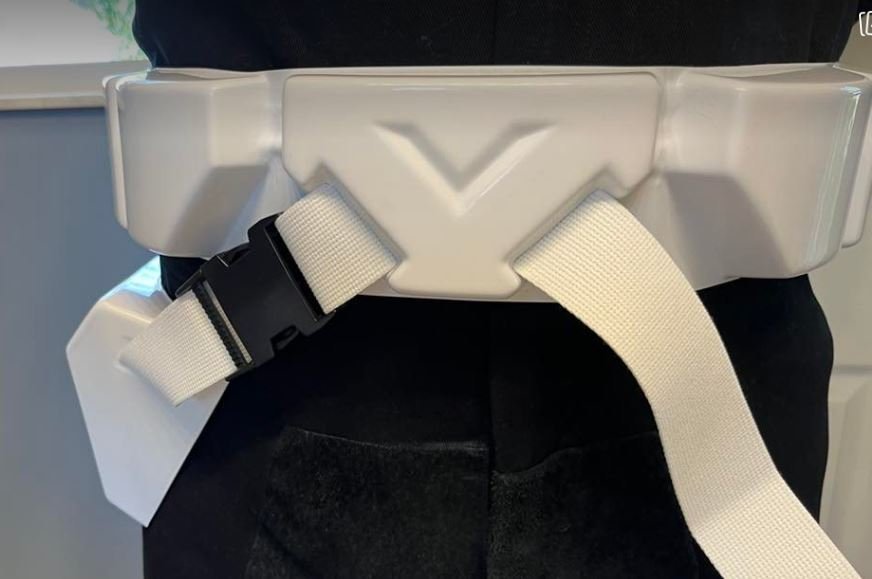
This is one photo of the belt rivet. It appears to not be centered between the end of the belt and the last box. On Pandatrooper's thread, it does appear to be centered. I would prefer it not so close to the edge, if it's acceptable to center the rivet in this spot. Is this ok? -
The first of a thousand questions about my build...
RZill replied to RZill's topic in ROTJ Biker Scout Armor/Helmet
Thanks! I was planning on the fold over and sew method for the front strap. I was referring to the rear of the belt, and how the strap in the back attaches to the belt itself. I know it requires a rivet on each side, but is the rest of that strap velcroed to the inside of the belt? It looks like it's attached somehow, and I am guessing it's a personal preference thing. Or, should I go with velcro in case it needs to be adjusted? -
The first of a thousand questions about my build...
RZill replied to RZill's topic in ROTJ Biker Scout Armor/Helmet
Ok, next questions - attaching the two inch wide strap on the back of the belt. I know there is a rivet to hold the strap to the belt, but I assume I should use velcro to reinforce holding the strap to the belt? Then for holding the straps for the drop boxes to the belt, I see a snap method by Pandatrooper - snap plates (male end) glued to the inside of the belt, and female end sewed into the drop box straps. Seems like this method would allow them to hang and sway more naturally, but is it necessary? Would velcro be a good option here? Whatcha' all think? -
The first of a thousand questions about my build...
RZill replied to RZill's topic in ROTJ Biker Scout Armor/Helmet
I am going to cut my flight suit in half where the belt and cumberbund will cover it, and extend the suit another couple inches taller. With that, the vest will not make a big difference, and I can still wear it. I'll probably troop in a TK around here in the summer, anyway, as it is still cooler (temperature-wise) than the Scout. -
The first of a thousand questions about my build...
RZill replied to RZill's topic in ROTJ Biker Scout Armor/Helmet
OK, cool. I have enough velcro strap to let them out more. Thanks -
The first of a thousand questions about my build...
RZill replied to RZill's topic in ROTJ Biker Scout Armor/Helmet
Before I attach the bicep straps, whatcha think? Obviously, the bottoms are flaring a bit because I've not done the chest to back straps yet, but do the shoulder bells look good? And... I may get shot for this one... but, I've heard other Scouts talk that they don't often wear the vest while trooping. Of course, I'll keep wearing it for pics, fittings, and approval, but... -
The first of a thousand questions about my build...
RZill replied to RZill's topic in ROTJ Biker Scout Armor/Helmet
About how much space between the shoulder bells and the shoulder bridge? -
The first of a thousand questions about my build...
RZill replied to RZill's topic in ROTJ Biker Scout Armor/Helmet
I'm hoping to have the shoulder straps all done today, and tackle the side straps tomorrow. A couple questions: - should I be filing down the corners of the shoulder bridges? I feel it poking into me, and I am guessing since they're covered by the elastic strap over the bridge, it's fine to file those down. But, it looks like kayelbe's corners are still sharp. - it also seems like both of you have an elastic cover strap that is open ended, then wraps around the shoulder bridge, and is connected underneath with velcro?? -
The first of a thousand questions about my build...
RZill replied to RZill's topic in ROTJ Biker Scout Armor/Helmet
Nnnnneeext question - best method for the white cover over the shoulder bridge? Is it just a sleeve that can slide over the bridge once the T strap is attached? I appreciate kayelbe's advice on that strap, but since I am not going Lancer, I'm seeking an alternate method. -
The first of a thousand questions about my build...
RZill replied to RZill's topic in ROTJ Biker Scout Armor/Helmet
I haven't quit, I just got really busy and tired with my new hours. I'm still building, and have purchased a sewing machine and learned to thread and use it. Now, on to the shoulder bridge. The CRL says that for Level 2, I should use white fabric between .5 and 1 inch wide to cover the shoulder bridge. Since I am not going for Level 2, is a 1.5 inch fabric acceptable? Seems like that would give better coverage of the shoulder joint. -
The first of a thousand questions about my build...
RZill replied to RZill's topic in ROTJ Biker Scout Armor/Helmet
Not going to lie, I was terrified putting in my first rivet. But, I was careful, I practiced on a separate piece of plastic, and got 'er done. Looks the same on the other side. Now on to the opposite knee! Been trying to get even the smallest thing done every day. Alas, I start my final hell week - six straight 12 hour work days, so the Biker work will suffer. On to regular day shift after that, so I can devote more time to this. Hopefully, it's done and approved before the IC Con, and I can meet our Emperor in uniform!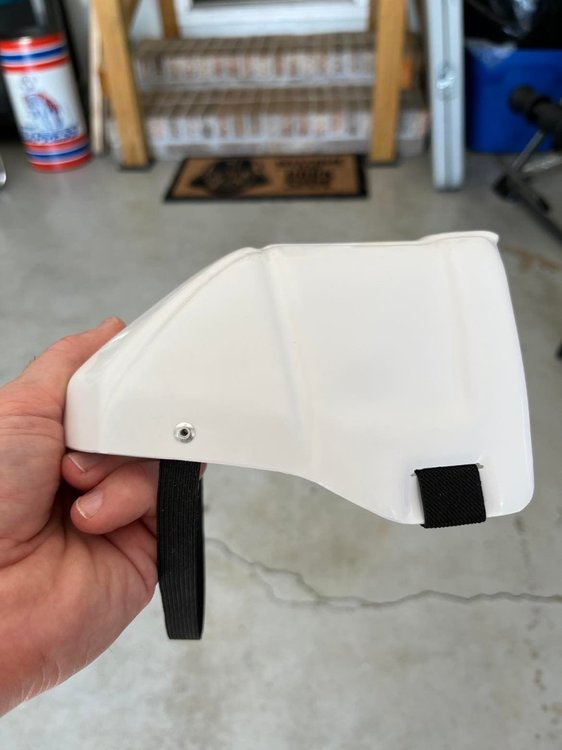
-
The first of a thousand questions about my build...
RZill replied to RZill's topic in ROTJ Biker Scout Armor/Helmet
Well, I said in my previous comment something about a million questions. Upon further review, that call is overturned - I originally said a thousand questions.... which I might approach! Next question - I'm about to invest in a sewing machine. Do I need a heavy duty machine, or will the regular material type be sufficient? I figure heavy duty, since it's sewing through velcro and the strap together. Thanks! -
Pandatrooper's SC Biker Scout build
RZill replied to Pandatrooper's topic in ROTJ Biker Scout Armor/Helmet
I only have two snaps left from my TK build, so now I save yet another trip to the store! -
Pandatrooper's SC Biker Scout build
RZill replied to Pandatrooper's topic in ROTJ Biker Scout Armor/Helmet
Okey dokey. Easy enough for the front. I guess there is no need for snaps to allow it to swing, since it's going through the strap slot, anyway. I'm more concerned about how to connect the back. Is the swaying around that big of a deal where I'd need this snap contraption? Or, is it just fine to simply glue or stitch the drop box straps to the belt without doing the snap thing? -
Pandatrooper's SC Biker Scout build
RZill replied to Pandatrooper's topic in ROTJ Biker Scout Armor/Helmet
So, in the photo with the snaps, strap, and rivet, is that sort of a before and after photo? The rivet goes through the snap and the backing once the snap has been applied?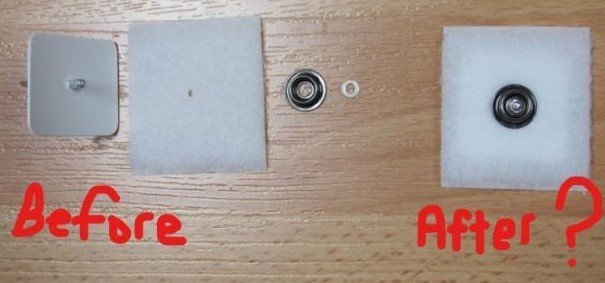
-
The first of a thousand questions about my build...
RZill replied to RZill's topic in ROTJ Biker Scout Armor/Helmet
Ah, ok - missed that one. Thanks! Sorry for the nitpicking, but I want this to be right Still under my promise of a million questions, and I'll be helping another trooper build one at an armor party, so expect more!!! -
The first of a thousand questions about my build...
RZill replied to RZill's topic in ROTJ Biker Scout Armor/Helmet
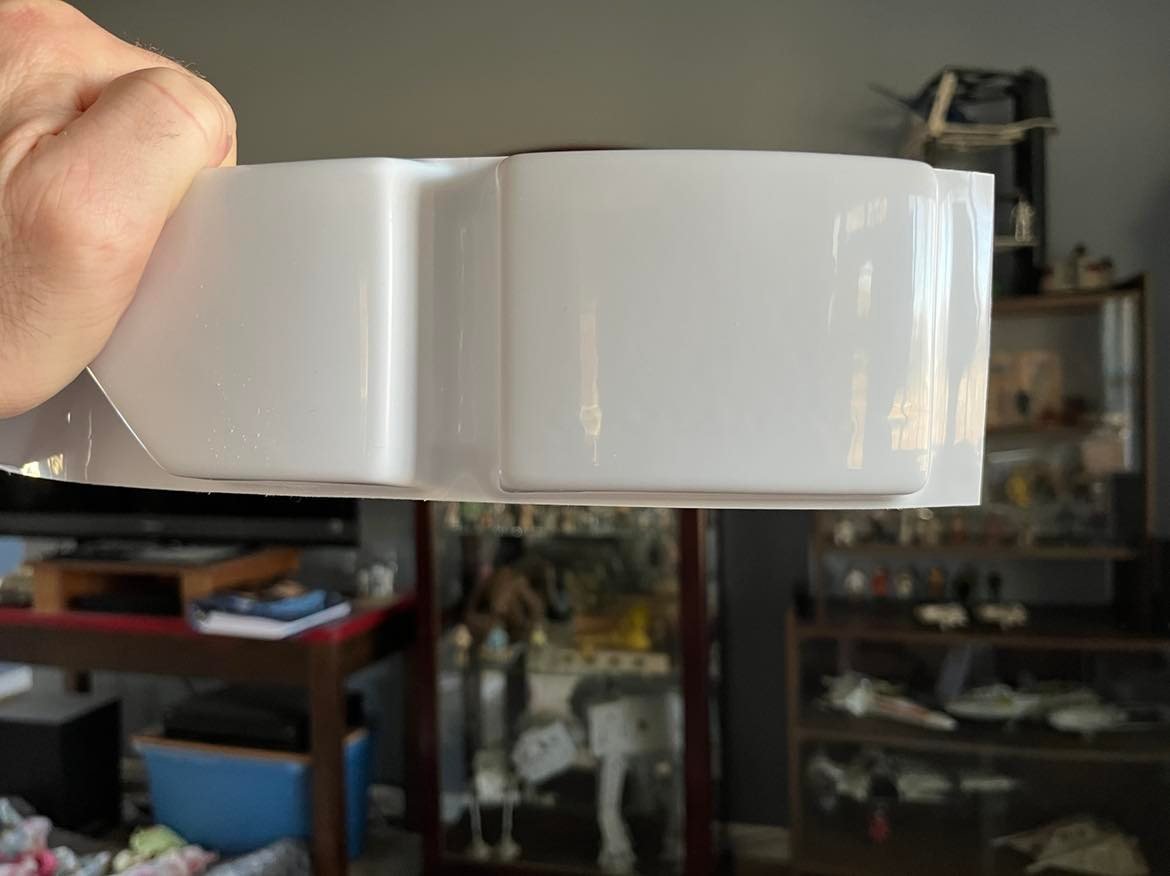
It's very difficult to see in the photos on Scoutopedia if the corners of the belt are rounded off or not. And the CRL doesn't show them at all. I'm guessing it's not a huge deal, since the top of the belt, at least on the edges, is covered up, anyway. Also, I've asked before, but should I level off the tops/bottoms of the boxes on the belt? Again, they are difficult to see in photos. I've sanded them down a little, but should I level them all the way to the boxes?
-
The first of a thousand questions about my build...
RZill replied to RZill's topic in ROTJ Biker Scout Armor/Helmet
Excellent, thanks. I have plenty of strap material, it’s the Velcro itself of which I only have four inches per side - I am sewing Velcro to the strap. -
The first of a thousand questions about my build...
RZill replied to RZill's topic in ROTJ Biker Scout Armor/Helmet
More and more and more questions - I told you it would be a million of them! Regarding the velcro for the side straps from chest to back armor, should it be heavy duty velcro? I know it would hold better, but also tougher to sew on to the strapping. It doesn't seem like heavy duty would be necessary, since it's not supporting any weight, it's just connecting front to back. AND, is eight inches enough to strap my front to back? It was all that was included in my set. After using my calculator app, I've discovered it's four inches per side Is this enough? -
The first of a thousand questions about my build...
RZill replied to RZill's topic in ROTJ Biker Scout Armor/Helmet
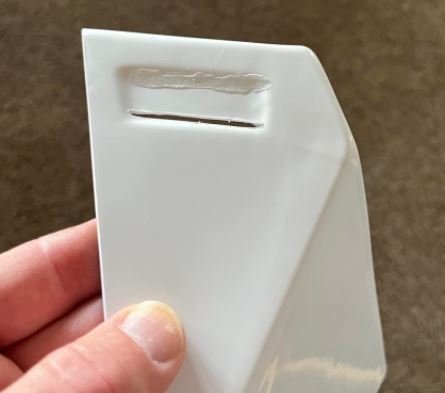
Here is my ABS paste result. The paste came out ok - not exactly the same color as my armor, but in brighter light, barely noticeable. Plus, the affected area is mostly covered by the strap, anyway. Pretty easy to make via the instructions from Kalani on white armor. I am buying a sewing machine to sew the velcro to the straps, since I have been wanting one for other projects, anyway. My arm and leg armor is basically done, aside from gluing on the greeblies. I am tackling the side strapping for the back/chest armor next.