RZill
-
Posts
163 -
Joined
-
Last visited
Everything posted by RZill
-
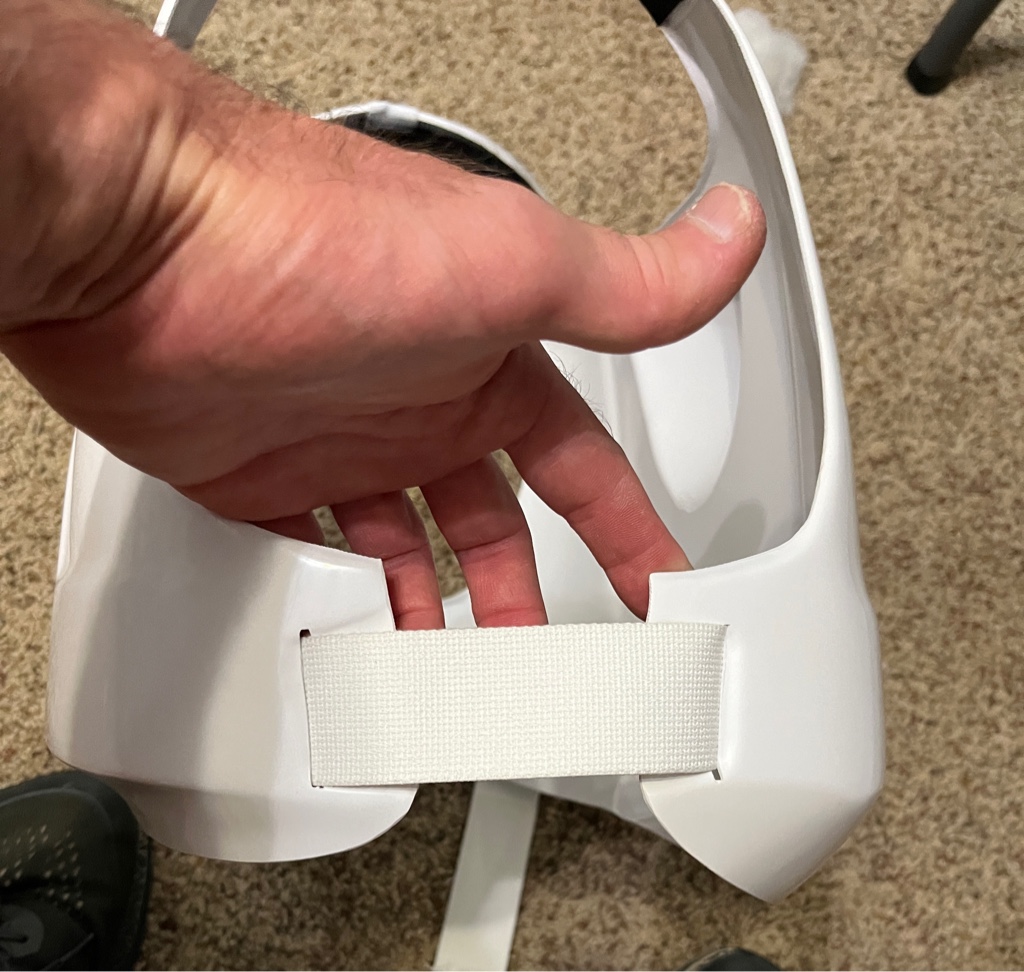
Yeah, the rivet’s just there to hold in place for now to line it up for pics and the bottom rivet. And I’m putting the half inch elastic strap in, too. Here are other angles. Sent from my iPhone using Tapatalk


-
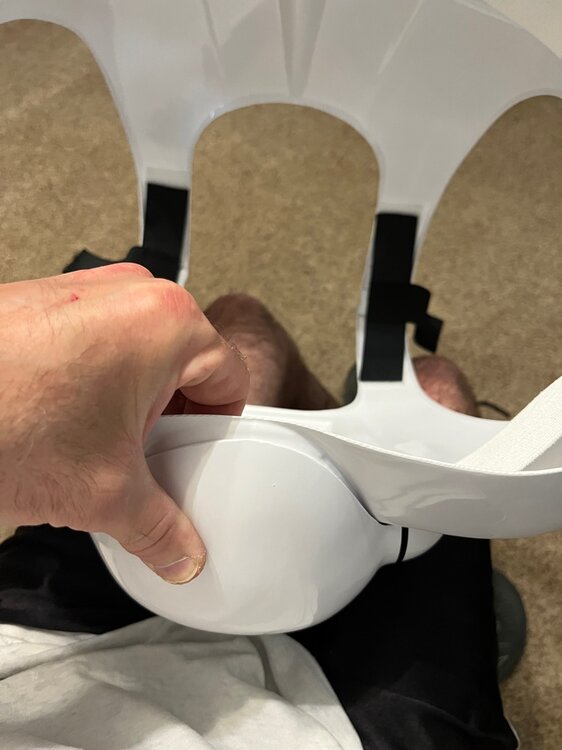
Another “before I rivet” question. Should I trim down, or is this good? Sent from my iPhone using Tapatalk

-
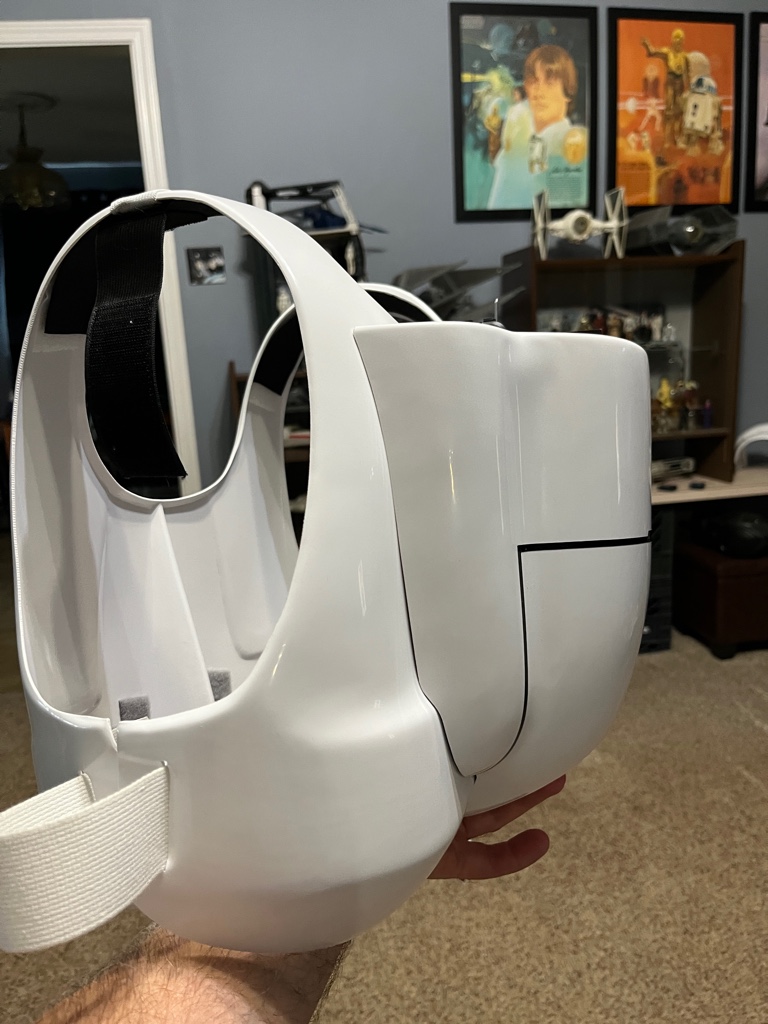
I know I’m jumping around here, but now I have a chest strap question. My other method was not working, following a Lancer build. I thought I needed a double strap look on each side. Am I ok with just a single strap on each side, no stitches or anything, just one strap velcroed to the inside front and back? From what I’m reading in the CRL, I only need the correct strap type and width to connect. Sent from my iPhone using Tapatalk


-
First of all, Happy Fathers Day to all you who have been helping me, and if you are a dad - or, like me, only a doggy dad. Question about the top of the tank - CRL only says top of tank has a rivet - multiple photos from CRL and Scoutopedia have the rivet appearing to be put in from either side (from up under the inside of the tank, or from right on top of the tank. Does it really matter which way the rivet goes in? Maybe another nit picky question, but again, I don't want to rivet anything before I know for sure.
-
I think my holster is too small. Maybe it’s just the camera angle? Hardy har har. Seriously though, I’m fitting my holster with my vintage Kenner pistol, but won’t troop with it. If it’s bigger than the prop pistol, it looks like there’s a photo on Scoutopedia with white leather liner inside that can make up the difference when I get one. Any suggestions on a pistol maker? Sent from my iPhone using Tapatalk


-
Yes, this is exactly what mine looks like. I do have the vintage Kenner Biker Scout pistol, which from what I understand, fits this size - I can try that. And I do have an e-mail out to my GML - still waiting to hear. Thanks! I know I am super nit picky and that I would stop doing this, but when it comes to riveting something on the boot - yeah, I want to get that right! Much appreciated.
-
My holster looks quite different from any pics I’ve seen on Scoutopedia. Studio Creations have pre-grooved lines going much closer to the top. And the bottom of this raised part goes all the way to the bottom, not about a half inch of flat space like the photos show. Should I just go with what I have, cut where these grooves are and attach? Wonder if I should contact my GL and see what he says, and if I need an entirely new holster. I’m not riveting this on until I’m positive. Sent from my iPhone using Tapatalk

-
You guys are awesome! I've been a TK for almost five years now, and I sing the praises of the 501st community whenever I have a Q&A with folks. I don't want to rush it, but I am hoping to be done by July 7th weekend for a big Con. Three days, and I'd like to not be a TK for all three again.
-
Thanks, Mickey! I was going to watch the video today and get a lot done, but had a family emergency that took most of my day.
-
Yes, it's completely disassembled. The only thing they do is put grooves where the five cuts go into the holster. Hard to tell from the pics in Scoutopedia - are those cuts complete holes, or just ridges carved into it? One photo looks like cuts all the way through, but I want to know before I do anything to it. And my TD is not assembled at all - I have not permanently affixed anything but the greeblies. My main question is if the clips need to be riveted on. I am guessing they don't, since you don't see anything but the tops of them and nothing is mentioned in the CRL about that.
-
I had actually just found that one, myself, right after posting this! But, I had a family emergency and couldn't amend my post. Thanks
-
OK, I think I am finally happy with the paint job on my snout and greeblie. I am going to tackle one thing that has scared me, which is applying the stickers. In the meantime, is there a good basic build thread for me to reference for building the TD and boot holster? I've been looking at a couple of Lancer threads, and it makes me think too much about things. I want it done right, but it's making me too nit picky.
-
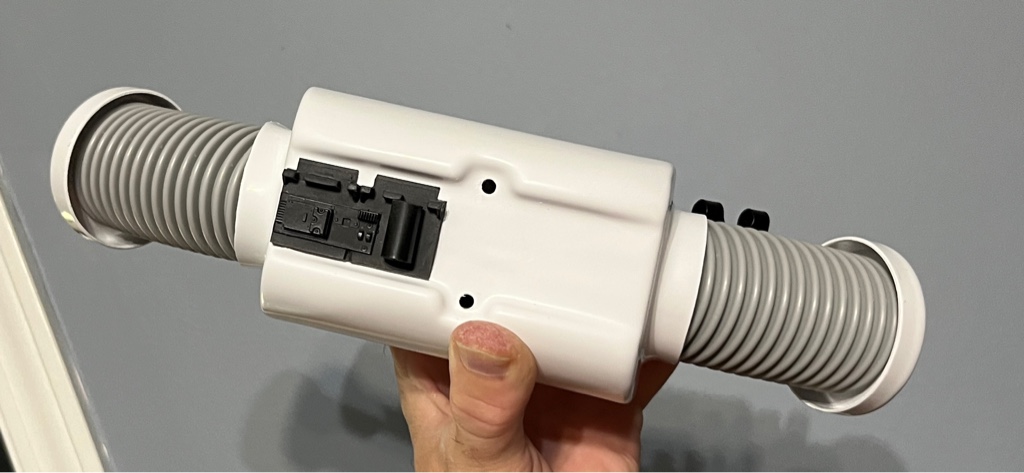
I know it’s upside down, but I guess it doesn’t look too short on the belt. Nothing is attached yet. I might barely sand down the edges of the TD. Sent from my iPhone using Tapatalk

-
Adding some non-helmet questions while the snout and greeblie paint dries. I feel like my TD is too short. This is how it came with the SC kit and all I did was sand down each end for the caps. There’s little room between the TD and end caps. Should I sand the TD ends down a bit? Is it too short? Measuring straight from end to end (caps included) it’s 11.5 inches. Sent from my iPhone using Tapatalk


-
So, I should just fix it up still using acrylic? Sent from my iPhone using Tapatalk
-
Eh, actually, I’m taking it off and going with gloss enamel. The acrylic matte might be good for the greeblie, but this is too dull. Gloss enamel is what I used for my TK ab buttons and those look good. Sent from my iPhone using Tapatalk
-
I actually think that’s not too terrible for the first coat. Sent from my iPhone using Tapatalk

-
I’m a bit disappointed that I’ll likely not get my helmet done in time for our big Con in a month, much less tighten up the rest of the build. But, this earhole thing is looking like an optical illusion. I tried taking a shot from as directly straight in front as possible, and the holes look way too small. But, from an angle and straight profile, they look ok. What say you? Sent from my iPhone using Tapatalk


-
OK, my next question is about the earholes. The Kropserkel tutorial video that was recommended to me shows him putting black mesh over the earholes, but the CRL says no mesh. What do you guys do for that? Simply paint enough of the interior of the helmet so that no white is seen through the earholes? I assume we want to leave those open for venting.
-
Did I do something wrong?
-
Mine got a little warped, but it doesn't appear to affect the look from the front. Certainly flush enough on the sides for the glue.
-
I just formed the lens and not getting it flush all the way around. Is it ok if some parts are not flush? I’m thinking that’s ok, as long as I tape it down when I glue it. I’ve already tried reheating it a couple times and I’m afraid to warp it if I do any more. Sent from my iPhone using Tapatalk

-
That’s why I’m on here, to get advice from the best! Thank you both. [emoji3]. I’ll have many more questions about the helmet in the next couple weeks. Hopefully have it done by our big Con in July. Sent from my iPhone using Tapatalk
-
I over think everything! That's just what I do... and why it took me thrice as long as anyone else to build my TK. So, you're saying not to cut down any more at all? Or, should I cut to the pencil marks that I made? (I know to round off the top corners)
-
I don’t even have that snout ridge on the bottom. Mine comes straight down. I never trimmed it at all, it came like this. Sent from my iPhone using Tapatalk