troygordon2
-
Posts
129 -
Joined
-
Last visited
-
Days Won
2
Everything posted by troygordon2
-
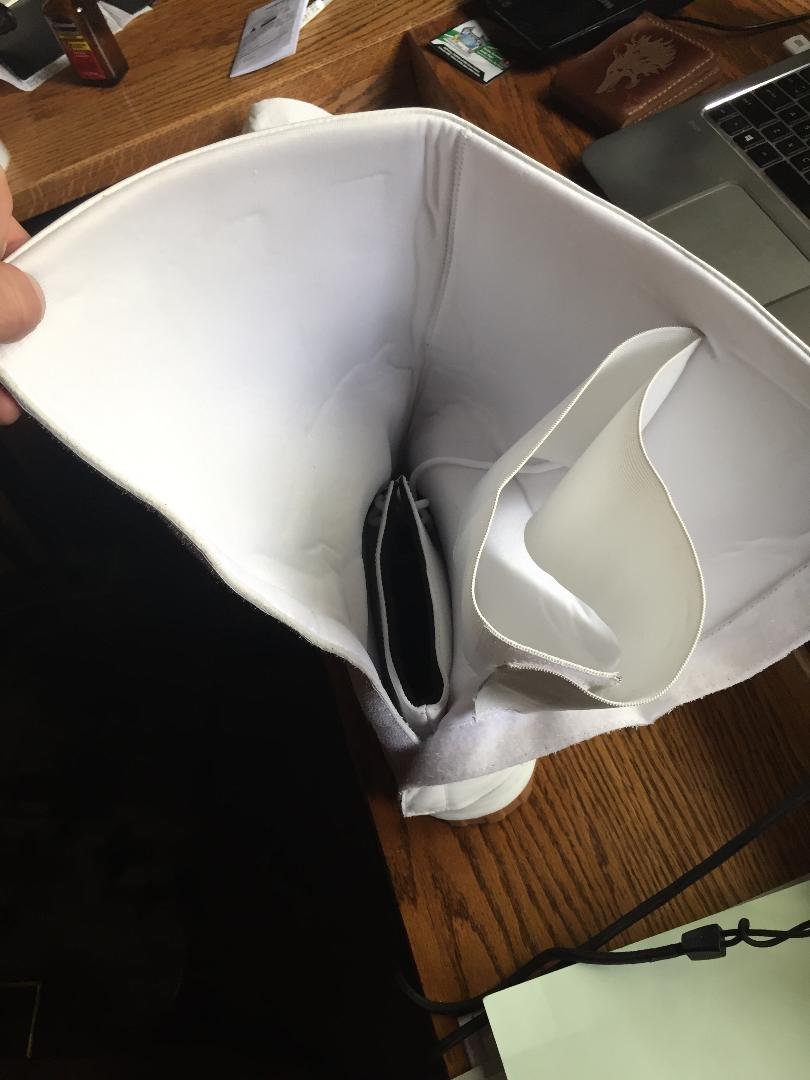
Did you guys cut into your boot holster to accommodate the trigger guard on the pistol? It seems to sit awful high, even falling out when not secured magnetically. The one here was the Thingiverse file, which I feel may be too small given the room present in the holster.
-
Crow Props Biker Boots and Gloves are in
troygordon2 replied to troygordon2's topic in ROTJ Biker Scout Soft Parts
I think I've got a cheap and easy solution to the pinched heel. I took some foam .5 inches wide, cut a piece to gently wrap the top of the ankle and not get in the way of the calf strap, added a smaller slice above with contact cement, and it seems to do the trick filling out that space under the dog bone. I cut slots in it to add an elastic strap to help hold it in place as well as hold the laces from the lower white boot. https://www.amazon.com/gp/product/B07WFYN1G7/ref=ppx_yo_dt_b_asin_title_o06_s00?ie=UTF8&psc=1- 16 replies
-
- 2
-

-
- boots
- biker scout boots
- (and 1 more)
-
Thank you sir. Stupid tank strap thingies... I also need to get a normal helmet kit eventually. Proud of the one I made, but want to do Lancer properly.
-
I I used some .5 inch very squishy foam to fill in that point on the Crow Props boots that has been mentioned by others. Pretty easy fix and it fills out everything well. I made a custom helmet, and of course that required a custom hinge that I'm actually quite proud of. I made sure to keep the 22mm concave face though.
-
All, My Nerd Years Resolution is coming along. I think I'm about ready to submit my application photos for the Timberline Garrison (Idaho and Montana USA). Hit me with any constructive criticism you've got though regarding the build. I think maybe my bicep pieces need to be moved forward more, but other than that, I'm just not seeing the forest for the trees at this point. I would like to weather it, but figured this would be a good shot to let the Peanut Gallery have a go before doing something like that. As an actual former Cavalry Scout, I NEVER looked this clean. Especially in combat, so this feels too parade ground for my likes. Another step for another day though. Helmet was designed and created by me. Armor kit was Studio Creations Gloves from Wampa Wear Boots from Crow Props Undersuit ("PJs!", if you're a former tanker) by Krypton Top
-
Honestly. I would drill it out and buy a replacement to mount on properly. I know Studio Creations sells parts https://studiocreations.com/howto/bikerscout/forsale_bike_replacementparts.html and it's a very nicely made piece with the hole predrilled for proper rivet placement right there in the center. Good upgrade for $35.
-
Crow Props Biker Boots and Gloves are in
troygordon2 replied to troygordon2's topic in ROTJ Biker Scout Soft Parts
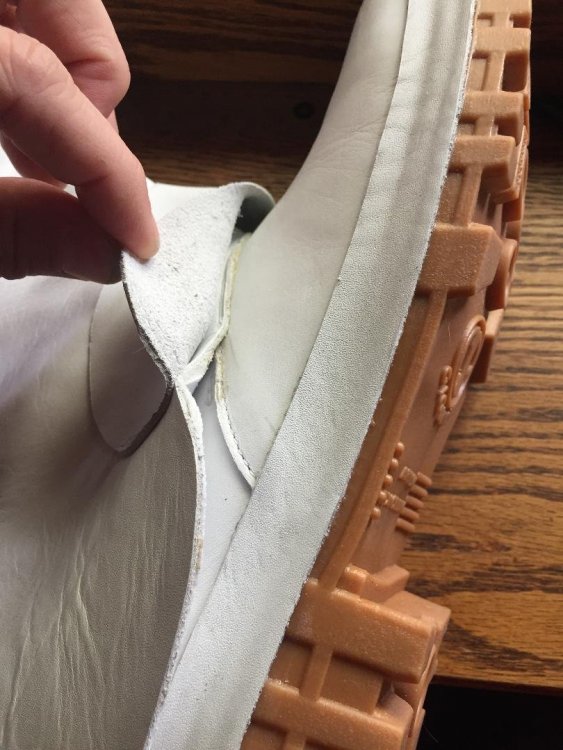
On the pinched ankle. I've been able to experiment with .5 inch poron sheets I have for other projects, and they are soft enough to be comfortable and do a good job fillings the space in front of the ankle and the inside of the boot to remove the pinch. I'm going to experiment a bit more and hopefully come up with a cheap and easy solution. I must admit, the more I deal with it, the less thrilled I am as to the quality of these. The leather is nice and soft, but I think it could have used more...beef... to help the sleeve stay up and fill out the area under the dog bone. The sole is awesome, and I the workmanship regarding stitching and all is very nice, but I think he needs to move that pattern closer to the ankle and bulk it up a bit rather than letting it get so pinched and floppy. -
Crow Props Scout Boots and Gloves -- My Take
troygordon2 replied to Chopper's topic in ROTJ Biker Scout Soft Parts
As I look at mine, I wish the dog bone was closer to the ankle. It seems weird to me given all the measurements we provided that it was not. Maybe I can add some reinforcing material inside and underneath the dog bone to help the curve look more natural. -
BikerScout007's Patrol Trooper Build!
troygordon2 replied to BikerScout007's topic in Patrol Trooper WIP
I am honored to have been a part of the process and to once again contribute to another amazing effort by talented people. Can't wait to see how you guys finish them up. -
Crow Props Biker Boots and Gloves are in
troygordon2 replied to troygordon2's topic in ROTJ Biker Scout Soft Parts
I'd very much like to hear it! Its my first build, and MAAAAAYYYYYBEEEE I would say I'm not entirely stoked about how far forward the dog bone seems to sit on my foot. The straight up and down of the calf looks right, and they are comfortable to be sure, but something about that dog bone seems off to me. BUT, I am very new to soft parts, so I could be wrong. It's happened before. -
Crow Props Biker Boots and Gloves are in
troygordon2 replied to troygordon2's topic in ROTJ Biker Scout Soft Parts
Apparently I can't load too many photos... Maybe I need photo bucket links. Here's the top of the gloves at least. You can see the Crow gloves on the left are slightly shorter than the Wampa, they also don't have that little clasp/clip thing. The leather is thinner/softer on the Crow gloves, but it's a very comfortable glove.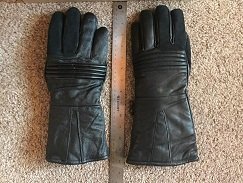
- 16 replies
-
- 1
-

-
- boots
- biker scout boots
- (and 1 more)
-
Crow Props Biker Boots and Gloves are in
troygordon2 replied to troygordon2's topic in ROTJ Biker Scout Soft Parts
Should be able to see it in the picture. It comes up about 12cm or 4.5 inches from the base of the heel. Sorry I couldn't get a larger pic, it was limiting me for some reason.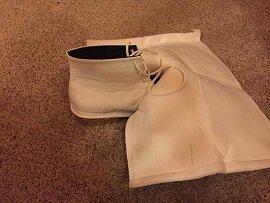
- 16 replies
-
- 1
-
-
- boots
- biker scout boots
- (and 1 more)
-
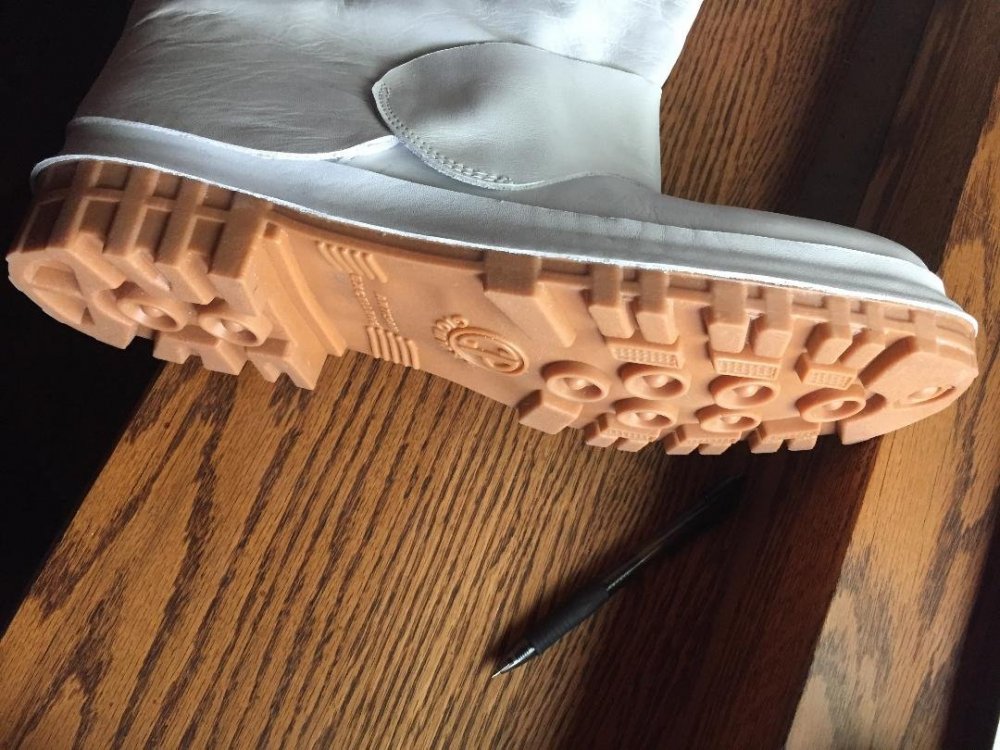
I'm currently building my ROTJ Scout trooper and just got the final pieces in. No more slacking and procrastinating, it's time to complete this thing already. I figured some of you would be curious about the Crow Props boots and gloves though, and wanted to give my first impression. Bottom Line Up Front: I'm impressed. The boots are beaitifully made and the leather is very supple. "Supple" isn't a word I get to use often, but having worn lots of boots in my day (real boots for the US Army and work boots), the leather is very soft and comfortable and nicely put together. The boot upper wraps around the lower which can be laced tight (plenty of lace in there, so I'll probably trim it back). The dog bone sits well forward, permitting a pretty wide boot over the shin. I'll take more pics and post them later once I get the holster (SC) trimmed and mounted. I really like that he included an elastic band thats almost 5 inches thick to help support the right boot with holster in place. I'll have to pull the velcro in a bit tighter, but still a nice touch I hadn't thought of. The tread is very tough stuff, and I think I remember him saying that he makes them special with CnC machines or something. Looks great. I'm a size 12US, and the fit is very nice. As a bonus he included the gloves. I'll post those pics later too. Honestly, I like them more than my Wampa Wear gloves. I have XL Wampas, and they don't feel right. The leather is tougher on those, and there seems to be more padding, but that XL doesn't fit the way it should, while the Crow Props XL feels perfect, going all the way to the skin between my fingers. The leather on the Crow gloves is soft, and has more of a sheen, but it's new leather, so I imagine that will fade with time. The Wampa gloves have a little pocket for...stuff I guess, that the Crow gloves don't, but storage space doesn't seem to be a big deal with the Scout in general given all the options we have with the belt and all. Again, I'll get more pics later but I like what I'm seeing and definitely feel it was worth the price paid. Shipping didn't seem to be an issue either, it took 12 days for them to arrive from Crow Props in .. I forget where he's at...Mexico, or Bolivia or something...Sorry Gio... but they made it to Montana just fine and promptly.

- 16 replies
-
- 4
-
-
-
- boots
- biker scout boots
- (and 1 more)
-
New Patrol Trooper Helmet Maker
troygordon2 replied to MrPoopie's topic in Patrol Trooper Armor/Helmet
All, Thanks for the kind remarks. I'm pretty new here, haven't even finished my ROTJ Scout build (but will!), but I've been making helmets since 2013 and selling them with the shop name of Luna Armor Works. Mostly Halo, Titanfall, Destiny, custom work, and some Star Wars. As an artist, it's tough to see past the flaws in our work, but I'm pretty pleased with how this finally came together. It "took too many hours to be proud of". We (@MrPoopie and I) started this work back in March before the world went sideways, had one version done in May, but then it needed to be scrapped once I had it in hand and didn't like how it came out. Then my printer died and I had to fix that. Then schools here got cancelled. Then I worked on the Montana Mask design group. Then..well... it's been a busy few months for the world. BUT, we kept tweaking and working, and I'm proud of what we've got in the end. I'll send 2 out to those who commissioned me this week and let them give it a thorough review, but I'll tell you what I've got and how it's made. With the exception of the ear piece which came from a commission from Alain Rivard, the rest was built from the ground up in Blender. There are 4 molds plus one 3d printed part to the design, plus the visor material and hoses. The helmet main body, 2 chin parts that slide under the face fin things, and what I am calling the "Tiara" on the forehead. The main body is made from several different resins, which is why it has the mottled appearance. I use a slow cure resin first (smoothcast 300), pushing it into the corners and details of the mold. Then I use a medium and fast cure resin (smoothcast 320 mixed with Onyx), and sometimes straight Onyx, to cast additional layers, I add bondo body filler under the opening rim and sandwich that between layers of resin because it's far easier than trying to slosh the resin in there to get a full and tough base to trim and sand during clean up. Different materials all add a little bit of reinforcement to one another, and the composite has worked well for me over the years. There is some dremmel work that needs to be done in the rear vents (damn you air bubbles!), trimming out and sanding the visor area, under the face fin to allow easy sliding of the upper greeblie, and the base opening, but not all that much, and some slight sanding to finish it up. The chin pieces and tiara require some sanding from the molds too, but very little. The Tiara is actually made from something called "Feather Lite" from smooth on, and even though its a solid plastic piece, it weighs VERY little. It rests easily on the lip of the brow of the main body. I hit them with a heat gun and ensure the shape is formed to be as flush with the helmet as possible. The teeth are 3d printed. I tried molding them, but the material is so thin I keep breaking it trying to pull it from the mold, so it's easier and far less expensive to print them. I also hit them with a heat gun and form fit them into the inside of the helmet, which has a small inset that holds the teeth in place. The only pieces we are missing are the visor at this time, and the side hoses. I've ordered some 3/8 inch hose to test out (What's a "Metric system?") as 1/4 seems too small. I'll update as I make that adjustment and get kits ready to sell and post pics. Again. Thanks for the kind words. I'm loving the group and the vibe and hope to be a respectable member soon. Troy -
Yup. Big spray cans. You can usually find it at any hardware store alongside the plastidip. Lowes and Home Depot (I assume you're in the US) or any auto parts store will have it on hand.
-
I seem to be the only person who dislikes plastidip and it's tendency to peel. If you want something permanent, try truck bed liner. The cost is about the same, and it also adds reinforcement to the materials it's applied to.
-
I am going for my first ever build and approval, and decided to give them a try. I'll be happy to review them when they come in. Gio has an excellent reputation within the 501st community (from what I've seen) and I have no doubt they will be up to snuff. Enough faith to drop the money anyways. As the Wise Zen Master says, "We will see..."
- 18 replies
-
- 2
-
-
-
- bikerscout
- boots
- (and 1 more)
-
tutorial Bending Scout / Helmet visor Tutorial
troygordon2 replied to WilsonSith's topic in ROTJ Biker Scout Armor/Helmet
Is this visor Lexan? I'm trying to get some welding visors glued into helmets today, and even the high temp glue sticks just aren't doing the trick. I warped them with my heat gun to fit, but the glue isn't catching. What are you using that sticks? -
Running a test print on a barrel part with no supports except for the build plate. That area between the barrel and the shroud is a support nightmare, and I plan on molding and casting copies so don't want the gap in there anyways. Good luck! Love the weapon shape and design, can't wait to get mine finally put together (along with the rest of my Scout uniform).
-
How did you print the barrel and shroud without all the support material between the 2? I'm printing one myself now, and clean up is a MESS.
-
I just bought the helmet files from Do3D. You don't want them. The proportions are really bad, and I don't understand why they laid out the parts they did in the file provided, but you cant easily slice out the bits to print separately without damaging other components or even the part you want they are so tightly packed. I am working on my own design to get it as close to the Anovos pics, but wouldn't recommend the Do3D files if anybody wants a quality build.
-
Thanks for finding these, mate.
-
Rivets for belt, tank, holster, and knees
troygordon2 replied to Igneous's topic in ROTJ Biker Scout Armor/Helmet
I'm putting my SC kit together now. Appears there is a rivet on the outside and inside of the top hole, but is the bottom only supported on the inside of the armor? -
Pandatrooper's SC Biker Scout build
troygordon2 replied to Pandatrooper's topic in ROTJ Biker Scout Armor/Helmet
I apologize for all the questions. I haven't used a rivet since metal shop in high school, and that was in 1996! When you put the rivets in, you put the backup plate inside, makes sense, but do you put on on top? Are there 2 washers on the rivet, one on both sides? Thanks for your help and continued patience with all of us looking to do this right. -
Building a screen used helmet replica
troygordon2 replied to Strider's topic in ROTJ Biker Scout Armor/Helmet
I've been working on my first build, and being a glutton for punishment wanted to make the helmet myself, and I've always wondered about there being 7 or 8 dents in the back there. Some builders have the 7, some have the 8, and I won't like, it's caused me some concern come submission time.