mr paul
-
Posts
409 -
Joined
-
Last visited
-
Days Won
31
Everything posted by mr paul
-
Even without the info I received there is a reasonable case that can be put forward from the amount of reference available (regardless of lighting and environmental influences) that show it as orange. That includes the visual dictionary and Glynn Dillons concept sketches for the ST. Some comparison images I have posted above showing my orange mixed in amongst screen ref from different locations. So for me I have the intel I received, reference imagery, personal experimentation with different colours across different helmet paint applications under different light sources (red does not match the screen ref satisfactorily) Plus the connection to the orange colour being designated to Kyber Crystal containment also found on the shoulder straps of the Kyber Crystal Patrol Pack. So it has an in universe relevance as well seeing as the Shoretrooper was a specialist guard at the KC facility. It would be great if Dillons confirmation could add to that as well. In the meantime I would want others to take this seriously as an observation based on what is available already to them and not assume its red based on someones opinion. As far as I am aware there has been no hard evidence put forward confirming it was red in the first place. It would be interesting to hear from others on what they think regarding the helmet emblem. Maybe revisit some reference and take a look.
-
-
Here to help
-
I'll stick with the orange thanks all the same.
-
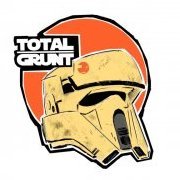
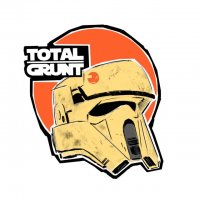
It seems to be quite an emotive subject over on my page so I am not going to say too much lol. I personally am using Spicy Orange. A couple of these images are my emblems in the orange.
-
Here is my bucket again. Revised. A little bit more muck added. Also because of recent reliable intel the emblem had to be repainted. The forehead emblem of the Shoretrooper is not red and neither should it be represented that way. Looks like another colour to be added to the Shoretrooper armour palette. Orange. My assumption that it was red was based purely on the facts that I have spent more time looking at the armour instead of the helmet. Lighting played a factor in every image due to the emblem being up top and also the AC-ACT is emblem is very much red. Also the bicep of the ST is Toyota red therefore I jumped without looking and assumed they used that same red on the forehead. They did not. I was wrong. I am glad I was wrong as the orange looks so much better and completely changes the appearance of the helmet/armour. Once you start looking it's kind of obvious in all the reference available. I know I am not the first to have observed this and added it to my kit. However the majority are using red and the CRL states red. Along with all the merchandise that accompanies the Shoretrooper. It should be orange.
-
Yes this is a stripped out ANOVOS. I had the privilege of seeing some reference showing the inside of one of the SU helmets. This is how the padding was arranged in that particular helmet. The chin strap was assembled and glued in as seen above. Another image below shows the block foam padding at the side of the hemet.
-
The build so far.
-
Belt buckle.
-
Here is my take on the Shoretrooper helmet internal rigging. It is actually very comfortable and keeps it from resting on the bridge of my nose whilst keeping the weight down. Good air circulation too. 1" upholstery foam. 19mm black polypropylene webbing (Take note of the standard weave) JSP safety helmet chin cup. Plastic 20mm side release buckle. 13mm ID rubber O ring. ....oh and very strong glue.
-
The secondary plate has 2 prongs as well giving the appearance that they extend all the way through to the helmet. It's quite an organic design in that respect. Not what one would expect.
-
In the light of the recent commissioned ANOVOS paint I realised mine needed updating to bring it up to speed. So here is my remastered ST bucket (left) next to the commission paint (right) Much more happier with my helmet mods, paint, colour, texture and breakdown.
-
Thank you so much mate Appreciate it.
-
Here is a recent ANOVOS helmet that I have been commissioned to completely strip back and repaint by a client. I am very pleased with it. Nearly 3 years of researching, trial and error has culminated in what was a well practiced, very straight forward, quick and successful paint application. My techniques have really been boiled down over time so I can get the required effect efficiently and consistently. Paying close attention to the right kind of marks found around the ST helmets. The way/order the paint was applied. The correct texture. The correct weathering and the way the weathering appears around the helmet. Some quick mods were also made to the helmet thanks to some top tips from a man in the know.
-
-
Some pictures from around the current armour.
-
Made some mods to the ANOVOS thanks to some observations from a friend and his work on his own helmets. Forehead has been bent outwards and the lens lowered to make that wide ANOVOS step a more appropriate size. Also removed the previous weathering and reapplied it employing the same colour and techniques I am now using for the rest if the armour.
-
A look around the new shins. I have made mine up to look like a post production beaten up pair. Flared, expanded ankles (to aid getting them on and off) visible velcro and revised weathering both colour and application.
-
Shoretrooper Rear Cartridges There appears to be 2 different types of triple cartridge that can be found on the rear skirt of the Shoretroopers. One is what I will call a "hero" version and the other a "stunt". There are not great pictures of these cartridges publicly available as they are tucked around the back mostly out of reach. Luckily there are enough images available so I can show that one set of cartridges is hollowed out whilst another set looks to be completely filled in. Alongside this I have been fortunate enough to have had access to better reference images of both sets but unfortunately I cannot share those out. We have however done our best to replicate the 2 different variants as best we can both in scale and detail. The stunt version is very interesting and has been somewhat crudely filled in by hand. If you look at the images of the resin casting I have made of our model and how I have treated it, you will get a better idea of what the stunt cartridges actually look like and how they have been prepped to make them easier for moulding and casting. Please note I am referring to them as stunt and hero to distinguish between the 2 variations based on nothing other than the build quality and how one is more detailed and the other is crudely filled in. They were not purposely made for stunt and hero armour. These "stunt" cartridge kits are now available through my FB page www.facebook.com/totalgrunt
-
Hi and thank you. Really pleased that you say they are passable as "cast" parts. I suppose that is the effect we want from these. These parts are relatively easy prep because they are simple shapes with larger flat surfaces. Printed at 0.12 layer height they require minimal work with the mouse sander to finish.
-
All the components of the right shin assembly. The shin halves, front armour, upper armour, studs and rim will all be included within the STL bundle. The 2 rubber straps and resin cast found parts needed to complete the shin i.e. the upper and and lower Martin Baker buckle and Head snow boot fastener will continue to be made and sold through myself.
-
Now this is very picky but it has been bugging me since I started painting the stripes on these new bells and using this particular image for reference. There are not many good clear face on shots of the left shoulder bell so cannot confirm if this is consistent across the different costumes. This image shows what looks to be the upper black band taking a dive downwards as it passes over the centre ridge of the bell. I ignored it the first 2 times but as I have just had to paint another shoulder bell I have included it this time around and I am happier with the result. There is not much symmetry on this armour (look at the bell for instance) and the stripes appear to be wonky also. So why not.
-
Some random pics of how it is going.
-
Hi mate. Thank you! Really that is the ultimate compliment because that is what we set out to achieve with this project so that is great to hear that. There are some revisions made since this picture was taken and hopefully I can manage to dress myself correctly next time. There will be more dress rehearsals coming soon.
-
Some dressing issues here. Photo taken from a few weeks back. Overall looking right and that is the goal.It goes together really well and everything works as intended which is a huge milestone.