bselphfsu282
-
Posts
293 -
Joined
-
Last visited
-
Days Won
1
Everything posted by bselphfsu282
-
I was referring to the toe cover, which fits well length wise, but just wide.
-
Are you guys using a heat gun to form the armor somewhat? My boots are a little narrow for the covers, and they stick out a bit. Also, the forearm section is a little wide an could be closed in. I have never worked with a heat gun on armor, just PVC, and I'm worried I will put bumps and impressions from fingers on it. Any tips?
-
Ha! Red bull this morning and Dr. Pepper this afternoon! Hey, reading law all day, and your mind will start to wonder! Thanks!
-
Ok, I know lots of questions today, but I blame Grumpy for getting my mind working on this tank/weight thing! The CRL is silent, but could you make the cumberbund open on the side, under the arm/arms instead of the back? Here is my thinking: you make the cumberbund open on the sides so you can open it and slide in and out. You make it where there are your straps attached to the cumberbund itself, so it looks more like a tank top than just a cumberbund. You then put Velcro on the front of the cumberbund and the back of the chest and back plates. Kind of like Jango, you put the plates on the cumberbund with the velcro and the straps that are attached to the velcro for the shoulders. Then you could actually leave it on the cumberbund for good an just slip in and out by opening the bund on the side. Since it would open to the arm pit, you could slide out without ever having to take off the hard armor. Might solve the issue with the tank pulling down since it is more attached to the cumberbund and not to just the chest. Also would prevent any of the fatigues showing between the bund and the chest and back plates. Thoughts?
-
Good look there, I noticed it too when I looked. How are the shoulders supposed to sit on the connecting back and chest plates? I know there are gray greebs that go on the shoulder pieces on the chest, but is there anything on the back? And should they connect, or should there be a gap?
-
Grumpy, you bring up an interesting point, you would be pulling down the chest piece due to the weight. Has anyone developed a way to prevent this? I could see putting snaps or velcro to the cummerbund and attaching behind the chest piece (would also prevent the chest from showing any camo undersuit between the two) or make 2 straps running from behind the chest, behind the cummerbund, and attach to the pants like you would suspenders (but this might just end up pulling your pants high in the front...). Thoughts?
-
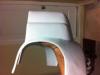
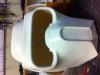
Does the tank look too fat? I didn't even think the greeb had a lip to it, thank god I didn't cut yet, but problem is going to be the back plate to the greeb is about 2 inches and same from greeb to the edge of the tank. Think this will work?
-
Dude that's awesome! Great job! Thank god I just looked at your build, cause I almost cut out the entire greeblie for the tank topper, not realizing there was an extra lip there that does not actually stick out!! I would have ruined that for sure!
-
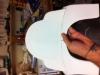
Did the hole in the back plate and L-brackets. I didn't make the hole too back, but big enough to put my hand through. I also have to cut out the top of the tank so the greeblie can sit in there. I will take an extra piece of abs and tack it as a base plate one the underside of the top of the tank. The L brackets didn't work perfectly and had to be bent a little with the heat gun for them to get a good fit on both the tank and back plate. I also put some CA glue around the edges to help secure it, but since I will be putting bondo all over it, I was probably unnecessary.
-
Patience! Miqt gave a great reference for me to get started with, but it vary a good bit as well. I felt like I was working on a dang ear cover on a TK helmet again! If you have a dremel, use it with 120 grit sanding drum for the finer fitting. Mine is still not perfect, sitting just a little higher on one corner than the other, but I think it works and is just me being OCD about it! Starting the bondo on everything tomorrow and ill post up some pics. Trying to get the paint figured out at this point!
-
I'm a big fan of rattle cans and the ease of painting with them, so what would be the suggested color of choice? I know the rustoleum Fossil for the base, but what of the brown and green? I'm going to try to do the painting with cut out stenciles.
-
Can someone tell me how they attached their visor? What screw and did you make it flush with the visor? Also, can someone tell me how the thigh pouch should be cut at a bias. From pics I have seen of others, it looks flat across an not cut at an angle.
-
Alright guys, opinions on tank and sun visor? Also, how did you guys attach the visor? I put two small screws in at this point, but wanted to check before I did something I shouldn't. The screw does not sit flush and didn't know if there was a trick. For anyone who has a BC kit, can you post a picture of the shins you did? I'm unsure of where to cut. I jointed the biceps, but since I have smaller arms, the ABS joining strip keeps cracking or on the verge of cracking. Suggest heat gun to bend them a bit more? Thanks guy!
-
Question guys, what boots are everyone using at this time? Also, with this BC kit, the straps and belt seem a bit flimsy an I didn't want to run the risk of them tearing. Should they be coated with plastiseal and then painted grey primer? Also, how does the belt attach in the back? I plan on adding snaps to the bottom of the cumberbund and snap on the belt (or velcro, whichever seems to e better) but do the backs just meet in the middle or is it attached to the webbing belt that was provided?
-
So great! Got everything trimmed this weekend, except for the shins. I have not decided what boots would work and I don't want to tackle those until I get the boots for measurement. Any suggestions?
-
Awesome! I am planning on playing around with it this weekend to see how I can figure it. Ill post up pics as I go. I also had a question on the shins, but ill post a picture later on it. The trim lines on the BC kit seems to be a bit shallow, but ill know more when I actually cut the return edges to see if it will fit. I have pretty small calves and they look like it won't fit my leg. Didn't know if anyone else had this problem and had to put in bigger shims than usual.
-
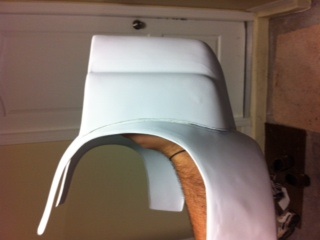
Awesome pictures! That is exactly what I'm looking for! I should have asked this before, but those little ridges on the back plate, do they indicate how wide (in a perfect world) and how tall it should sit?
-
Maybe it is just my kit, but how is everyone attaching the tank greeb? There is no indention where it should actually go and the HIPS is not thick enough the sand in to create and indention and still have anything under to support the greeb. I was thinking of cutting an then putting a plate of ABS under for support. Has anyone else run across this?
-
It can wait and thanks again! I doubt my little heathens will allow much work on it tonight regardless!
-
Can anyone tell me how thick the tank should be? I plan on using a contour gauge to determine the angle to make the cuts, but I do not know how thick it should actually be. According to the screen grabs, it looks to have an inch or so from the edge to the greeblie an then from the greeblie to the back plate. Does this sound about right?
-
Yeah I noticed that a bit. I just thought that it was supposed to be that way like the TK wonkiness.
-
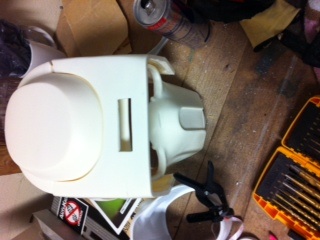
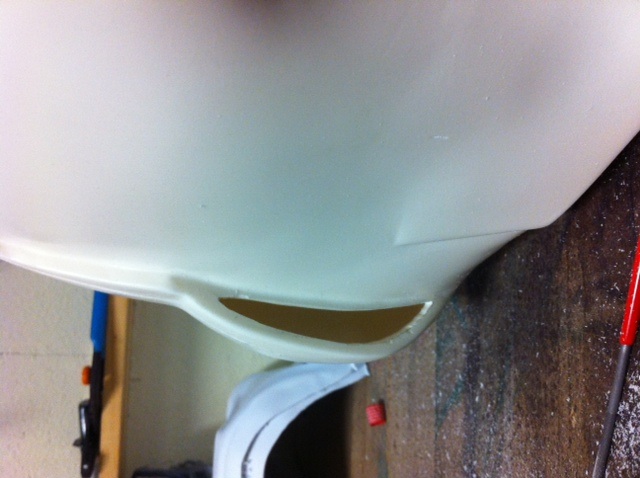
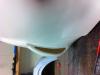
Got a little done this weekend after all of your helpful tips. I drilled and then used the cutter bit with the flex shaft to cut the big parts. I then sanded by hand, with small files, and with the drum. My question is, how was the side vent? Did I get too close to the edge? On the eye portion, on the left there was excess resin built up, so I'm going to hand to sand a bit to give it a lip for the lens to sit behind. There was also a pretty good size seam around the thing, so I need to get that sanded over and probably some bondo to smooth out. I trimmed two pieces so far and I think the score and snap method is working best for me. I tried my RC scissors, which were fantastic on ABS, but big fail on this thick HIPS. Please let me know how it looks this far! Thanks again for all the help!
-
What is the best dremel bit or the cutting, or do you use one of the discs?
-
Chex, are you referring to a biker scout? This build is for the kashyyyk trooper!
-
Hello to all. I just received my BC armor and bucket kit, and I currently have the traditional overwhelmed feeling that I get before I get started on any project! If course, I have hundreds of questions, most have been answered by the research I have done in this site, but some are still lingering! I have never built a kit out of HIPS before, and nothing of this thickness, so what I the best way to trim the armor? Score and snap method still work, or will I need to go to a dremel? Also, I have not dealt with a resin bucket before, so what would be the best tool for it as well? Second, the tank.... Looks to be many hours of aggravation! Can anyone tell me how thick the tank should be? From the back plate to the edge of the top of the tank and where the greeblie should sit? It looks like there should be about an inch boarder from the edge of the tank and the greeblie. I believe I am going to cut a small hole in the back plate and rivet the tank on once it has been cut out. What is the best way to attach and measure the curve of the back plate? For the shoulders, I see a strap to go around your arm, but is there also a strap connecting to the should strap to keep it in place? Next, why is the purpose of filling in the underside of the visor? I know there is a "wonk" factor, but is it necessary to fill it is? I don't want to create anymore weight than I have too! Also, what color are you guys painting the inside of the helmet? Black like a TK/TD? Finally, for the biceps and the shins. I'm pretty comfortable with the process if joining and bondo, but there are no designated right and left side to the parts. There are two smaller bicep parts and two larger bicep parts, one with the greeblie grooves. Are the small parts interchangeable with the big parts or is there a specific small part that goes with the large with the groove and a specific one that goes with the one without? Same question for the shins! They look exactly the same as in the backs look the same and so do the fronts. Sorry to bombard with questions! Getting started this weekend, after a trip to lowes tonight for some bondo, tape, and files. Thanks!