Ammonites
-
Posts
235 -
Joined
-
Last visited
-
Days Won
5
Everything posted by Ammonites
-
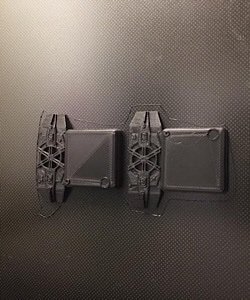
Holes in the sides for filament Glued and clamped together Plastidip added after the textured spray paint Couple lines but they can be hidden with some of the weathering.
-
I was going to spend a lot more time smoothing this out until I saw the textured appearance in the closeup shots so I'm hitting it with a textured spray paint, and will put black over this once the two sides are connected and solid. I've used this technique before and I think it will look incredible and match the screen references.
-
While I'm getting pieces printed out, I got a few more shots of the interior shield parts. It looks like a textured sand spray paint could be used, then painted black and some weathering added. I was also able to see more clearly the grip and brace pieces. The "battle damaged" effect looks like it could be a possibility, but may be a bit difficult to achieve. Probably best to just go with the standard for now, may try this out more with a second shield.
-
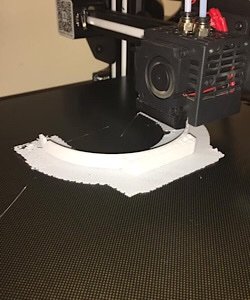
Starting to put together the Riot Shield as seen in Jedi: Survivor, used by both regular and pauldron-wearing Scouts. Files created by our own MrPoopie. I am printing these files on my Anycubic Kobra Max, 400x400x450 build plate. These files are intended to be printed out on larger sized machines. The main shield looks to be a light gray, with dark gray top. The inner grip is black, all satin or semi-gloss, with light weathering. A white imperial cog is in the center of the front, exact size to be determined later, and a red transparent view plate. The bottom 3 grill plated look to have dark gray recesses (same color as top) with the raised portions black. Side details just below the top portion of the shield, an inner groove on each side The inner grip area looks to be all black Now on to the print files. Most will need to be oriented to your printing preferences, but all have come out very nice so far. I'm just going straight down the list on the files for printing, no particular order, but it looks like the grip area on the back of the shield will be the first part finished. There are top and bottom brackets in the files, only one pictured here, both are exact size I printed the handle with 20% infill for added rigidity. One side of the "pole" is shorter, I inserted the handle into that side Details turned out nice, printed these with vertical orientation 3 grill files, all identical I can get about 2 pieces printed each day, I will update once some degree of progress has been made on the pieces.
-
I'd be interested in taking this on, I just got some screencaps from the game. Will it be split into smaller pieces? Got a couple shots for coloration. Looks like clear red? Also may need a big stencil for the Imperial Cog. Very light gray with dark gray top? Also light weathering added.
-
Have to see how it looks in actual gameplay, may have some differences.
-

RickyBoyBlue - TB-74259's Scout Trooper JFO Build Thread
Ammonites replied to RickyBoyBlue's topic in Scout Trooper:JFO WIP
I may have missed some of the conversation, I apologize for that. I have to work two jobs and get exhausted so I don’t always catch everything. And the build thread progressed so much faster than anything I’ve seen so there’s the possibility I missed because of that too. All my armor was 3D printed and it took a lot longer for me to get mine done. The “minor detail” is that the biceps are not attached to the arm with an elastic strap. You can see in the reference image that it is not present, the biceps are closed. Possible for a future Level 2. -
RickyBoyBlue - TB-74259's Scout Trooper JFO Build Thread
Ammonites replied to RickyBoyBlue's topic in Scout Trooper:JFO WIP
A few things I would have changed before the submission pictures, and minor details in reference images not specifically stated in the CRL, but as long as it’s approved I say welcome to the Fallen Order ranks! -
RickyBoyBlue - TB-74259's Scout Trooper JFO Build Thread
Ammonites replied to RickyBoyBlue's topic in Scout Trooper:JFO WIP
Looks like you’re adding extra silver on the baton where it needs to be black. Also, the secondary buckle plate needs to be taken off. Other than that it’s looking really nice! -
For the tank, it requires the trapezoid detail on top of the pinstripe with 4 thicker tank stripes. These are also acceptable for the ROTJ Scout minus the red detail on top. So if you want it to be interchangeable you can just have the top switch out.
-
Just had mine approved, looking good on that baton so far.
-
3D Printing JFO Scout (progress thread)
Ammonites replied to Ammonites's topic in Scout Trooper:JFO WIP
I think I was #3 in the Legion, so get yours done and you’ll be #4 -
3D Printing JFO Scout (progress thread)
Ammonites replied to Ammonites's topic in Scout Trooper:JFO WIP
And approved!
-
3D Printing JFO Scout (progress thread)
Ammonites replied to Ammonites's topic in Scout Trooper:JFO WIP
I think it’s about done, any thoughts?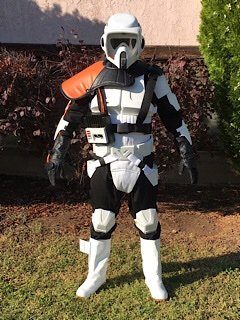
-
3D Printing JFO Scout (progress thread)
Ammonites replied to Ammonites's topic in Scout Trooper:JFO WIP
Got the boots! Just need to add the holster and get the decals on the tank now and it should be done!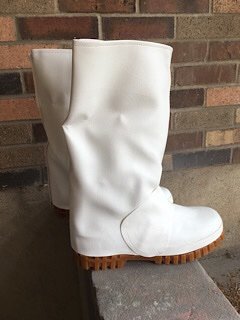
-
You’ll need a new flight suit for it, JFO lacks the riding straps and flap on the backside. I’m using a lot of Velcro to keep parts attached. In some parts it’s easier, and others the armor is more difficult but overall I’m enjoying it. Going for a regular trooper or getting the Commander Pauldron?
-
3D Printing JFO Scout (progress thread)
Ammonites replied to Ammonites's topic in Scout Trooper:JFO WIP
Test fitting. Need to keep placement of certain parts from moving around, adjust cummerbund, fix the hoses and a few other things, but feeling pretty good about it. Ordered the Captain pauldron as well, new boots are coming.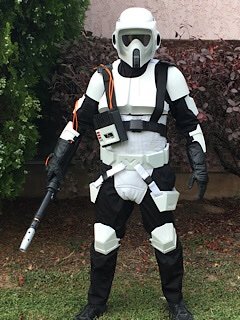
-
3D Printing JFO Scout (progress thread)
Ammonites replied to Ammonites's topic in Scout Trooper:JFO WIP
A bit more done, didn’t feel like posting every time a new piece was printed. Belt I believe is done, finish tank and chest, harness is almost done. Harness Belt and Detonator Chest -
Keep me posted!
-
For the costume the trapezoid and thicker rank bars are a requirement, not so much a choice. I’ll check out some pinstripe tape and see what I can do.
-
Looking to find a specific style of the tank decal, mostly for my JFO Scout but it is also canon for the ROTJ version. Does anyone know a vendor or have some files for this version? https://databank.501st.com/databank/File:TB_jfoscout_backarmor.png
-
3D Printing JFO Scout (progress thread)
Ammonites replied to Ammonites's topic in Scout Trooper:JFO WIP
Test fitting minus the shoulders since they need to be trimmed down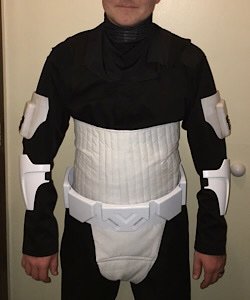
-
3D Printing JFO Scout (progress thread)
Ammonites replied to Ammonites's topic in Scout Trooper:JFO WIP
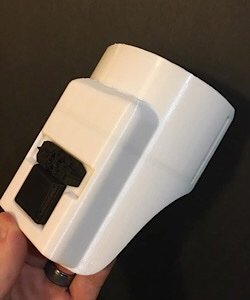
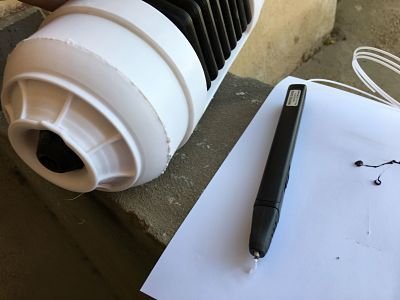
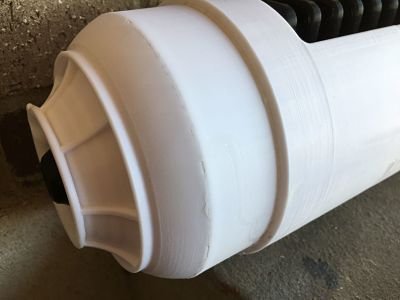
After putting the battery pack together, there were a few gaps I wanted to close, so I used a 3D Pen to "weld" them together after gluing it. Liking how its turning out.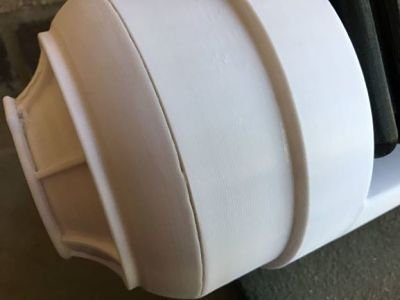
-
3D Printing JFO Scout (progress thread)
Ammonites replied to Ammonites's topic in Scout Trooper:JFO WIP
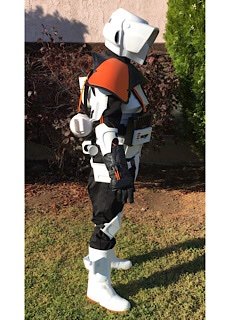
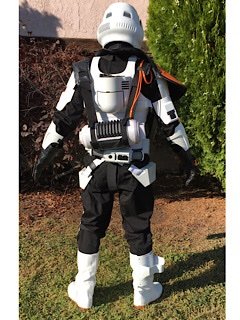
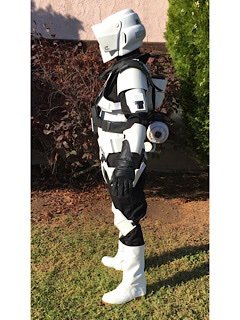
A few more days of printing and I’m almost out of white filament. Good news though, as the battery pack is nearly done. After much sanding, I was able to smooth out the other armor pieces and put a semi-gloss coat over them. Once it’s all done I will use a wash for weathering. On another note, the JFO Scout does not have the biceps or shoulders held down by a strap so a slight alteration was in order. I’ll work on some soft parts soon. https://www.facebook.com/photo.php?fbid=10226030484929327&set=a.10226030482089256&type=3 -
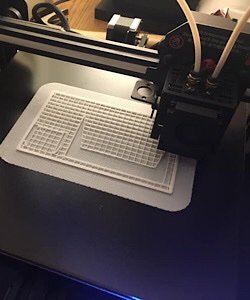
Got a better 3D printer, so I've decided to move forward and start on my Jedi: Fallen Order Scout Trooper. Been needing some upgrades to my other Scout anyway. As a test, I did a bicep piece, files from MrPoopie, and I think it turned out great. Here's the T-bits, printed at 0.2mm height. They turned out great! I then decided to switch to the white filament and print out the bicep. Using a raft support I think it turned out great. A bit of sanding, and I may go over with gloss white to hide the print lines better. While I've got the white filament, I wanted to do a couple bits of the Fallen Order costume so I'm getting the Control Box front panel printed out now.