11b30b4 Posted September 25, 2020 Author Share Posted September 25, 2020 Perfect, thanks Cricket. I do have those on my helmet but the wording was a bit confusing. BTW, your new backpack with lights and sound is awesome. Quote Link to comment Share on other sites More sharing options...
ScaryGuy Posted September 25, 2020 Share Posted September 25, 2020 2 hours ago, 11b30b4 said: ScaryGuy, is there a paint guide for the armor and helmet that shows the width of the striping on chest, shoulder bells, biceps, and forearms? Also is there a template for the Armoured fauld? No, we don't have a complete paint guide. You are doing a Captain? The chest is relatively easy for the Captain, all four sections (below) the buckles are painted blue, plus the left side bridge There are the four vertical sections of the upper chest painted grey-blue leaving tan indentations in between sections Left side section is painted grey-blue. The left forearm Left forearm is tan with moderate weathering. There is horizontal grey-blue stripe on the elbow side and a yellow horizontal stripe directly below it. The yellow stripe begins approximately above the fifth recessed section from the wrist end of the forearm, and ends approximately just below the eighth recessed section from the wrist end of the forearm. The grey-blue stripe begins at the bottom of the eighth recessed section from the wrist end of the forearm, and covers the remainder of the elbow end of the forearm. You can check this thread for a template for the faulds. @Cricket Thanks! That's correct. 1 Quote Link to comment Share on other sites More sharing options...
11b30b4 Posted October 5, 2020 Author Share Posted October 5, 2020 ScaryGuy thanks for the information and the link. So just over a week ago the chin strap arrived. I am getting some Rit DyeMore today and will be attempting to dye the chin cup and the strap black. I will have pics later. Continuing with the helmet. I am more and more regretting not painting the helmet black first then Sahara Beige. Among other things, it would have made weathering much easier. First, I did not like the gaps that were visible on the helmet, so I applied some filler then masked off the helmet and re-sprayed the Sahara Beige. Next, I masked off the helmet and airbrushed all the black details. I painted the detail above the eyes and under the brim with a signature brush. Next, I masked off the helmet and re-sprayed the Sahara Beige over the filled in gaps. Weathering…. So, this is not how I would choose to weather but it is what I have to do since I did not spray the helmet with black first or use black filament when I printed it. The layer of Sahara Beige is fairly thick and sanding through it to expose the paint below is not really an option, so I broke out the putty knife. Scraping and dragging the blade along the helmets raised edges and some of the flat spaces produced the desired effect. If only the base layer was black rather than grey…. Oh well, since I was going to paint in the exposed grey, I may as well be correct and paint it with a dark dark brown. I will let the dark brown dry overnight then I will be ready to do some rubs and washes. Thanks for the interest. Quote Link to comment Share on other sites More sharing options...
11b30b4 Posted October 6, 2020 Author Share Posted October 6, 2020 I applied a coat of burnt umber with a sponge. Rubbing off most of the paint was not as easy as I had hoped. Using a damp rag, I rubbed the helmet and almost none of the burn umber was coming off. Next, I used a scotch-brite pad and running water and that did the trick. Once I had the residue paint where I wanted it, I let the paint dry. Next, I masked and painted the blast shield decal with Montana Gold Red Orange. I weathered the decal then I mixed up some black, burnt umber, and water to make a wash and applied it with a brush over all the parts. Once the wash was dry, I did some final touch up painting then I installed the blast shield. I need to let this completely dry for 48-72 hours then pending any suggestions, I will clear coat. I also picked up some .04 thick clear PETG to vacuum form the lens. I will also be forming the lenses for Nico’s ROTK helmet at the same time. I sanded the bucks and then applied a thick coat of plastic wood. I also picked up some Rit DyeMore and powder Rit Dye. I will use this dye to tint the lens and dye the chin cup and strap. Thanks for the interest. 2 Quote Link to comment Share on other sites More sharing options...
ScaryGuy Posted October 6, 2020 Share Posted October 6, 2020 I have never seen anyone dye the chin cup and strap, most just replace the strap with black webbing. Interested if using dye will work too. 1 Quote Link to comment Share on other sites More sharing options...
Minimo Posted October 6, 2020 Share Posted October 6, 2020 I have a ton of poly black webbing I could send you some, just cover shipping, pm me if interested.Sent from my iPhone using Tapatalk Quote Link to comment Share on other sites More sharing options...
11b30b4 Posted October 6, 2020 Author Share Posted October 6, 2020 Scaryguy, I am hoping to have it dyed this weekend if not before. Planning on doing the lenses at the same time to save the dye. Minimo, thanks but I believe I am good to go. I snagged some 1/2" black elastic just in case the RWB elastic does not dye well. When I dyed my nylon Alice pack for my ROTK crystal Patrol Pack I learned a lot about dyeing nylon and plastic so I think this will work out fine. 2 Quote Link to comment Share on other sites More sharing options...
11b30b4 Posted October 7, 2020 Author Share Posted October 7, 2020 I sanded the bucks, then I gave them several coats of Primer. Once they are cured, it will be time to vacuum form. 3 Quote Link to comment Share on other sites More sharing options...
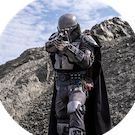
11b30b4 Posted October 8, 2020 Author Share Posted October 8, 2020 So, looking at the helmet, I may have gone a tad bit overboard on the weathering on the face. To me the sides and back look fine but the face looks a little bit busy. I did a quick photoshop side by side comparison. Left is how the helmet looks now and the right it what I would change it to look like. I am interested in your recommendations before I actually change anything. So, chime in and let me know what you think. 1 Quote Link to comment Share on other sites More sharing options...
Minimo Posted October 8, 2020 Share Posted October 8, 2020 I personally agree with your assessment and prefer the one on the right!Sent from my iPhone using Tapatalk 1 Quote Link to comment Share on other sites More sharing options...
ScaryGuy Posted October 8, 2020 Share Posted October 8, 2020 Totally agree. Less.is more 😉. 1 Quote Link to comment Share on other sites More sharing options...
11b30b4 Posted October 8, 2020 Author Share Posted October 8, 2020 Thanks guys, I see masking, sanding and painting in my future. 2 Quote Link to comment Share on other sites More sharing options...
11b30b4 Posted October 12, 2020 Author Share Posted October 12, 2020 I started with this. I had gouged out all the “chipped” weathering with a putty knife so just repainting would not allow me to reduce the weather. I needed to decide what details to remove and retouch. Once that was decided, I used 150 grit sandpaper to smooth the areas around the chipped detail then 220grit to blend. Once that was done, I masked off the areas I wanted to preserve and then shot a new coat of Sahara Beige on all the areas that needed attention. Using 320 grit, I feathered the new paint with the old then re-weathered with the burnt umber. Next, I mixed a brown and black wash and applied it to the whole helmet to blend everything. I believe this is closer to the desired level of weathering. Sometimes, my Mandalorian weathering level assumes priority. Anyway, I will clear coat the helmet tonight. Next, I vacuumed formed the lens. Next, I dyed the lens and the chin strap. This is a test lens after 15 minutes. The actual lens got dyed for 30 minutes and the chin strap for several hours. Once the lens was done, I test fit it with tape and installed the chin strap. I will get a better pic of the chin strap tonight as well. The Dye method worked great. Both the chin cup and the elastic multicolored strap are a nice shade of black. I used the Rit DyeMore graphite black on both, but I later did some TK lenses with Jacquard iDye Poly Fabric Dye and I feel it works faster and better. Dye bath temp is the only real hurdle, I stayed between 135°F and 140°F. Do not go over 150, just saying… So how do you guys mount your visor? Got any pics of the inside and how its mounted? Thanks for the interest. 2 Quote Link to comment Share on other sites More sharing options...
ScaryGuy Posted October 12, 2020 Share Posted October 12, 2020 Helmet is looking better! Weathering is still a bit heavy, but there’s room for personal preference. Good job on making the lens! 1 Quote Link to comment Share on other sites More sharing options...
11b30b4 Posted October 12, 2020 Author Share Posted October 12, 2020 ScaryGuy, thanks for the feedback. Here are the pics of the chin strap. Note this is the original multicolored elastic now dyed black. 1 Quote Link to comment Share on other sites More sharing options...
ScaryGuy Posted October 13, 2020 Share Posted October 13, 2020 7 hours ago, 11b30b4 said: ScaryGuy, thanks for the feedback. Here are the pics of the chin strap. Note this is the original multicolored elastic now dyed black. Looks great! Interesting technique! Quote Link to comment Share on other sites More sharing options...
11b30b4 Posted October 13, 2020 Author Share Posted October 13, 2020 Thank you. I like it better than the paint method because it will not scratch or flake off the chin cup and you can still use the included chin strap. Quote Link to comment Share on other sites More sharing options...
BigJasoni Posted November 3, 2020 Share Posted November 3, 2020 Jeff, You've inspired me again; I see a Shoretrooper in my future. Also, I really need to make a vacuum forming table; either that or I'm going to have to hit you up for a lens. Regarding the abdominal section did you scale it at all and if so, what did you do with the belt? I ask because I think we're about the same size and I'm trying to avoid some of the hurdles I encountered with the ROTK. Thanks, and awesome job! 1 Quote Link to comment Share on other sites More sharing options...
11b30b4 Posted November 5, 2020 Author Share Posted November 5, 2020 The only thing I scaled was the abdomen. I think I went 10 % larger but I do not even remember now. If you do scale it, be sure to scale the detail parts at the same time. Also, I now have a new Elegoo Mars Pro 2 so some of these parts will be reprinted in resin (buckles, etc...). As for the lens, we can work it out, shoot me a PM when you are ready because I am also working on a plan for the shoulder straps and leg straps. 1 Quote Link to comment Share on other sites More sharing options...
BigJasoni Posted November 6, 2020 Share Posted November 6, 2020 Jeff, Sounds good. I'll hit you up when I finally get around to this. Also, have fun with the resin printer. I'll be picking one up next month, I'm just trying to decide which one. I've been tossed between the Elegoo and the Phrozen Sonic Mini 4K. However, I really want to get one before I start this project. Also, I really like how you backed the abdominal seams, it's similar to what I did with my "flex plates" on the ROTK, but this looks much better/ stronger. Great job on the glue analysis! Finally, did you scale the belt to match the abdominal? I know we've discussed this before on another thread, but I really struggled with the sizing of the 3d printed belt last time. Anyways, I'm looking forward to seeing your work in progress. Quote Link to comment Share on other sites More sharing options...
11b30b4 Posted November 9, 2020 Author Share Posted November 9, 2020 Hello Jason, no I did not scale the belt, I do not believe it will make a huge difference but until I get further along in the build I wont know for sure. As for the printer, I highly recommend the Elegoo Mars 3 Pro. Very reliable and a bit larger of a bed. I also recommend the ELEGOO Mercury Plus 2 in 1 Washing and Curing Machine. This makes post print a snap and a lot less messy. My plan is to get the Peopoly Phenom L Massive-Format MSLA 3D Printer next year. after playing with the Elegoo, I love resin printing. I will be testing out some ABS "like" resin soon to see if this is a viable option for armor. BTW, I am using Denatured Alcohol for cleaning since 90% IPA is hard to find and more expensive. The DA works great. Quote Link to comment Share on other sites More sharing options...
BigJasoni Posted December 29, 2020 Share Posted December 29, 2020 On 2/3/2020 at 1:17 PM, 11b30b4 said: I will be making my own Jodhpurs, soft belt, and metal slider. Jeff, I just got done going through your thread again and I'm not sure why I didn't catch this last month. Which pattern are you using for the Jodhpurs and where did you find it? I was planning on making mine as well. All my searches come back with the Butterick 6340 Men's Riding Suit Pattern which I've seen on Etsy, but that's really about it. Have you started these yet? Thanks! Quote Link to comment Share on other sites More sharing options...
NegativeEleven Posted December 30, 2020 Share Posted December 30, 2020 I figured it would be easier to just modify a pair of brown 2XL scrubs. I traced front/back of my officer pants onto them, split the outer seam then pinned on the traced lines, turned inside out and resewed the seams. Had to do a little magic with elastic to the waist to fit me once it was put back together and added a fake flap to hide nonexistent zipper/button. Quote Link to comment Share on other sites More sharing options...
11b30b4 Posted December 30, 2020 Author Share Posted December 30, 2020 Jason, I will need to check but I do know it was a riding pattern with jacket and all. -11, I really like that idea; however, one would need the Jodhpurs to do this and I do not have a set. I really need to get back on this costume. 1 Quote Link to comment Share on other sites More sharing options...

Recommended Posts
Join the conversation
You can post now and register later. If you have an account, sign in now to post with your account.