

zediyeti
-
Posts
66 -
Joined
-
Last visited
-
Days Won
2
Everything posted by zediyeti
-

TB-16428 Lancer Request (Approved)
zediyeti replied to zediyeti's topic in Lancer Deployment Request
It is made of the same materials as my original, so it has cotton batting in between two layers of black cotton. I hope this shows it better p.s. i trooped today and got a comment from my friend that everything looked like it was fitting/sitting better lately! -
Hey! I'm a short scout, and I found a lot of help in reviewing the WIPs of others around my height. Here's mine, if it is of any help! You know how mandos love those WIPs... I also made my own soft parts, which I think I detailed a bit in here. If you haven't found them already, there are some other great WIPs from people our height on here that I have bookmarked
-
TB-16428 Lancer Request (Approved)
zediyeti replied to zediyeti's topic in Lancer Deployment Request
Finally finished the vest. Here it is! I also believe I fixed all of the broken image links -
TB-16428 Lancer Request (Approved)
zediyeti replied to zediyeti's topic in Lancer Deployment Request
ope, that was me interpreting the CRL wrong with the “appearance of being raglan” part. i see now! I have already started a new vest yesterday, so i’ll photo it and kit up again here soon. -
TB-16428 Lancer Request (Approved)
zediyeti replied to zediyeti's topic in Lancer Deployment Request
Yeah, half of these were hosted on discord which i didn’t realize started expiring photo links :’( i’ll have to go back and replace the broken ones with imgur. i’ll update the vest photos right now to start, at least -
TB-16428 Lancer Request (Approved)
zediyeti replied to zediyeti's topic in Lancer Deployment Request
Excuse that I have no gloves or forearms on, this was taken after a parade yesterday and I was more focused on the chest/pouches. Is this more of the spacing that it should be at? It is difficult to fit all of it onto my frame, there isn't that much real estate on my torso! I moved the bund up about 1.5", as measured by moving up the velcro on the vest that it attaches to to stay up. The chest, too, was moved up about the same to accommodate for the pouches sitting higher. The biceps were also moved up 1'2" I didn't think to take a full turnaround of the chest/back shoulder spacing for the vest in the sun. Let me know and I can take those of all angles, but for now here is this! -
TB-16428 Lancer Request (Approved)
zediyeti replied to zediyeti's topic in Lancer Deployment Request
I shall aim to make these adjustments and get photos this weekend while trooping or next week! -
TB-16428 Lancer Request (Approved)
zediyeti replied to zediyeti's topic in Lancer Deployment Request
Like this? -
TB-16428 Lancer Request (Approved)
zediyeti replied to zediyeti's topic in Lancer Deployment Request
This is a 3d print with files from MinuteFett. However when I was finishing it, I didn’t pay mind to the scope ridges and they got filled in, so I know that will need to be fixed. I have already contacted someone from my garrison to resin print me a new part that I will hopefully get this weekend and will update with photos of the repaired blaster if I happen to finish it sooner than you are done reviewing -
TB-16428 Lancer Request (Approved)
zediyeti replied to zediyeti's topic in Lancer Deployment Request
Oh sorry, I misunderstood. I thought it was just a blaster was required for level 2 costumes, so I put up my DLT-19. I’ll get some photos -
TB-16428 Lancer Request (Approved)
zediyeti replied to zediyeti's topic in Lancer Deployment Request
Is one required? I had assumed it was optional -
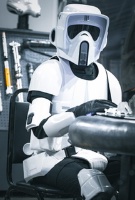
I believe I am finally ready to submit this. Please note that I am only 5'3", and that the kit has some wear and tear from trooping that I did my best to clean up. I hope neither of these are an issue. I look forward to your response, and to making my costume the best it can be! Name: Micah Zediker TKID: TB-16428 Garrison: Mountain Garrison Build Thread + Upgrade Thread: Parts Helmet: MonCal/FAC (modified) Armor: Studio Creations Gloves: Wampa Wear Flight Suit: Self-made Vest: Self-made Cummerbund: Self-made Codpiece: Self-made Pouches: Self-made Boots: Self-made Blaster: Hyperfirm Full Body Photos Helmet I realized after taking the full turnaround of photos that my helmet had the wrong number of indents. It will be some time before I can get help taking full photos again, so please see the corrected helmet with the proper number of indents below, as well as the repair made in my upgrades thread. Balaclava Flight Suit Shoulder Armor Upper Arm Armor Forearm Armor Gloves Wampa Wear yellow tags and clips/loops removed Vest Chest/Back Armor Cummerbund Codpiece Pouches Belt Thermal Detonator Knee Armor Boots/Holster DLT-19 Heavy Rifle Blaster
-
Howdy! Just dropping by to start a thread to document upgrades and repairs I have made on my kit since being approved. There are a lot of small things I didn't document, which were mostly quality of life type stuff. Lots of velcro added to keep things in place, and touching up to fix damage from 1. Shoulders trimmed to be more narrow, and further rounded the corners. They were colliding with the front and back armor, and I didn't like how it looked. I don't think it was accurate to the source 2. Drilled out the rivet from the tank topper and replaced it to be shorter. Original rivet here Drilled out bits (it was a FIGHT) New topper! 3. Made new flight suit pants. The fabric on both of these is twill, but I switched from Joann's sportswear cotton twill to Eddie Bauer cotton twill. The quality difference is insane, as you can likely see. They feel much more like the coverall material now, and I am very happy Luckily I had enough extra suede to redo the patches. I ripped the old ones off to use as a basic pattern because I lost my paper pattern for it. switched from an elastic waistband to a zip/button 4. Switched the helmet visor from the acrylic that came with it to a hobart shield. It is so much darker! 5. My mother found some elastic at a garage sale that she thought might be useful to me. Imagine my delight to discover it is the vintage woven style of white 3/4" elastic, and not the modern stuff that has the vertical lines running down it! Here is the difference in the two (garage sale on left, original store bought on right). It was a small change, but makes me happy. 6. I was gifted the accurate bolts for my birthday from my friends. I had to modify them to work with the resin helmet, but this was the deciding factor for me that I would finally try for lancer 7. I took an several rounds of lancer photos to get to one I was happy with, only to reference it against the CRLs and realize my helmet had the wrong number of indents on the back. I don't know how I never noticed! When I was originally building this costume, I checked off a paper list the level 2 certifications I was able to make and had checked that one off. Whoops. As you can see, it has 9 indents where the CRLs say 7-8. I decided to fill in the innermost one with plasticweld, based off reference photos that seemed the one that needed to go. As it is here it aligned with the middle point between the trapezoids, and other helmets I see do not have the indents going all the way to the middle. PlasticWeld filled Dremelled and sanded smooth Badly applied filler primer to even out the surface (can was almost empty... most of it got sanded off anyway) Freshly applied white paint And now the helmet all cleaned up and re-sealed. Only 8 indents! 8. I added a new and more comfortable liner to the helmet, vs the upholstery foam padding I was using before. The helmet now sits higher up on my head and does not interfere with hitting my chest armor, and is much more comfortable! More updates to come, particularly regarding my weapon and any changes that are given back to me on my lancer app soon to be submitted! (edit: submitted 2.28.24)
-
It looks like his bolt lengths are the same. I sent him a message, maybe he’d be able to glue in a longer one or I could try to unglue and add my own in. Thanks for the rec!
-
Hi, I recently acquired some of the proper 3m concave bolts for my helmet. I have a mon cal helmet, and they are just barely too short to fit all the way through the resin dome. Is there anyone that can point me in the direction of some advice on getting them to fit? i don’t want to sand down the wrong spot and compromise the integrity of the helmet. I’ve tried searching on here without much luck. We’re talking 1-2mm too short, so there’s surely a way to get them on!
-
Woohoo, I’m in! TB-16428 I have lots of little adjustments i want to make largely following the tips for keeping your costume together, plus i still want to make a wip post about my helmet so i’ll be sticking around on here. Still, super stoked!
-
Your video was a huge help!
-
Pictures and app have been submitted, just in time for my self imposed deadline! I see some adjustments I could've made in the kit up, but hopefully it is forgiveable by my GMLs. 🙂
-
That is indeed where it is.
-
I will try that if I have time. If not now, then later down the road. Is it possible to grind down the post, or is that something that would end up looking funky? I truly don’t know much about rivets or metal, I’ve just been hardcore wingin’ it
-
I did think about that, and worried about the size. But the next size down I had didn’t fit through the layers of everything and wouldn’t hold the washer
-
I did it backwards, following Mickey’s latest walkthrough vjdeo. Is there a way to rivet that doesn’t leave the post on the back?
-
Lots of updates to give. I don't know if I will type it all out in one sitting so I'll type as much as I can and see if a second post is required later. My goal is to have this finished and submitted by may 17, as I'm having surgery and will have difficulty putting the costume on for a few weeks-months after. I've been focusing on making progress and conferring with my GML rather than updating here, but the time has come. This is how big the parts were on me before heat shaping. Dang! I used the boiling water method because I've burned sintra too many times to trust myself to not screw these up. It worked a charm and I'm really pleased with how I got everything to fit. After and before (I shaped them even smaller after this picture, too) Much better, compared to before. After the initial shaping, I got to work with the lexan scissors on the biceps and shoulders. I did end up taking some off the top of the biceps, just enough to still allow the 2" elastic. Here's how big the shoulders were 2" line marked for dremelling. It was after I finished cutting all the slots that I went around the edges of everything with some sandpaper to really clean them up. The trim job by SC was great, though! Test fits! I got the belt mostly put together, though in this picture the dropboxes are not attached in the back yet. Knees The adidas make me go fast The chest is almost done. I only need to add the elastic to the shoulders, both on the bells and on the join of the chest and back. The shoulders are attached with zip ties and mounts, and the sides are cotton webbing that pulls tight and velcros to the back. The sides end up getting pulled front edge to back edge and it still feels a little big, but there's not much I can do about that. It does mean that I cannot reach across my body to adjust anything on my arms, so I'm definitely going to be adding velcro to the flight suit to keep everything in place. This is about how much space there is between the front and back when it's on This was just a fit test, so kindly disregard how uneven everything is and the missing parts. I cannot decide what I think of the pouches. Should I keep them at the full 5x6 size or are they gonna be too big looking? They're just safety pinned on here. And here's my checking of the back dropbox spacing. At this point I finally stopped procrastinating and made the vest, so here's some soft part shots. Still need to wash off the chalk line from the back I ordered the clips for the TD and got everything assembled and installed. It slides onto the belt real easy The last major things I have to do are: - Finish helmet (this will be it's own post because there was a lot going on with that) - Add shoulder elastics - Attach holster to boot and add blouser Aaanndd I believe that's it. Unless there is something I missed, so do let me know if there is anything. Here's the boot and holster, just awaiting the assembly. Finally, I'm sorry for the quality of these pictures but this is my latest try-on (pre sewing on pouches). They were taken with my front camera at night so the quality is eh but I'd just finished the vest and wanted to see how it was all looking. I also could not reach across to adjust the vest sleeve where it's hiking up so don't mind the unevenness. I'm very hopeful I can get this done within the next week!
-
Brilliant, thanks! I shaped the forearms in a bit more and with the elastics they’re feeling a lot better.
-
Wahoo! Big brown box from SC is here! I will post a more detailed update soon, but for now wanted to ask about the fit of the forearm and bicep armor. I bent them to the shape of my arms, but wanted to check where I am able to trim these to fit better, if at all. I put them on wherever they would stay on their own just so you can see the proportions compared to me, not thinking about placement. The bicep one if it were to be bent into a circle would encircle the entirety of my bicep, so I feel like that one needs a trim on the sides. I've put a drawing below of roughly what I'm wondering if I could trim it down to? And is it allowed to take any off the top or does that ratio of space need to be maintained? Can anything be done to the forearm or is it just left to be what it is because of the specific shapes/return edges on it? (rough estimate)

