Sabrina
-
Posts
30 -
Joined
-
Last visited
Everything posted by Sabrina
-
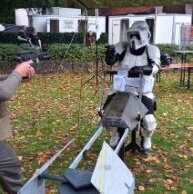
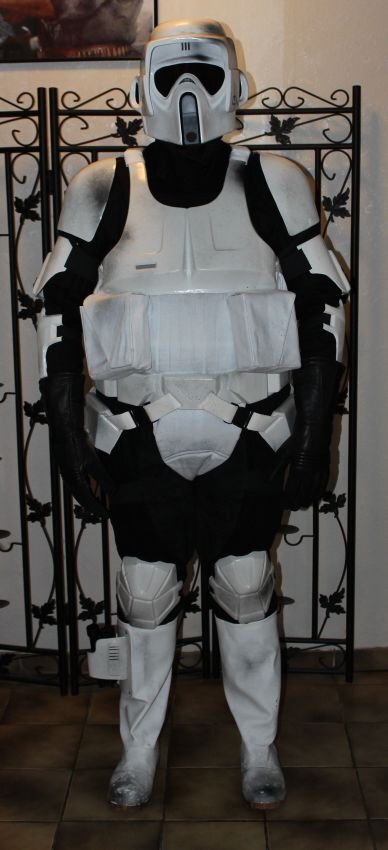
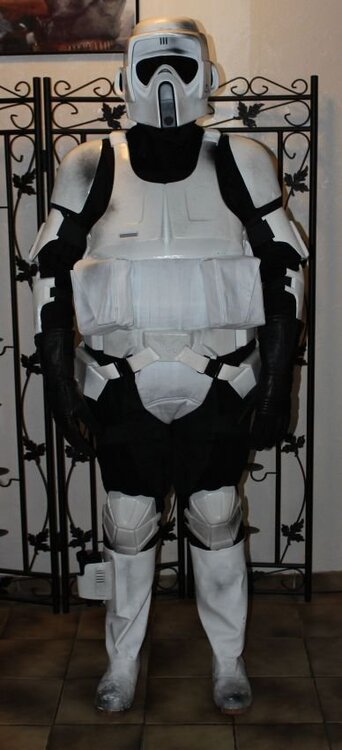
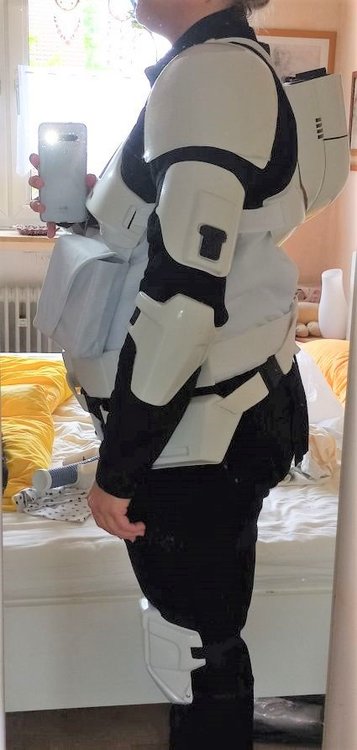
YAY! Finally, I have finished my build. Tomorrow I will wear it for a couple of hours to check, if the whole thing works and if it is comfy. What do you all think?
-
Cool! Thanks. I will definitely do some tryouts on a cardboard first.
-
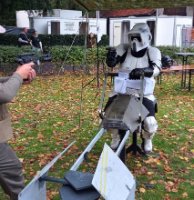
Hey guys! Now that temperatures rises and weather becomes nice and dry again, I want to weather my Scout and bought some black spray paint. Do I have to keep anything in mind or do I just spray here and there from a distance? Did you weather your softparts as well? I don't wanna make any mistakes. 😁
-
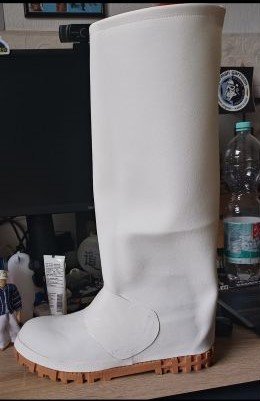
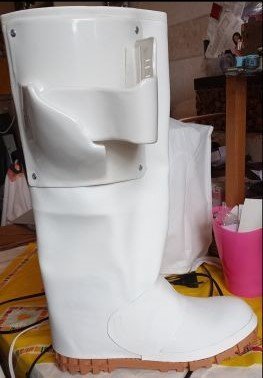
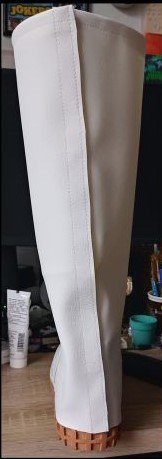
Finally, my boots are done! It wasn't too bad to do them, but the fitting was slightly annoying. I took the Kappa boots and carved out the sole, then measured the boot and my leg and draw everything on the white leather. The instruction I found here was pretty awesome. To get everything in place I used a hairdryer for softening the leather and E6000 glue to put it all together. I hit an elastic strap behind the holster in the inner boot, so that it won't lower while wearing it. On every boot, I kept the laces. I can get the boots better on and off without them, but the boots are way more comfortable to wear, when I tie them a bit. My hobbles are slim, so this is the best solution for me. I made a mistake during the adjustment of the holster. It said in the construction, that it is only fastened with rivets to the leather. Unfortunately that didn't work. Lucky me, I did the bottom ones first. I had to use some washers for the top ones and then glue the bottom of the holster. It cannot be seen from the outside, so I guess it is fine. What do you all think?
-
Hahaha... I just hope another Biker will be there on my first/next troop. When I ask my mate, who has a ANH Vader, I will probably just get a "how the heck should I know that?" 😂
-
Thanks Kelly! Ha! I knew the knees looked weired, but then I was so busy with the upper armor, that I forgot to change it. I will lower the boxes a bit by moving the velcro a bit further apart. Yeah, I will have to keep the level of the belt in mind and also lower it on the back the next time I put it on. My TD is symmetric, so I will have the round one on the left hand side, as seen in your pic. Whew... I am glad, that those are just small changes I need to do. I also need to practice the whole dressing, because it took me half an hour to put all the stuff on. Plus I need to practice it "blind" because I don't know if there will be any mirrors on my next troop.
-
I put nearly everything on today and I am quite happy about the fitting. The thermal detonator is in progress and next I will start the boots. What do you think so far of it? Anything wrong? The pockets look a bit crooked, but that can be adjusted. And please don't mind the chaos in the background of the fotos. 🙈


-
I wanna attach the thermal detonator to my belt next, but I am not sure on which side the small round greebly is. On the referenze pic in the crl it is on the right, in other building pics, it is on the left. What would be correct?
-
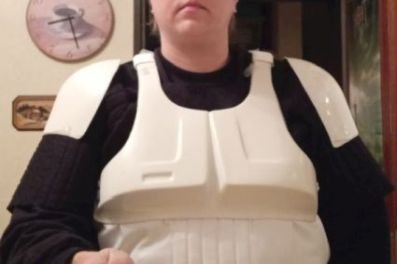
Hey Cat! I heated the straps with a common hair dryer and then flattened it by pressing it down to a wooden board with my hands - I was wearing protective gloves of course because the plastic became really hot. So the whole chest armor came "down" a bit and now my bosom fits in. I might wear some shapewear to flatten that area a bit more, but I need to see, how comfortable that is. I hope, I could help you with it.
-
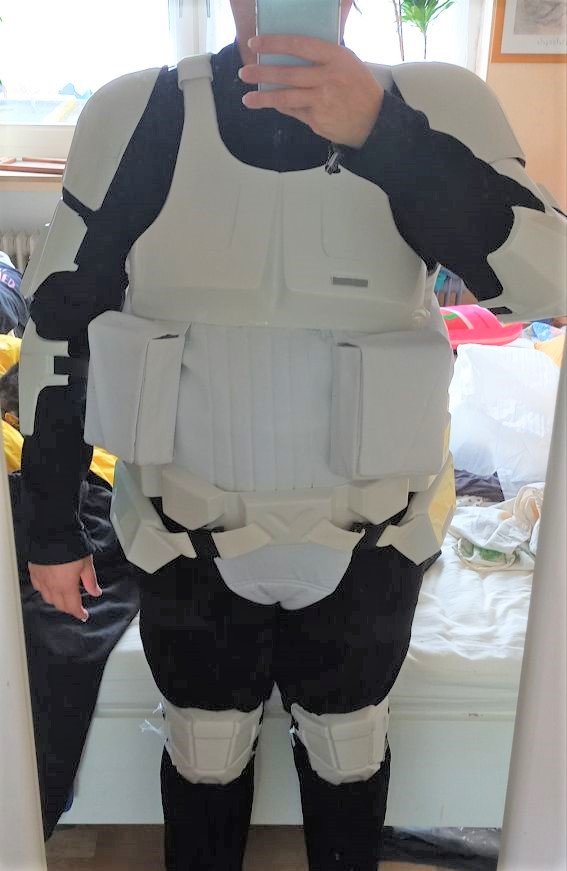
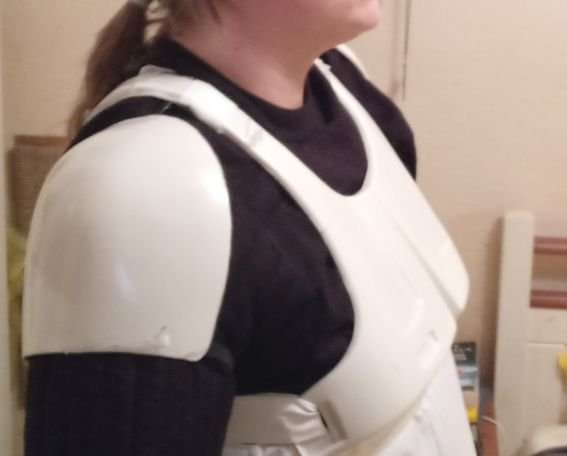
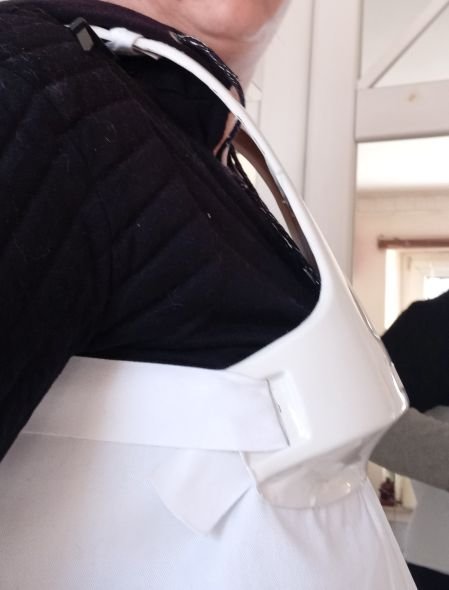
Heureka, it worked! I flatened the front armor with an hair dryer. It lays perfectly on my body now. I didn't even had those wide gaps, so I could use a normal sized fabric to cover them. Thanks for the clue, Kelly! Sorry for the fuzzy pic, but I was holding a selfie stick and that wasn't really a stable one.
-
Hey Kelly, thanks for all the details. Yes, they made totally sense and they helped! I heated the shoulder parts at the front up and "flatened" them. The whole front is lower now and way more comfortable to wear. I might even not need a large joiner. When the glue is dry and some sewing has been done, I will put it on again and show you the result. But from what I saw already yesterday, I would say: it fits!
-
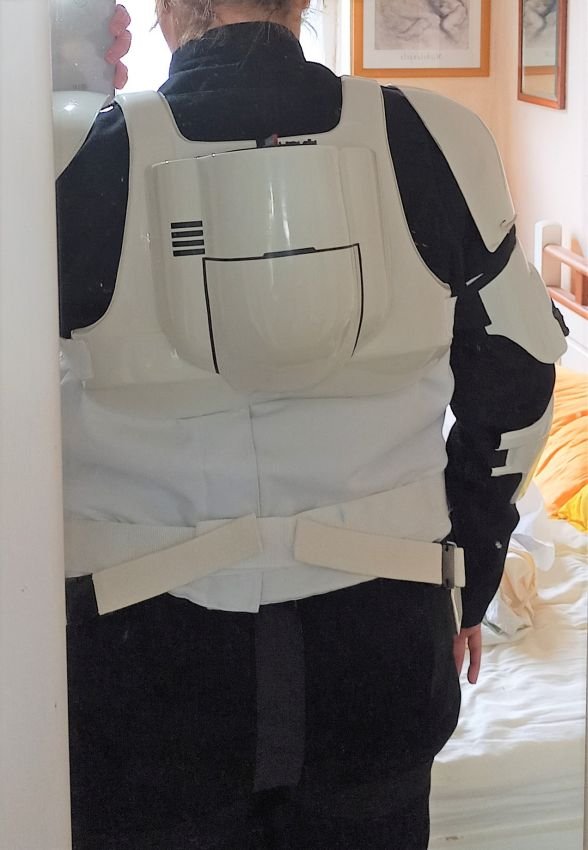
Removed all the velcro and buttons and adjusted it new with some tape. I set the back higher and I think you are right: it sits better. But before I cut ANYTHING off, I wait for your opinion LOL
-
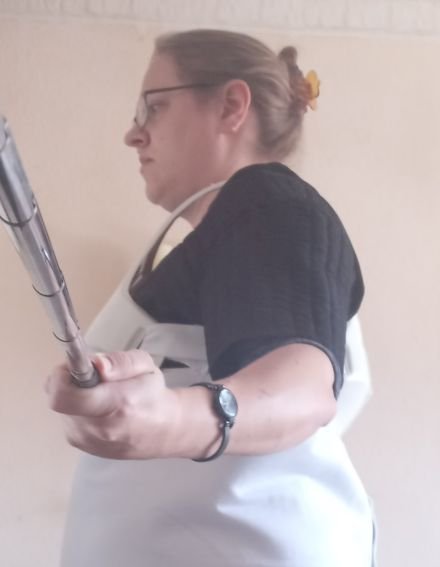
Challenging to take pics, when you live on your own🙄 This was the best, I can do. You might be right and the back needs to be a bit higher.
-
I will try to take better pictures by using a selfie-stick today or tomorrow. I would say the back is fine, but you are the experts.
-
Well hello there! I have finally finished all the cutting and also half of the straps on the knee and arm pads are put in place. I wanted to do the chest armor next, but I don't know how to fit it accurately. I say it like it is: I have no clue where to "put" my boobs. When they are exactly in the chest part, I have a gap between the armor and my body. Would that still be ok? Not sure, if the shoulder tops need to be shortened a bit more or if that makes the whole armor sits to high. What do you think? Any suggestions?
-
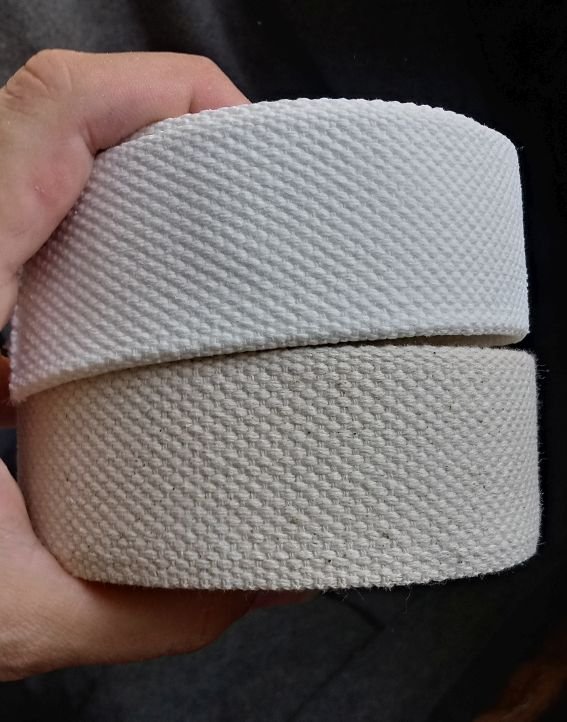
My armor is still in progress and I am busy cutting - the parts and myself. I ordered cotton webbing for the dropboxes. The colour was "natural", so I dyed it in chlorid. Do you think this white is white enough? I am not sure, if it will become ligher, when I dye it another time.
-
Hi Dennis! I checked those boots, but I really need to try on shoes before I buy them. During autumn a lot of combat boots are offered, so I just have to wait and keep my eyes open. As long as the sole is thick enough so that the pattern can be cut out, it should be fine. The design of the boots is quite common and hopefully I can get a decent pair. But thanks for your suggestion! If I find a nice pair, I will post a pic here for your opinions before I buy them.
-
I am really careful during the cutting - that's why I draw on the parts first and cut it after. The only thing I keep forgetting is, when there is a new blade in the knife. Literally spoken: there is already some blood in my work.🙈 Those references are great and finally I found a tutorial for the holster. There shoud be enough plastic "rubbish" left so that a connector can be bend and everything can be put together. I don't know, if I cut the tiny slits out - that depends how skilful I am with the Dremel. I have never worked with rivets before, so I have to do some try-outs here as well, because I am not sure about the pressure that needs to be used.
-
Shoulder and arm pads seem fine for me and I will leave it like that
-
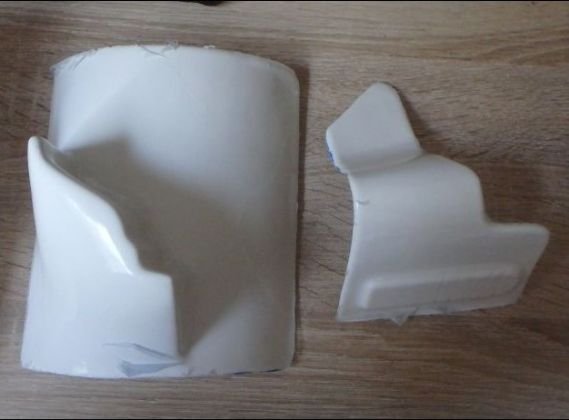
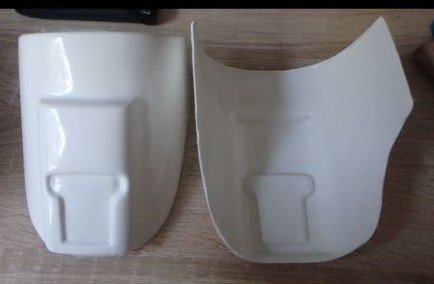
I am not sure about the shape of the belt box - that's why I cut out just one so far. Hopefully it is fine. The cut outs on both sides will be done later. I want to practice with my Dremel first because I don't know how the plastic "reacts".

-
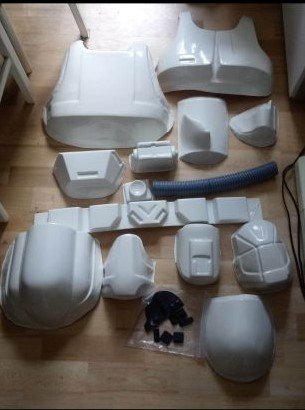
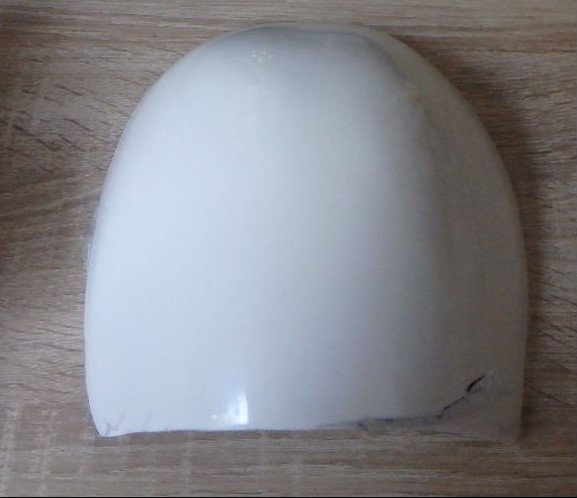
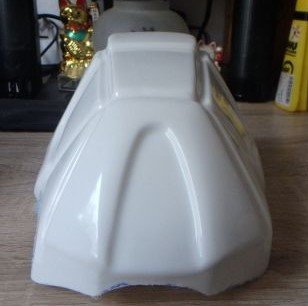
I started to cut out the parts by using a sharp fine cutter. Before, I checked several pics here and online to get the shape right and then I drew it with a marker on the parts. The edges look not nice on the pics, but that is because I left the foil on the plastic for protection. If you see anything concerning or absolutely wrong please let me know!
-
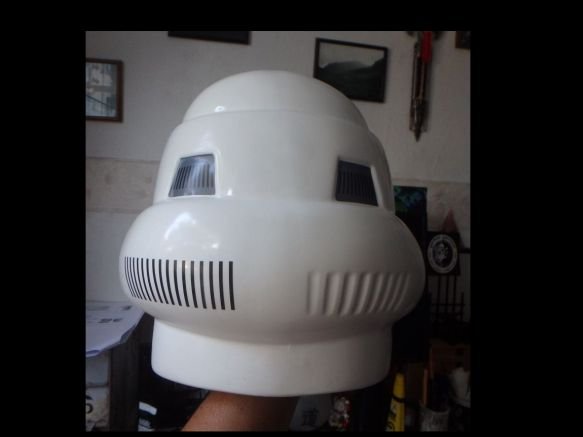
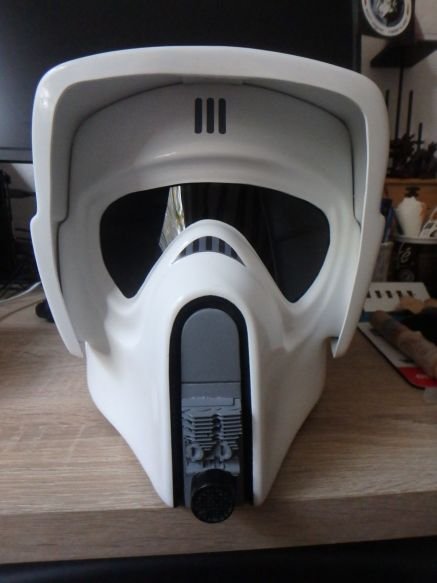
Hello folks, I have never build an armor before, so it is problably the best for me to show you what I did/do before I make horrible mistakes. What I have got so far: Helmet (ready made) and Armor kit by CfO Flightsuit + softparts (just ordered it) by Kripton Boots are planned to be selfmade but I need to wait until the basic boots are in season