

Ruthar
-
Posts
208 -
Joined
-
Last visited
-
Days Won
9
Everything posted by Ruthar
-
TB-12110 "Ruthar" CHiPs Request (Approved)
Ruthar replied to Ruthar's topic in CHiPs Deployment Request
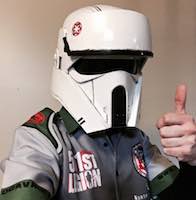
Ensemble Photographs Front: Back: Left: Right: Details: Poses: Individual Components: Supplemental Photos to show 1) working holster, 2) slight sleeve length adjustment, and 3) slightly lowered abdomen: (Please excuse the poor background - I can definitely suit up for additional photos if these aren't clear enough) Also a photo to show the mesh behind the helmet teeth: Thank you for your time and consideration! -
Name: Taylor Goodson Legion ID: 12110 Garrison: Northeast Remnant Height: 5' 7" Weight: 180 Helmet: Armory Shop (Helmet #7) Armor: Armory Shop Jacket and Trousers: Armory Shop Gloves: Endor Finders Blaster: Polymer Armory Build Thread (for further information):
-
Good morning! There certainly aren’t many options available for the PT. You can try getting in touch with Armory Shop on Etsy (https://www.etsy.com/shop/ArmoryShop) or you can send a message to Walt’s Trooper Factory on Facebook. WTF is supposedly working on a kit for the PT, but it is as of yet unseen. Best of luck with your hunt - it’s a great choice in costume!
-
Patrol Trooper CRL revision (and Level 2)!
Ruthar replied to BikerScout007's topic in Patrol Trooper HQ
Am I crazy? It looks to me like the notch is there in the image above. -
Patrol Trooper CRL revision (and Level 2)!
Ruthar replied to BikerScout007's topic in Patrol Trooper HQ
Adding it as an optional item seems like a great solution. Deal! -
Patrol Trooper CRL revision (and Level 2)!
Ruthar replied to BikerScout007's topic in Patrol Trooper HQ
I guess you could paint them on, but that would be quite the task - it's a pretty small and isolated area. I agree with the trepidation in regards to Anovos, but I think the reference images provided above in tandem with Anovos' addition of the mesh could be sufficient. In regards to the backside patch, I did a search for motorcycle breeches, motorcycle police pants, etc. A lot of the results seem to include that seam as well, such as this image below. Still not enough to really make a decision there, but it makes at least a little more sense as to where that detail might have come from. -
Patrol Trooper CRL revision (and Level 2)!
Ruthar replied to BikerScout007's topic in Patrol Trooper HQ
The promo shot has them if you really zoom in. You can just about make it out between the teeth here: -
Patrol Trooper CRL revision (and Level 2)!
Ruthar replied to BikerScout007's topic in Patrol Trooper HQ
Sounds good! I unfortunately don’t have a Hot Toys figure myself, so I just went off whatever pictures I could find. We really need a shot of this guys backside! -
Details Sleeve Length One thing that's been bothering me is that the sleeves get tugged down by the weight of the forearm pieces so that they then hit my handplates. To fight this, I had the sleeves taken up by removing a few ribs at the elbow. The result is nice - the sleeves now terminate just before the wrist but are pulled down into place once the forearm armour is attached. You can see the new sleeve on the left and the original length on the right. Holster Size One thing that I knew I needed to fix/adjust was fitting my blaster into the holster. The holster that came with my kit is just too narrow to receive the two blasters that I already have for my Biker Scout. Instead of destroying the blaster by forcing it in or completely reshaping the holster with heat and causing it to look strange, I decided to rebuild the holster from scratch. I traced the original holster onto some paper by tracing each edge and turning it along while moving the pencil. This gave me a 2D rendering of the material required. I then cut it out and attached the rear edge to recreate the piece. After the paper model of the piece was created, I expanded the width by creating a second paper version with increased dimensions. Eventually, it was big enough to receive the blaster. Once the size was discovered, I flattened the paper version and traced the pattern onto some white ABS. I cut out the shape and cleaned it up with a dremel and some sandpaper. Then, I used a heat gun to form the holster around the blaster itself for a snug fit. I used zap-a-gap to close the holster in the rear to create the closed holster. I used some acetone on a rag to remove the black sharpie lines before taking the final pics. Here are some shots comparing the new holster to the smaller original one. And some shots of the new fit. Here's the holster with my Hyperfirm EC-17 that I use for most events as I'm not afraid of it being bumped around. And with my resin "dress-up" blaster that I used for my Lancer application that I use for more formal events.
-
Patrol Trooper CRL revision (and Level 2)!
Ruthar replied to BikerScout007's topic in Patrol Trooper HQ
A couple things, now that I sat down to actually look through things: Helmet - Do we want to add a mention of the mesh behind the teeth? Maybe we can move requiring them to be cut out and backed with mesh to level 2? Pants - There is additional stitching seen on the Hot Toys figure at the backside, akin to riding pants. Do we want to require that for level 2? Here's a shot of what the Hot Toys backside looks like for reference: Shoulder Armour - "attaches to jacket with no visible strapping" - perhaps remove the "jacket" requirement to read "sit flush with the shoulder strap with no visible strapping." Unless we are certain that it's actually affixed to the jacket, in which case we can definitely leave it. Belt - Perhaps it's worthwhile to be more specific about the size of the leather pouches? Maybe something like this: To the immediate left of the white front belt boxes, there is a small leather (or leather-like) pouch with a hard plate and black press stud that is roughly 3" in length, the same length as the front boxes. To the left of this small pouch and to the right of the front belt boxes are two large leather pouches that are roughly 4" in length. TD - "Silver rings border the openings on the box that the tube passes through." The TD I received with my kit has the silver ring only on the left side where the longer piece meets the box. Maybe it's better to move this requirement to level 2 as it will need adjusting from everyone if we keep it. Just a thought - I'm not even sure what kind of ribbing/detail is on the tube between the box and the ribbed cap on the right side (I just weathered that region myself on my belt for the time being). Boots - "Dogbone is attached to the boot with a thin rubber-like strap passing under the boot's sole." This might be really splitting hairs, but it doesn't look like it's a rubber strap on the Hot Toys figure - maybe just requiring a less-defined "strap" is enough? I used nylon webbing on mine as it looks close to what the figure has to my eyes. Holster and Baton Holder - Perhaps we should move the requirement for the items to fit into the holsters to level 2? It seems strange to me to require those items to fit when they are optional accessories at level 1. I assume we should require the blaster and baton for level 2 (assuming there aren't laws preventing weaponry in the appliant's country)? I think that's all I found. Sorry, it was more than I thought - looking forward to hearing what you guys think! -
Patrol Trooper CRL revision (and Level 2)!
Ruthar replied to BikerScout007's topic in Patrol Trooper HQ
I'm doing a few updates on the suit this afternoon to tighten things up. I'll have a pass and see if anything comes to immediate mind. -
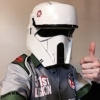
Details Helmet Teeth One of the things that I overlooked was the teeth on the helmet. The helmet came pretty finished up, so I assumed that I didn't really need to do much to it. However, in studying some images, I did notice the mesh behind the teeth in the shots below. I zoomed in on this image to find a hint of the mesh: The Anovos bucket has the mesh, too, and they claim to have access to direct sources. I finally decided to take the plunge and get this detail added. I started by drilling a hole in between each tooth to start the process. Next, I used a small sanding bit on my Dremel to open up the holes a little more. Then I finished up the square openings with some small metal files. Here's what they look like all opened up, but the paint is a bit rough now. I used a bit of grey and black acrylic paint to clean up the rough edges to make them look fresh. For the mesh backing, I cut out two 1" x 4" strips of plastic screen mesh material that I've used for a bunch of other TK helmets. At the top of the strip where they meet, I cut an angle so they meet but don't overlap beneath the center "tooth." To keep the mesh in place, I just used a couple thin strip of black gaffer's tape. Here's a shot of the new, more accurate frown. It still needs to be re-weathered, but I want these coats of paint to fully dry first. Helmet Height Adjustment I've trooped in the costume three times now. The biggest problem each time has been visibility - I've adjusted the padding each time to get something more usable, but the problem has persisted. The collar of the armour is just slightly too tall for my short neck to permit the helmet to sit at an appropriate enough height for me. However! While I was cutting out the teeth, I had a sort of "aha" moment - I could use the teeth to see out of instead of the lenses. It's not ideal, but it would at least give me a more comfortable trooping experience. I experimented with a bunch of different padding setups, but here is the one that seems like it will work the best. Looking from the front, there is definitely more room for moving the head up, down, and around. I definitely like the side profile a lot better - it looks like the helmet is in a more appropriate place than how it was previously touching the collar. This is all the foam I used to fill the empty top of the helmet. I'll clean this up and get it properly installed when I finish the helmet interior later on, but this just gives a general idea. On the plus side, you won't ever see my eyes behind the lenses - just my forehead and my sweating brow. I did a short video demonstrating the newly improved helmet motion. Definitely so so much better than how it was! Next up is really wrapping up the helmet interior as well as a few other quality of life improvements I'd like to do with a few troops now under the belt as true tests.
-
Thank you! I'm glad you find it helpful. If you've got any specific questions when you get under way, don't hesitate to reach out!
-
Thanks, everyone! Happy to be here. If you need anything at all, don't hesitate to reach out!
-
Thanks, everyone! I had the chance to do the first troop in the costume. It's definitely not the easiest wear out there, but everything held together at least. More modifications to come soon!
-
Thanks, Jeff! As of a little while ago, the PT is approved! Our GML did up this fun little edit to celebrate. Time to start handing out some tickets! More to do still with the helmet interior, fit, and some other remaining level 2 things that are still being discussed. It never ends, but that’s the fun part!
-
Submission Photos Having finished the weathering, there isn't any reason to delay suiting up for some approval shots. It's pretty similar to the earlier shots, but here's what it looks like with the weathering all wrapped up. Front: Back: Left: Right: Details: Poses: Individual Components:
-
Great thinking, Jeff! Better to be safe than sorry, no doubt. No more waiting necessary!
-
Details Thermal Detonator End Cap During the weathering process, I noticed something that my suit was lacking. The end cap on the right of the thermal detonator should be ribbed. Mine had some very light ribbing detail, but it was pretty much flat. So, I created the ribbing using a bit of extra rubber strap. This strap came with the kit but was originally intended to be used to connect the toe armour around the boot. I opted for actual elastic in that region, so I didn't use these straps. No time like the present! I measured the circumference of the cap to be 7" and the width to be just about 1/2". So I cut a piece of the strap down to that size. Just a few dabs of the gel control super glue was just enough to hold it in place. It looks much more appropriately textured now.
-
Weathering Even though it's optional, I wanted to get the weathering on my suit before I submitted it. I've weathered a whole host of my suits, and each time I do it a little differently. For this trooper, I opted to go with a light oil/grime look as I imagine these troopers are dirty from exhaust and engine work from their environment on the streets. I use acrylic paints, black and silver as well as a small paint brush and a weathering sponge. I combined the two paints to get the liquid look of oil. 3 parts acrylic black and 1 part acrylic silver is what I went with. To weather the pieces, I go very heavy with the paint brush, really pushing the mixture into the crevices on the parts. I then let it dry for a few minutes. After that, I take a slightly damp rag and rub the paint away with circular motions toward the edge. For this trooper, because the leathering is pretty light, I'm taking a significant portion of the paint off, leaving most of it only along the edge and here and there lightly on the surface. The armour pieces are not all that need attention. I touched the gloves with some of the paint very lightly to make them look used as well - it would be silly for the handplates to be weathering but for the gloves to remain clean. I'm opting for the "less is more" approach with this particular weathering as it's really not that heavy in the reference photos. I weathered all the armour components with the black/silver mix. The only place I used a third colour was the bottom of the boots. On the references, there is clearly a lighter brown dirt present at the bottom of the boots, so I wanted to recreate that. To do this, I first weathered the region with the black/silver mixture. Then, I added a layer of acrylic burnt sienna. I rubbed most of it off the top but left it primarily around the lower edge to give that dirt look to the very bottom. It's not too bold, but it pops nicely when your eye finds it. The weathered boot is in the front and the untouched boot is behind. Here's another shot of the boots. You can really see how the weathering makes the lines, indents, and details pop that much more. It's subtle but makes a nice difference. Here are just another couple shots of my weathering process so you can see how things are brought to life with the added paint. The forearms were coated with the weathering sponge across the whole surface first: And then it was wiped away to leave the grime in the crevices. Biceps - top untouched, bottom weathered Shoulder bells - top weathered, bottom untouched Getting the abdomen armour weathered was the longest part (aside from the helmet). I used the paintbrush to get in between all the plastic pieces, then used the weathering sponge to touch the whole surface before wiping it down. This leaves all this great grime in between the ribs which gives the abdomen section a nice, used look. I spent the most time getting the helmet just right. The technique was the same as all the other pieces with the black/silver mix, but I really took the time to get it just right. Here's the final product: My best advice with weathering is to really just have fun! I always look forward to this part of builds that include weathering, and this one is easy as it's just paint and doesn't require damaging the armour in any way. You get to get super dirty with black paint, too, so why not enjoy it?
-
Details Suspender Tabs, Shoulder Foam, and Lens Before suiting up for the final approval photos, there were a few things I needed to do. The pants are made of a rather thin material, so the suspender clips have a hard time grabbing the material and staying there. So, I sewed in small squares around the edge where the clips hold in order to thicken the band at those places. With just a few more thin layers sewed in, they hold nice and tight. As I mentioned previously, the shoulder area really digs in thanks to the protruding edge. To help keep the pain at bay, I installed two piece of foam folded around that ledge. I just used some gel super glue and a touch of zap-a-gap to hold it in place. I also needed to get the lens in the helmet. I will be going into much more detail on my helmet interior (after the approval), but I definitely needed to get this in before submitting. On each side of the lens opening on the inside of the helmet, I installed two patches of velcro. Then, I installed two pieces of matching velcro on the front side of the lens piece. As I said, I'll go into much more detail about what I do for the helmet interior later. For now, it's time to get dirty!
-
Patrol Trooper CRL revision (and Level 2)!
Ruthar replied to BikerScout007's topic in Patrol Trooper HQ
I didn't even catch that - nice change with the ear bump flip! I see what you mean - it almost reads that Level 2 has more options available. Putting the option in the level 1 text does open it up to all builders. Also, something that caught my eye the other day before submitting. The text for both holsters say that the items should fit inside. However, the items in question are optional accessories, so everyone may not have them in the first place. I'm probably splitting hairs here, but it just made me think for a moment if there's a better way to describe those items without using the items that may not be there. -
Thanks! Going to start the weathering soon - can't wait to see how it makes all the nice little armour details really pop.
-
First Test Fit With all the components roughly completed, it was time for the first full and complete test fit. Without further ado, here are the photos! Front: Right: Left: Back: Details: Poses: Bucket off: Components: Takeaways All in all, things fit pretty well and as expected. The suit allows for a bit of movement and isn't too restricting, mostly because of the lack of thigh armour as well as the small size of the arm pieces. I can't lift my arms up too high or the plastic shoulder straps do pop off, so I have to be careful about that. I might install an additional strap between the shoulder and bicep just for safety. If the shoulder pops off, I would hate for it to smash down to the floor - a strap to catch it just in case will make me feel better. Inside the chest plate, there are two grooves that receive the collar piece. They aren't sharp, but they push down very hard into the shoulders once everything is installed, so I'll have to add foam there for comfort. I also need to spend some time getting the helmet to sit right. Currently, my eyes are just barely at the bottom of the lens so I can't really see. The front edge of the helmet is touching the collar, so it's preventing my helmet from going much lower. It should just be mostly playing with the padding inside the helmet (which I just roughly tossed in) to get it to sit forward enough, but, in the worst case, I'll cut down some of the collar height so I can get the bucket lower. Suiting up was actually pretty simple and didn't take very long. I definitely need an assistant to get everything strapped and in place, but guiding them through the process was pretty easy. Definitely a successful first suit up - I definitely know what I need to do moving forward. I could actually use these photos for initial approval, but I don't want to do that just yet - I'd rather get the suit ready to go and get the weathering on there before I do final submission photos. Regardless, it certainly won't be long now. Onward!
-
Strapping and Fitment Cod Piece, Shoulders, Arms, and Handplates A handful of miscellaneous pieces are the last things to be tackled. With the belt finished, the cod piece was next. First, I had to get the right placement. I used a bit of painter's tape to hold the cod in place beneath the belt to find the right location. The first attempt (below) was too high. The second adjustment had it much better. I chose to install it to the inside of the abdomen plate instead of the belt - there is already too much stuff attached to the belt, so I didn't want to add even more. Just a pair of snaps and some lengths of elastic is plenty to hold it. I used 2" elastic for a little more robust hold. Next is installing the shoulders. I put the chest and back plates on and had someone mark where the center shoulder bell line aligns with the side edge using a piece of painter's tape. I then removed the components and cut out a strip of black ABS. This piece of ABS will be glued to the top of the shoulder snap plate and will hold the shoulder bell up. Without the plate, the shoulder bell would follow the curve of the body and fall beneath the edge of the armour. Here's what the shoulder bell sits like with that little ABS piece installed. It's slightly above the edge of the armour instead of stuck beneath it. I glued the piece of scrap ABS to the top of the shoulder snap bridge using super glue and zap a gap for a good strong hold. While holding the shoulder bell in place, I marked where the tongue of the ABS piece sat beneath the shoulder bell. Then, I installed a snap just beyond that marked edge. I installed a snap on a 1" wide length of elastic and then glued it onto the ABS piece. The shoulder bell can now be snapped into place. Here's what the new shoulder bracket looks like. And here's what the shoulder looks like snapped in place. The overlap with the edge of the armour is good - it should sit up right against the rubber shoulder strap just as they are seen in the reference photo. Moving downward, I installed velcro to hold the biceps and forearms against the suit. The suit comes with velcro already attached, so I just placed some adhesive velcro along the insides of the arm components. The same is true with the gloves - they already have velcro sewn in, so I just placed some adhesive velcro against the back of the hand plates. And here is a pair of shots of what the pieces look like together. And a quick test with the shoulders, chest, and back as well: To prevent scratching the bicep armour, I cut out some foam to line the inside bottom edge of the shoulder bells. I coated the middle with E6000 but used super glue around the edge to keep them in place.


