Hikuro1983
-
Posts
52 -
Joined
-
Last visited
-
Days Won
2
Everything posted by Hikuro1983
-
I’ll probablh do a do of Velcro. These have to stretch to get my head inside
-
studio creations Lee's Super Fun Time Biker Build
Hikuro1983 replied to Hikuro1983's topic in ROTJ Biker Scout WIP
Installed the chin strap afterall Also replaced cotton webbing with 1 inch black elastic so the ends met better Thus I was able to place the loop with what material I had left. Thus the shoulders are connected, and I'll sit back and await for my soft parts to arrive. I'll give it one last look over Wed. evening and submit my photos. -
armor pops out of the loop but I guess that's just gonna take some adjusting. Anyways, thanks guys, got my shoulders strapped now so I'm gonna just wait for my soft parts to arrive this week.
-
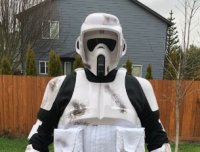
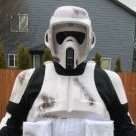
So here's an idea that was suggested by a garrison mate, I switched the cotton webbing out with black elastic to give it a stretch when putting it on and it confines back to it's original or close to position, this means the edges of the armor met back up versus having a gap. This also raised the armor considerably btw. With black elastic. 1.5 cotton loop now covers and raises the armor in general higher up requiring me to unhook and rehook straps to get in and out of armor which isn't difficult at all. Increases tightness when putting it on but it's not uncomfortable.
-
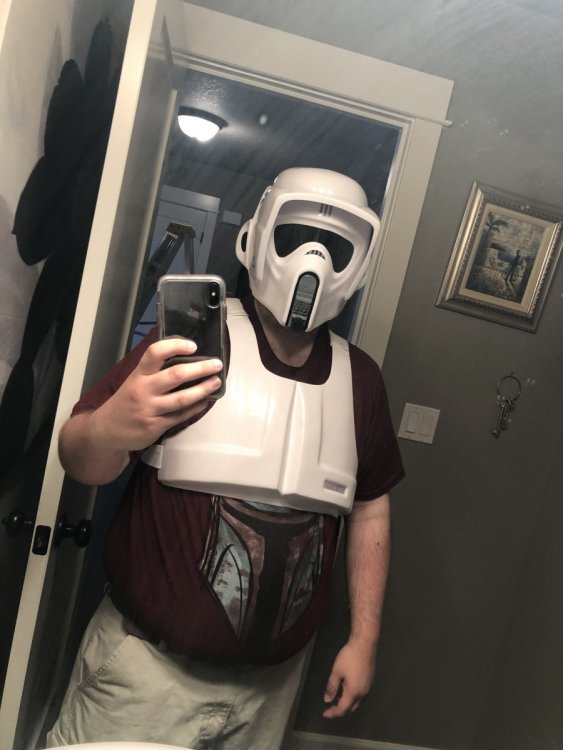
So, soft parts won't be available until Wed evening, I did raise it up to what was suggested earlier closing the gap at 1.5 inches better image to illustrate that. However the loop I need to make doesn't cover at all So you guys are saying to raise it up even more so probably 1 inch gap so it's actually more pectoral like Chopper says. Or can I take 2 of the 1.5 inches stitch them together to becoming 3 inches to create a larger loop to cover up the armor a bit more? Because of the time crunch I can't wait around, I have my own I bought recently it's just a different pattern design than what was given. If I have to replace that I will to keep it more consistent, that's not a big deal. The problem is I don't wanna keep making adjustments again and again wasting material when I have 3 days to get this thing done.
-
I did bring it up so the gap between front and back is 1.5 inches. If I make the gap to the sides wider than that makes the top go down further and back to square one. At this time I have no soft parts until Wednesday and rather tight on time as this needs to be finished before Friday. So adjustments needed can happen after the weekend.
-
Here's adjusting the top straps at 1.5 inches give or take a 1/16th or so. molded it a bit with heat to keep the top ends down a bit to fit more contoured with my shape. Hopefully this'll work. the downside is I don't have enough of the same strapping to match the loops as the shoulder.
-
Yes it’s SC, andWon’t be able to get my head thru very well if I raise it up and would have to heat and shape at that point as the Armors position right now rests right around the rib cage. So the end points above would then start to stick upward versus following the contours of my body as they are now. I had the two parts looked at by a fellow scout who thought the positioning where they are now seemed appropriate.
-
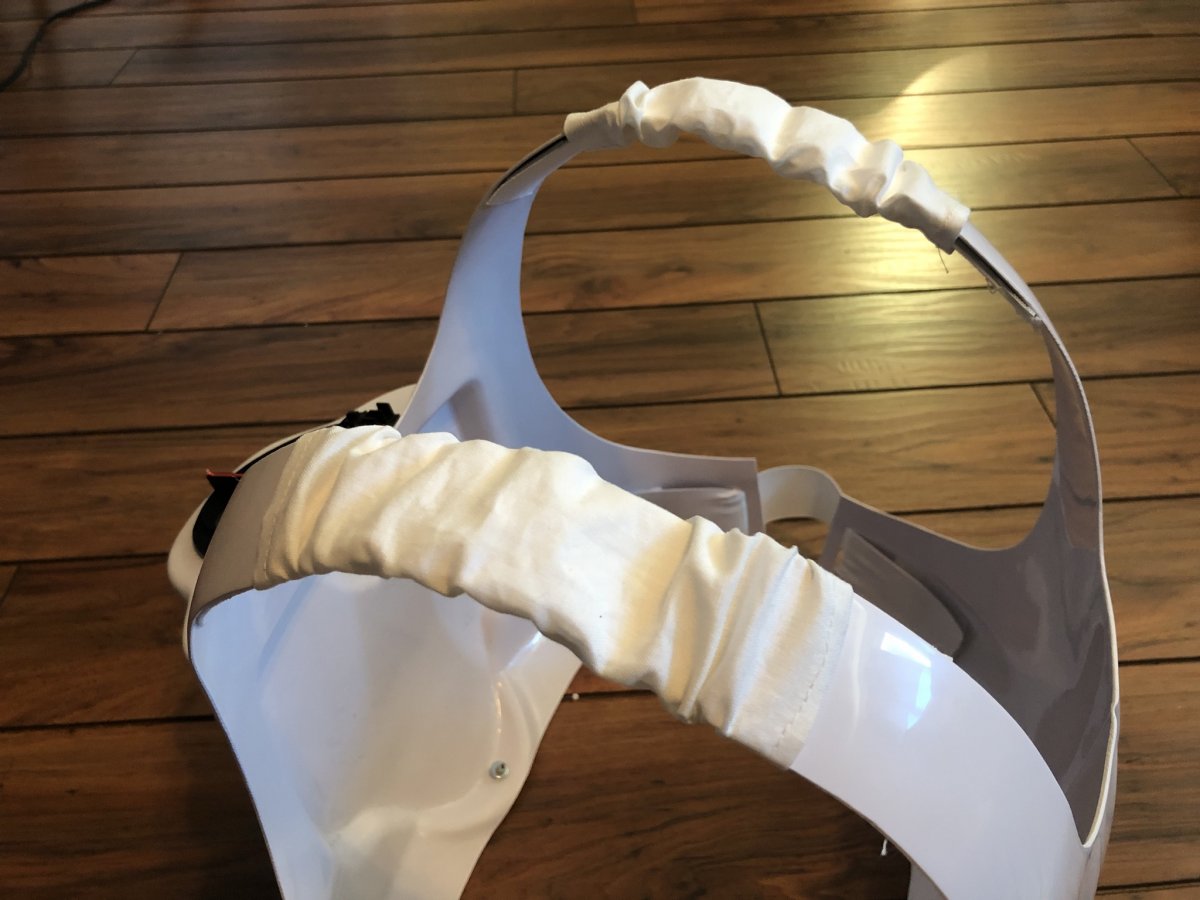
Sure, one side has no loop fabric, the other side does. right side of your screen will have no fabric, left has fabric. upper angle, you can see how far back that's going...we're talking roughly 5.5 inches. fabric no fabric.
-
I’m a fairly big guy and there’s a huge gap between ends of the chest and back. I’m using a white cotton fabric per the crl but the level two states using the cotton webbing which won’t work for me. The CRL states The chest and back armor join together over the shoulder and the gap covered with a loop of white fabric. anyone got any advice or image of what they did in this case?

-
studio creations Lee's Super Fun Time Biker Build
Hikuro1983 replied to Hikuro1983's topic in ROTJ Biker Scout WIP
Thank you for the advice, I'll look further into it if it bugs me going on, right now, feel pretty good with it. Good news though is I've been working at it about an hour or two a day during my lunch breaks at work and after dinner when I get home from work. Here's some of what I've been doing.... Thermal using an iphone repair kit screw driver to pole holes for the wire to go thru the T bit. I'd say it worked perfectly. strapping the biceps and forearms Got to a good enough point I felt it was just right and finished it off. a fellow garrison mate pointed out that the topper should be centered to the top of the hump but it's not depicted that way in the CRL. So now I got an exposed hole I could either fill or if it doesn't matter cause it's in the CRL clearly being on the edge, then I will drill the current rivet out and put it back where I originally had it so I don't have to dink with covering the hole. Any advice?- 30 replies
-
- 1
-

-
- biker scout
- wip
- (and 3 more)
-
studio creations Lee's Super Fun Time Biker Build
Hikuro1983 replied to Hikuro1983's topic in ROTJ Biker Scout WIP
Okay so basic assembly of the helmet is finished. I got a couple spots to tighten up, including installing helmet liner and chin cup strap and visor. But before all of those I wanna do a light bit of weathering. Afterall I'm the type that doesn't believe that armor should be shiny. Was also able to work a bit on my hip boxes and belt. I came to the realization that the nylon webbing I have won't be enough to go around my waist.....it's short a few inches to do it right so that'll have to go on order which means it'll take a few days longer to finish the kit. I'm still in my projected range to finish before the convention but it'll be tight just to get the test run in time for next weekend. Something else that's kind of bugging me is placement of the topper to the hump let alone how to secure the hump to my back. I can't believe drilling a hole from the top side and riveting is the only thing....so what's holding the bottom then from not being floppy? Just glue?- 30 replies
-
- 1
-
-
- biker scout
- wip
- (and 3 more)
-
studio creations Lee's Super Fun Time Biker Build
Hikuro1983 replied to Hikuro1983's topic in ROTJ Biker Scout WIP
more helmet fluff. worked on doing the ear holes...took me 40 minutes to find a format I could agree upon just to let the dremmel screw up the nice drawing I did. Little filing will fix that up nice and done. dome is glued to the main body, it fit pretty well but to help secure it I'll be adding tiny 1/8'' rivets on the front sides that'll be hidden by the visor. Snout and Greeblie are painted and curing at this time, will install them tomorrow and get the visor mounted. Rest will be a cake walk to finish the helmet then off to work on the armor which is mainly installing pieces together and seeing how to strap stuff. I'm still hoping I'll be done this weekend.- 30 replies
-
- 1
-
-
- biker scout
- wip
- (and 3 more)
-
Because I work for a living to afford this blasted hobby.
-
What's going on biker fiends?! While new to the group not new to the cause, been a 501st member for exactly a year now and after several costumes the time has come to do something different! A while back I thought maybe it was time to knock another item off my to do list and that was a Biker Scout suit. I enjoy the TB's, they got a lot of love in ROTJ and I like motorcycles, so it kind of went hand in hand for me. The one thing that bugged me though was finding a good kit and the soft parts to do the job. I'm a grower not a sewer (Well not anymore, I'm shrinking YAY keto!) and I don't carry a lot of cash these days. But I did some odd jobs while working full time and managed to come up with the scratch to get a Studio Creations kit as it seemed like one of the best and easier to handle kits out there. I also have a garrison mate who's building one for his wife and seeing it in person really got me excited. So after talking to Jeff a bit and having a deadline to finish in 2 weeks, my garrison mate Ralph and his wife agreed to help get the soft parts done while I get my armor from Jeff at SC and knock it down. I received my kit on tuesday so he was incredibly quick, responsive, and polite, all the things you want from someone offering their services. Upon inspection, the parts were clean and crisp. Jeff apparently had redone his mold for the front and back torso parts and they look fantastic. Everything is trimmed very nicely, very little burrs or marks, almost none really, so kudos to him and his work. Beginning work on the helmet as it's one of the most simplistic parts of the entire kit. I began by dremmeling the visor out that he was nice enough to mark the areas to cut out. I then used an exacto knife for areas I was having trouble getting at then went and sanded it down to smooth it out. The one area I'm kind of having issues with though would be where the ears are. Which I pose this question to anyone who's done this. Where do you know to cut the hole? Is there a template online I can print and trace on or something? I dunno how far out is to far or anything like that...I don't wanna cut off to much! Also, since I"m aiming for Lancer status, what is the appropriate cover for these? Normally people use a screen mesh, but it's noted in the CRL that it's not to be used for Lancer. So then what do you use? Is it just a big open hole? That sounds kind of odd. I was able to get a rough assembly, well, infact it's mostly assembled. Things just kind of fit into place and I'm fairly happy with the result. But before I seal the deal I wanted to show off how things look so if there's something jarring I should pay attention too that could screw up my approval please speak up. I matched the side lines going from the visor to the helmet pretty well I think. So imo, besides painting the snout and the greeblie, then adding some velcro for the closure, I think this thing is about ready to be buttoned up and done. With any luck I'll have the majority of this thing done over the weekend. Ultimate goal is to be approved before a big convention, but testing next weekend after this one. I'll update as much as possible between now and then until it's completed.
-
Likewise, I now own a SC kit and bought the helmet with it. The inside of the face plate was marked and followed that with a drill bit and dremmel, used an exacto knife to get to the harder to sand places and then just sanded it down a bit to smooth out the edges. It wasn't bad at all....probably one of the easiest ones I've done.