

Jakeputt
-
Posts
924 -
Joined
-
Last visited
-
Days Won
23
7 Followers


About Jakeputt

- Birthday 06/25/1979
Recent Profile Visitors


-

Sasquatches Kashyyyk Trooper Build
Jakeputt replied to Dark-Saber2023's topic in Kashyyyk Trooper HQ
Yeah man, get started. It's fun being in the kashyyyk kit. Sent from my SM-N986U using Tapatalk -
Sasquatches Kashyyyk Trooper Build
Jakeputt replied to Dark-Saber2023's topic in Kashyyyk Trooper HQ
I've enjoyed helping you and Chris with both your builds. I look forward to updating the crls and helping potential Kashyyyks get into more accurate kits that are closer to what is seen on screen. You're doing great. I know the feeling of being defeated after taking so much time to work on a kit only to have a list that needs to be changed and I also know how intense every part of this kits build can be. Keep it up and you will get there. Sent from my SM-N986U using Tapatalk -
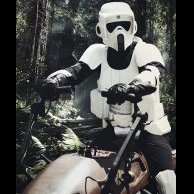
Get the straps on em Chris
-
Looking good so far
-
Hey there! Welcome to the forest You're in luck, there are several sources for the armor parts. You can go through Biker chick here on the Forums, she has an abs and resin set available that has all the parts you would need. Or you can go through galactic armory on etsy to get the .stl files if you have a 3d printer. Or search for christhepropguy on etsy or facebook he also has the hard parts available in plastic or files.
- 1 reply
-
- 2
-

-
I think it looks great, the main part that your wanting to express is the contrast between the camo spots and the background fabric. Honestly the camo fatigues are a secondary visual element in the kit where the armor pieces are the primary. Things will look more together as you put more of the finished armor pieces on.
-
Its looking pretty good so far Chris Sent from my SM-N986U using Tapatalk
-
The colors do look fantastic. I am concerned about your coin slot. The lvl 2 specifications do have an exact measurement for that detail. The size of your slot should be fine for basic approval. Sent from my SM-N986U using Tapatalk
-
I would like to see something between 1st and 2nd. Sent from my SM-N986U using Tapatalk
-
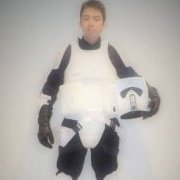
After discussing your kit with the team we have two minor adjustments that we are asking for: 1. remove the black stripe on your tank and replace it with thinner striping closer to 3mm 2. reposition your back pouches so they are even and then retake your back picture. In the images you submitted your back pouches were uneven. With 2nd level applications, we want the kit to look as sharp as possible.
-
If that's your intent I would make a set for the 1/6th group and one for the costumers. Sent from my SM-N986U using Tapatalk
-
Also, remove the pouches from the belt and make the cod piece not as long. Sent from my SM-N986U using Tapatalk
-
With initial inspection, here are my first suggestions. You need to make your visor coin slot thinner, make the bolts on the sides of the visor removeable and make the trapezoid recesses in the back of the helmet smooth, remove the straps from around the calve pieces and take the rings off of the boot top armor. Sent from my SM-N986U using Tapatalk
-
Burnsie - Kashyyyk trooper 41st submission (WITHDRAWN)
Jakeputt replied to Burnsie's topic in 41st Elite Deployment Request
Sounds good Sent from my SM-N986U using Tapatalk -
Thank you for taking the time to load all the images into Dropbox, but we need the images actually placed into your application submission. This link is a recent approved biker scout lancer submission as an example to follow: You will want to follow Mickeys instruction that we shared previously on how to embed your images into the post. Sent from my SM-N986U using Tapatalk