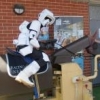
Goubatsu Posted July 8, 2012 Share Posted July 8, 2012 So I was meant to start a build thread a while ago but things came up.. so anyway! My SC build, very first build to join 501st! Got the box last Tuesday upon my return from Melbourne! Anyway before my armour arrived I had the gloves and under/racing suit, the under/racing suit still needs all the suede stuff added and maybe some Velcro to help keep the forearms on. Then there's nothing left on that part... Anyway so this weekend some lovely, kind people in Canberra helped me with my kit and in the two days we managed to get this done! Very quick photo's my dad took, dinner was almost ready. Anyway I think for two days work we did pretty darn well. So what do you guys think? Shoulder bells might need a bit cutting down or rounding, and I haven't done strapping yet for them.. (please be specific if it does need work on the shoulder bells )... But am I on the right track here? I'll post some close ups of the way the chest/back harnessing was done, it was done a slightly bit differently to the instructions, mainly to accommodate my small thin body, which I hope is fine with 501st approval. I'm ordering a cummerbund and the boots next week or this week. I also ordered a KS helmet a few weeks a go (assembled). I'll be replacing the snout, decals and bolt covers on it as well for a bit more screen accuracy I'll be sure to keep this updated on any work I make from now Quote Link to comment Share on other sites More sharing options...
Evil-Inc Posted July 8, 2012 Share Posted July 8, 2012 The SC buckets snout should be fine. I think it's only the KS snout that needs replacing. The one I got from SC looks fine & dandy to me. Quote Link to comment Share on other sites More sharing options...
Chex Posted July 8, 2012 Share Posted July 8, 2012 Great start, looking good! Quote Link to comment Share on other sites More sharing options...
Goubatsu Posted July 9, 2012 Author Share Posted July 9, 2012 Just some pictures of my weirdly harnessed chest plate, would the way i'v done it be right for approval? Or should I redo those velcro straps and stuff? Just going for 501st approval not any lancer jazz at the moment. Quote Link to comment Share on other sites More sharing options...
HooliganScout Posted July 9, 2012 Share Posted July 9, 2012 That is one of the more interesting set ups i have seen :-) Two issue that I see ( may or may not be an issue for 501st approval, used to be a GML but that was years ago): 1. the white wrapping looks really long, normally it is about 2in long 2. The black strap attaching to the shoulder looks to be just 2in velcro...my worry, especially when trooping, is that it won't give you a lot of give when moving. I would recommend 1/2 inch elastic with velcro sewed to it in order to attached the shoulder to the chest. The elastic will provide give when you move and make it more comfortable over the long haul. I would recommend wrapping with 2 in cloth and building an straps system with elastic attaching the chest and back and than to the shoulder....a "T" shape. When I am home from work I can post a picture of how i did mine if you like. Quote Link to comment Share on other sites More sharing options...
Griffin-X Posted July 9, 2012 Share Posted July 9, 2012 I agree...interesting take on the setup. For mine, I used elastic and Velcro to join the chest/back parts. Then, I used Nylon webbing for the wrap around and secured it with Velcro. Lastly, I made a "T" shaped Velcro part using some cotton webbing and Velcro for the shoulder bells. It works well for me. Here's the result... Quote Link to comment Share on other sites More sharing options...
HooliganScout Posted July 9, 2012 Share Posted July 9, 2012 Here is my set up outside of the armor....wrap is duck canvas and the strapping is black elastic the wrap is actually glued to the armor helping give support. Inside of armor....the black elastic is sewn into a "T" shape and attached to the chest and back across the seam Quote Link to comment Share on other sites More sharing options...
Goubatsu Posted July 10, 2012 Author Share Posted July 10, 2012 Yes I did say it was a funky setup Was really a test to see if we needed to cut or heatgun anything aka chest and shoulder bells... Im really quiet thin, but it seem's it fits almost perfectly when every-things as close as it can be! So I'll get onto those T straps. Still got a bunch of elastic left and shouldn't take long at all to do those, espically now that we know how small they have to be and things Is the material im using to cover the gap fine? As in a-okay to cut out just a square of that stuff and place it on top of the straps, or should I go get something else like mentioned duck canvas? Also bonus picture! Kneepad, does it look fine to you guys? Reminder im not going for Lancer but the second strap just helped securing it. A LOT. Quote Link to comment Share on other sites More sharing options...
Goubatsu Posted September 11, 2012 Author Share Posted September 11, 2012 KS Helmet finally arrived... I should finish the belt and redo that strapping on my chest... before my boots and cummerbund arrive.. so its all finished at the same time... not completely related to my SC build but yes, it is a part of the end product and just a reminder that I have not forgotten about this project! (im just slow) Quote Link to comment Share on other sites More sharing options...
Darthzemog Posted September 14, 2012 Share Posted September 14, 2012 Looks good, would move the bicep armor up a little closer to the should bells, they seemed a bit low to me. For the knees, I test fitted them on the flight suit, with the straps on them. Then had Velcro sewn to the flight suit where the top part of the knee armor would be and placed Velcro in the underside of the top of the knee armor. The result, they don't slip down anymore as they Velcro right to the suit once I slip them on with the straps attached. I can walk, run, kneel down and squat all fine without them looking funny or moving. Just something I picked up here on the boards that worked good for me. Quote Link to comment Share on other sites More sharing options...
Goubatsu Posted September 18, 2012 Author Share Posted September 18, 2012 I shall definitely sew some velcro onto my racing suit! I've found they move around a lot but not really up or down, but side to side, but I can finally sew the patches on as I just received my boots today.. (and cummerbund, pictures soon) Thanks for the tip, much appreciated Quote Link to comment Share on other sites More sharing options...
Goubatsu Posted September 23, 2012 Author Share Posted September 23, 2012 Quick update got my cummerbund and boots... and a quick two photo's of everything together. Also a question, my shoulder bells, well the one that is on properly, (my left side) do you think I need to trim anything off it? I know I need to round it off a bit but do you think it needs any trimming/need to be smaller? I also haven't put the strap on the shoulder bell yet, so that may make them fit a bit better.. I can see why the knee thing above is suggested... but they did twist a bit from going up and down stairs.. Quote Link to comment Share on other sites More sharing options...
Havok69 Posted September 24, 2012 Share Posted September 24, 2012 Being a Biker Scout n00b take my advice with a grain of salt, but I would recommend perhaps some foam padding on the bottom part of the knee pads so they don't point down so much. Or maybe it just requires that you move them up a bit? Quote Link to comment Share on other sites More sharing options...
Goubatsu Posted December 2, 2012 Author Share Posted December 2, 2012 I've been terribly lazy and so busy in the past 2 months with work and being in a new relationship, dog having puppies, etc, that my armour was neglected, and you guys, (sorry!) But 4 weeks ago i went into overdrive and finished it basically all off! Finished it about 2 weeks ago, havent had any time to post on here, Almost there though! Only taken me around 7-8 months? Waiting on my flak vest and then i'll be bolting my holster on and doing the suede on the thighs, otherwise I think its all good/clear to go! The first one is a bit of a old one, i will make sure to take more pictures of how iv done the belt and all the other parts as well individually since im so thin and had to make a few adjustments you'll see soon anyway.. Also bonus photo from a photoshoot this weekend in the rain forest, never felt more at home.. was an amazing feeling Glad to finally have it (almost! So close!) finished Quote Link to comment Share on other sites More sharing options...

Recommended Posts
Join the conversation
You can post now and register later. If you have an account, sign in now to post with your account.