Arnie Posted May 23, 2012 Author Posted May 23, 2012 Already did the acetone, and it almost look like when I got it. From what I found on google, about acetone and fiberglass, it almost seemed like acetone was made to clean fiberglass, so I took the chance Dont know what primer MC uses, but damn that stuff sticks to the helmet Will sand it where needed and give it a new coat of primer tomorrow. Let dry for at least 24 hours, and then try a new coat of gloss white. Quote
Griffin-X Posted May 24, 2012 Posted May 24, 2012 Whew...glad that worked! Good to know too about fiberglass and acetone. I've had the same thing happen on blasters and I know it stinks. Hang in there! Quote
Arnie Posted May 24, 2012 Author Posted May 24, 2012 Yeah I have tried something similar on blasters too. You would think that I had learned by now Oh well. Back to square one Quote
Southscout Posted May 24, 2012 Posted May 24, 2012 Oh no.. Wasn't the Plasti-kote gloss white good enough? What did you switch to? Quote
Grendel_Blitz Posted May 24, 2012 Posted May 24, 2012 Wow! The lid looks fresh out of the box (from MC). Impressive as to how well it cleaned up. Good luck on round 2 - painting can be a POS! \m/ Quote
Mr.Mike Posted May 24, 2012 Posted May 24, 2012 The issue you had with soft paint was caused by too thick coats or not enough drytime between coats or both with out a doubt. Also the sun drying you did may have played a part drying the surface before the rest of the paint had a chance to outgas. Acetone is the solvent typically used in fiberglass work. You need to be careful not to let it pool or remain on the glass too long as it will soften the resin and become tacky. Wipe it on and wipe it off. I would contact the maker of the helmet and find out what type of resin he used in the glass work, poly vinal, vinal ester, polystyrine or what have you, then google up how to prep and work with that particular product. different solvents will react differently as will different paint types. With paint thin layers are key one coat at a time. If you paint layers are too thick the surface will flash off traping the solvents inside. This can cause a couple issues. One being what you have already found, a "dry" surface but soft below. The other issue is called porosity. This is the appearance of tiny pinholes through out the paint. No matter how much you wetsand and polish you'll always be fighting them. Helmet looks really nice, I cant wait to get one! Quote
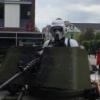
Arnie Posted May 24, 2012 Author Posted May 24, 2012 Thanks for all the input guys The plasticoat I started out with didnt have a colour I liked. I was white yes, but I just wasnt satisfied...Maybe I should have settled, instead of going throught it all again. This time I am priming it with Citadel Skull White. Its a great hobby spray that dries extremely well, and I have worked with it quite a lot in the past years. This is how it looks now. The primer is already dry, as it dries in a matter of minutes, and its now a couple of hours since I painted it, and I'm actually thinking about trying a new coat of shiny white paint. Plasti-kote again, RAL 9010 Quote
Grendel_Blitz Posted May 24, 2012 Posted May 24, 2012 As Obi-Wan said... "Patience!!" Seriously though, good luck with the second time around!!! \m/ Quote
Arnie Posted May 25, 2012 Author Posted May 25, 2012 Aint good at being patient It seemed dry already yesterday, buuuut I will leave it be until tomorrow Quote
Grendel_Blitz Posted May 25, 2012 Posted May 25, 2012 Looks nice and shiny!!! (fingers crossed!!!) \m/ Quote
Arnie Posted May 25, 2012 Author Posted May 25, 2012 So did the last one, until I touched it... But it seems nice and solid now. Will leave it be until tomorrow and give it another coat I think...but not sure if the extra coat is necesarry. Quote
Arnie Posted May 26, 2012 Author Posted May 26, 2012 Its dry now and heres how it looks There are some tiny flaws in the paint though. First is on the visor. At the top right corner it looks like the paint have run a bit, and the edge by the bolt, the paint is a bit uneven as well. I have put in some plastic spacer/shims between the visor and the helmet itself. Next step will be a light wet sanding more or less all over, and then give it a final paint job. This time with the same brand of paint! Quote
Southscout Posted May 27, 2012 Posted May 27, 2012 Looks great now. I'm happy that the paint worked since at least in my part of Sweden it's near impossible to get a good quality spray paint. The only thing we have is cheap no-name or store-branded paints so if Plasti-Kote hadn't worked I would be in trouble. What will you cover the inside with? Plasti-dip? And one thing that has puzzled me a bit, the holes above the nose, are they supposed to be holes or will they be covered up? Quote
Arnie Posted May 27, 2012 Author Posted May 27, 2012 On screen the holes where just a decal, but the MLC helmet have them cut out. I will keep the holes to give me a tiny bit of extra air intake But I dont plan on doing anything to the inside of the helemt, except adding padding. Quote
Arnie Posted May 28, 2012 Author Posted May 28, 2012 Helmet is more or less done now. The screw covers are being glued with E6000 right now. Heres how it looks. Thinking about painting the inside of the went holes black, to more simulate the decal thing. Dont know. Quote
Grendel_Blitz Posted May 29, 2012 Posted May 29, 2012 The white paint turned out great. I will be painting a white and black Scout helmet possibly next weekend so I plan to come back to this post as reference. Nice job!!! \m/ Quote
Arnie Posted May 29, 2012 Author Posted May 29, 2012 White and black?? one of each right? But thanks Just picked up my Vinyl at the post office today, so its time for some boot building Quote
Arnie Posted May 29, 2012 Author Posted May 29, 2012 Started on the boots. Letting the vinyl cool before reorganising the pins, to pull the vinyl in at the sole. Perdy colours :-D Quote
Grendel_Blitz Posted May 30, 2012 Posted May 30, 2012 A real snug fit indeed... This is my issue with many Scout lids. My melon is larger than most and most buckets are built for smaller heads. (My Altmann's is perfect with plenty of wiggle room but the MLCv3 is super nice as far as design) \m/ Quote
Pandatrooper Posted May 30, 2012 Posted May 30, 2012 Helmet looks good. My only minor feedback is maybe the black on the snout is painted too big? On the screen used helmet, the snout edge is still white. See pics here. http://starwarshelme...iker_Scouts.htm Quote
Arnie Posted May 30, 2012 Author Posted May 30, 2012 Yeah I noticed, but its going to be tough to cover up... Will look at what options I have, or maybe just leave it as is. Quote
automaton Posted May 30, 2012 Posted May 30, 2012 Looks great! Nice helmet pads. I especially like the ones around the ears. Where did you pick them up? Quote

Recommended Posts
Join the conversation
You can post now and register later. If you have an account, sign in now to post with your account.