Fox Posted November 1, 2023 Share Posted November 1, 2023 Got a shipping notification that my armor from RS Prop Masters is on the way. Might as well start a topic for it. By the time I get it I'll have "every item" I need. Quotation marks are used because Keep Trooping should be sending me out the correct sized and fixed soft goods sometime soon. What I have from them is okay for a test fitting with the armor but needs a bunch of work to be fixed. I think my Garrison is going to a con in January it would be nice to have it ready by then. 2 Quote Link to comment Share on other sites More sharing options...
Fox Posted November 2, 2023 Author Share Posted November 2, 2023 As predicted, I just got the shipping notification from Keep Trooping. Ina week I should have all the hard goods and soft goods. Quote Link to comment Share on other sites More sharing options...
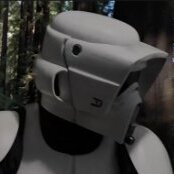
Fox Posted November 6, 2023 Author Share Posted November 6, 2023 Got my armor less than an hour ago. Inspecting all the pieces starting with the helmet. I was afraid my head might be too big for it, but I can get over my head. Problem is the hard hat adjustable plastic liner pushes inwards on my temples. While pains me to do so I cut it out the helmet and replaced it with padding. Might be less accurate but I'll rather have a piece of padding pushing against the sides of my head than hard plastic. 1 Quote Link to comment Share on other sites More sharing options...
Worst Posted November 6, 2023 Share Posted November 6, 2023 @Fox In my thread @Aradun mentioned that a lot of people have this issue. I'm not sure if there are any tweaks you could make but it definitely seems common. I'm still on the fence so I'd be interested to see what you decide to do. Quote Link to comment Share on other sites More sharing options...
Aradun Posted November 6, 2023 Share Posted November 6, 2023 Keep in mind too that “accuracy” is only evaluated from what’s visible. So weather you use tactical padding, foam, or the strap that was used in the original film on the inside of your helmet, because it’s not visible, it has no bearings on your final approval. So, do whatever is going to keep you most comfortable during a troop. 2 Quote Link to comment Share on other sites More sharing options...
Dart Posted November 6, 2023 Share Posted November 6, 2023 Agreed. I hate hard hat liners in all my helmets. Foam works best for me. And if it works for you, and it's comfy to wear, no problemo. 1 Quote Link to comment Share on other sites More sharing options...
Fox Posted November 6, 2023 Author Share Posted November 6, 2023 Feels much better with padding. Still waiting for my correct size jump suit to arrive today. In a meanwhile I did an over the t-shirt fitting with the armor. Only other possible problem area is the belt. They asked for my waist measurement. Maybe the outer end of the belt is that measurement. Going to have to sew on bridge of some sort to give me more room. Also have to attach the holster to my boot. Latest RS video actually shows them cranking out a bunch of orders. Mine is among them. The smell of paint on the helmet is still fresh. Went with the pre-weathered option. It a good amount of weathering in my opinion. From a distance it looks clean. Up close you can see that it's not. Quote Link to comment Share on other sites More sharing options...
Chopper Posted November 6, 2023 Share Posted November 6, 2023 20 minutes ago, Fox said: Only other possible problem area is the belt. They asked for my waist measurement. Maybe the outer end of the belt is that measurement. Going to have to sew on bridge of some sort to give me more room. Note that if you need to make a small bridge for the belt webbing, then the extension will need to be fully concealed by the thermal detonator box. If it's at all visible, then you'll need to replace the webbing with a longer length. 2 Quote Link to comment Share on other sites More sharing options...
Fox Posted November 7, 2023 Author Share Posted November 7, 2023 First test fitting armor with soft goods. Keep in mind that the cod piece is held up by a loose knot. I have to sew on the Velcro. Cummberbund is held up by fiction. With the jumpsuit on the two ends of the main belt don't even touch. Camera is in auto-mode making things too bright. https://drive.google.com/drive/folders/1XSZKP4rVyU2gL9FBX2GNrY7bl14QBej7?usp=drive_link A few observations. 1. While you can dress yourself (as I did). I think it would help to have someone make fine adjustments. 2. Neck seal pretty much just there to traps in all that body heat. 3. The lower edge knee armor really digs in. Have to add padding of some sort. 4. Helmet starts to open when you bend over. Might add some Velcro to keep it shut. Face plate in the fully open position locks in place but makes a popping sound when pulling it back down. I'm not going to lock it in place like this as I fear over time it will cause it to crack. 5. The bigger Jumpsuit feels better. Those elastic thigh straps were cutting off the circulation in my legs. Things I need to work on: 1. Attach Velcro to cod piece. 2. Create a bridge for the belt. Thermal detonator should be long enough to cover it. 3. Cummerbund is too long. In one picture you can see that I wrapped one end under the other. Black strap I'm holding is to show where the Cummerbund closes in the back. I think it too far off from the center I'll have to trim some of the length off. Guess I'm buying one of those handheld sewing machines. Quote Link to comment Share on other sites More sharing options...
Fox Posted November 7, 2023 Author Share Posted November 7, 2023 4. And I'll need to sew on the pouches. Quote Link to comment Share on other sites More sharing options...
DukeOfNachos Posted November 7, 2023 Share Posted November 7, 2023 Peanut Gallery observations. 1. While you can dress yourself (as I did). I think it would help to have someone make fine adjustments. It helps LOADS, i call my daughter my squire... its kinda fitting. 2. Neck seal pretty much just there to traps in all that body heat. Luckily the neck seal is Optional, unless we're talking about the mandarin collar. 3. The lower edge knee armor really digs in. Have to add padding of some sort. My knee is velcro'd to my kneecap, so i'm not really digging any plastic into the meat of my knees. 4. Helmet starts to open when you bend over. Might add some Velcro to keep it shut. Face plate in the fully open position locks in place but makes a popping sound when pulling it back down. I'm not going to lock it in place like this as I fear over time it will cause it to crack. Add a velcro Dot right where the helmet hits at the lowest point, works great. 5. The bigger Jumpsuit feels better. Those elastic thigh straps were cutting off the circulation in my legs. Yay! you can always work with extra room! Things I need to work on: 1. Attach Velcro to cod piece. Attach the mate to your vest ~1" or so up from the bottom edge. 2. Create a bridge for the belt. Thermal detonator should be long enough to cover it. If the TD doesnt cover it like one of the armory team said, just pop the rivet and make a new webbing piece, its pretty easy. 3. Cummerbund is too long. In one picture you can see that I wrapped one end under the other. Black strap I'm holding is to show where the Cummerbund closes in the back. I think it too far off from the center I'll have to trim some of the length off. Guess I'm buying one of those handheld sewing machines. I feel this, i just updated my original one AND made a new one to make refinements while getting things to lancer level spec! add velcro front/back of the bund 1" from the outer ribs. The ones that face out, hook them to your pouches, the ones that face in, hook it to your vest. 4. And I'll need to sew on the pouches. See answer to 3. It works great, and they can be removed if you need to wash etc. Quote Link to comment Share on other sites More sharing options...
Fox Posted November 7, 2023 Author Share Posted November 7, 2023 13 hours ago, DukeOfNachos said: Peanut Gallery observations. 1. Attach Velcro to cod piece. Attach the mate to your vest ~1" or so up from the bottom edge. Just tried attaching the cod with the vest using safety pins and it works pretty well. I'm now in the safety pinning things in where I want to place them phase. 1 Quote Link to comment Share on other sites More sharing options...
Chopper Posted November 7, 2023 Share Posted November 7, 2023 20 hours ago, Fox said: 4. Helmet starts to open when you bend over. Might add some Velcro to keep it shut. Face plate in the fully open position locks in place but makes a popping sound when pulling it back down. I'm not going to lock it in place like this as I fear over time it will cause it to crack. 1. Attach Velcro to cod piece. 2. Create a bridge for the belt. Thermal detonator should be long enough to cover it. 3. Cummerbund is too long. In one picture you can see that I wrapped one end under the other. Black strap I'm holding is to show where the Cummerbund closes in the back. I think it too far off from the center I'll have to trim some of the length off. Guess I'm buying one of those handheld sewing machines. The rotating area around the bolts is a high stress point. I tell folks to avoid opening the helmet all the way, as it will stress and eventually crack the visor shroud around where the bolts mount. Check out this thread for some tips on securing your costume: https://forum.501stpathfinders.com/topic/18894-some-tips-for-keeping-your-scout-costume-together-while-trooping/ Also, your cod looks pretty thin. You might need to add some stiffening material to it down the line, but for now focus on getting everything sized and positioned properly. Check this thread: https://forum.501stpathfinders.com/topic/19967-soft-parts-best-practices/ Your bund does look long, but I would not try to alter it with a handheld sewing machine. If you have a garrison mate with a table sewing machine who is willing to help, then that might be an option. Or if you want to buy a sewing machine and learn how to do some basic sewing, then that's an option as well. Otherwise, look at local alterations or dry cleaning shops near you to get it adjusted. If you've got more questions -- let us know. 1 Quote Link to comment Share on other sites More sharing options...
Fox Posted November 8, 2023 Author Share Posted November 8, 2023 I'm making a shopping list. One thing I'm unsure about is the type rivets for the holster. I know they are 3mm silver, but Amazon is throwing like a thousand different types at me. Is there a technical term for the type of rivet to speed up my search? Quote Link to comment Share on other sites More sharing options...
DukeOfNachos Posted November 8, 2023 Share Posted November 8, 2023 s'what i got originally. https://www.amazon.com/gp/product/B07R5HYWRW/ref=ppx_yo_dt_b_search_asin_title?ie=UTF8&th=1 Quote Link to comment Share on other sites More sharing options...
BikerScout007 Posted November 8, 2023 Share Posted November 8, 2023 1 hour ago, Fox said: I'm making a shopping list. One thing I'm unsure about is the type rivets for the holster. I know they are 3mm silver, but Amazon is throwing like a thousand different types at me. Is there a technical term for the type of rivet to speed up my search? 3mm short aluminum rivets work pretty well. I get Arrow brand https://www.amazon.com/Arrow-Fastener-RSA1-8IP-Aluminum/dp/B0006JJPBU/ref=asc_df_B0006JJPBU/?tag=hyprod-20&linkCode=df0&hvadid=416872195419&hvpos=&hvnetw=g&hvrand=1091634511296402964&hvpone=&hvptwo=&hvqmt=&hvdev=c&hvdvcmdl=&hvlocint=&hvlocphy=9031195&hvtargid=pla-898659400925&psc=1&tag=&ref=&adgrpid=93604209293&hvpone=&hvptwo=&hvadid=416872195419&hvpos=&hvnetw=g&hvrand=1091634511296402964&hvqmt=&hvdev=c&hvdvcmdl=&hvlocint=&hvlocphy=9031195&hvtargid=pla-898659400925 Quote Link to comment Share on other sites More sharing options...
Chopper Posted November 8, 2023 Share Posted November 8, 2023 Also, don't forget 1/8" aluminum backing plates or your rivets will just pull through. 3 Quote Link to comment Share on other sites More sharing options...
Fox Posted November 9, 2023 Author Share Posted November 9, 2023 Safety pin fitting before any cutting and sewing. https://drive.google.com/file/d/1jr4jHKsD5KxzUORzXwUN1eFM-REaSYyd/view?usp=sharing If things are a little sloppy that's because everything is held together with safety pins. The pouches were placed an inch away from the last vertical line on cummerbund. I pinned the cummerbund closed with the back facing forward and then rotated it around my torso. In doing so the pouches got pulled to the side. Height of the unmodified cummerbund is 11 inches. In this photo I folded 2 inches of it under itself making it more like 9 inches in height. Length of the cummerbund is about a foot too long. Making everything bunched up in the back. I feel like I want to pull the cod's lower elastic tight as it looks like it's just hanging but when I do that it bunches up the fabric of jump suit it feels like I'm trying to steal hotel bath towels by hiding them in my pants. Quote Link to comment Share on other sites More sharing options...
Chopper Posted November 9, 2023 Share Posted November 9, 2023 Your pouch position looks about right. I do want to note that the velcro stitch marks in the dead center of the bund is a bit concerning to me. For approval, that strip will likely need to be unpicked and steamed to remove the indent. For your cod, it's meant to sit flat on the front of your body, so you will definitely need to put some sort of stiffening material or fabric behind it.The strap doesn't need to be tight, but it shouldn't be sagging either. When the cod has something rigid to maintain it's shape, then it doesn't crumple as much from the strap. 1 Quote Link to comment Share on other sites More sharing options...
Fox Posted November 9, 2023 Author Share Posted November 9, 2023 That's not the Velcro stitching. It's the maker's label. I ended up with 2 cummerbunds because the first had the wrong pockets. Both have Velcro on the inside but only one has the maker's label. I'll use the one without it. Also got 2 cods as well. Guess I could sew one on top of the other to double the thickness. Quote Link to comment Share on other sites More sharing options...
Fox Posted November 10, 2023 Author Share Posted November 10, 2023 First purchase of materials to finish this made. Should get what I need to attach the holster to the boot, extended the belt and to work on the cod's straps by next week. Doing these first next weekend before I try the cummerbund. I'm confident with my ability to sew on some Velcro and anything that is hidden from plain sight. Cummerbund is something I might seek actual help with. 2 Quote Link to comment Share on other sites More sharing options...
Aradun Posted November 11, 2023 Share Posted November 11, 2023 That's not the Velcro stitching. It's the maker's label. I ended up with 2 cummerbunds because the first had the wrong pockets. Both have Velcro on the inside but only one has the maker's label. I'll use the one without it. Also got 2 cods as well. Guess I could sew one on top of the other to double the thickness. If the one with the maker’s label is correct, just unpick and remove the maker’s label as Chopper suggested and give it a little steam ironing and you’ll be good as gold. It’s really easy, but do the picking from the label side so you don’t damage the front facing or the stitch lines for the ribs.BTW, what maker is it?As for the cod, don’t sew them together and double them up. You’ll create unsightly seam lines on the cod that will not be approvable. The only visible seam lines on the cod are the stitched arch. If you’re leery about adding the stiffener, find a Garrison mate or seamstress that can do it. The cost should be fairly cheap. Some buckram or a thin piece of craft foam is all you need. 1 Quote Link to comment Share on other sites More sharing options...
Fox Posted November 11, 2023 Author Share Posted November 11, 2023 Imperial Boots/Keep Trooping did the soft goods. 1 Quote Link to comment Share on other sites More sharing options...
Fox Posted November 15, 2023 Author Share Posted November 15, 2023 Riveted the holster to the boot. Did a few practice rivets before attempting. Of course, I let the backing plate slip when doing the second rivet and it didn't secure with the boot. Then spent about 20 minutes to remove it without damaging the holster. Was then able to fix it and do the remaining two. Next step later this week Velcro those belts. 2 Quote Link to comment Share on other sites More sharing options...
Fox Posted November 19, 2023 Author Share Posted November 19, 2023 Among the supplies I bought was one of those mini-sewing machines for the simple tasks that I could do by hand but would take too long and wouldn't look pretty. Even though these little things would be hidden under other parts of the costume I wanted to a pretty job this time. Practice first on an old shirt. The provided instructions weren't very helpful. Found a helpful video someone made and felt comfortable enough to try it for real. Since it came with white thread pre-installed, I decide to tackle making a bridge for the belt. I think it worked fine for this. For the next job I needed to remove the white thread and replace it with black. Somewhere during this process, I guess I touched the tension knob. Apparently from some of the reviews the tension for machine is impossible to reset. All the work I did with the black thread looks worse than if I did it by hand. Maybe this is my fault for not buying a real full-size machine, but I don't intend to ever do more than simple things when it comes to sewing. You don't by professional grade frying pan if the only thing you're going to make are grilled cheese sandwiches. Hours I spent trying to troubleshoot it I could actually finish a few things if I had done them by hand. How do I know it is the machine and not just my lack of skill? The next day after getting the machine I got Amazon message from the maker saying in order to have a better experience please follow these instructions. To me that's pretty much admitting your product doesn't work as advertised. Time to see about returning it. Quote Link to comment Share on other sites More sharing options...

Recommended Posts
Join the conversation
You can post now and register later. If you have an account, sign in now to post with your account.